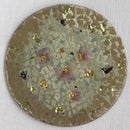
Introduction: Gilded "Rose Gold" Wedding Place Card Frames
A place (card) for everyone, and everyone in their happy place!
This lovely use of genuine Copper Leaf transforms place card frames from simple to stellar quickly and easily. Even better, the frame goes home with your guest as a sparkling souvenir of your special day.
Step 1:
Step 2: What You’ll Need –
Foam brush for applying size
Foam brush or soft brush for topcoat
Cotton gloves
Sepp Gilding Workshop Water-Based Gilding Size
Sepp Gilding Workshop Copper Leaf book of 25 leaves – you’ll need 1 leaf for each frame
Sepp Gilding Workshop Acrylic Clear Coat (optional - solvent-based)
Small cast resin place card frames (ours measure 3 ½” x 3 ½” at the outside edges
Step 3: Varieties of Leaf
For this project, we chose copper leaf for a rose gold look. Sepp Gilding Workshop (SGW) offers Gilding Kits with varying colors of leaf and primers, along with size, brush, stir stick and even gloves. SGW also offers Red, Yellow and Gray primers, and Imitation Gold, Aluminum, Variegated Red, Blue and Green Leaf separately.
Step 4: Apply Size
Lightly load your foam brush and apply enough SGW Water-Based Size to leave a thin white coating over raised areas of the clean, dust free frame. Apply size to all your frames. When finished, immediately wash the foam brush thoroughly in water. The SGW Size will shift from milky white to clear in about 20 minutes – then it’s ready to gild. Since we’re working on a white surface this change may not be visible. Check that the glue is dry but tacky by gently touching a few areas with your fingertip – no moisture or glue should come away on your finger – it should feel sticky but dry. Don’t worry – this size stays ready for gilding indefinitely - so you can take your time with the fun of applying leaf!
Step 5: Gilding!
For this project, wearing cotton gloves will keep your hands from staining the leaf. Wearing your cotton gloves, pick up a square of copper leaf near the corners. Place the leaf over the frame and gently pat the leaf to the sticky areas. Keep pressing till all the sized areas are covered.
If you missed any areas, simply apply a little more size where you want, and allow about 15 minutes to get tacky.
Step 6:
Once you’ve applied leaf to all the sized areas, do a final pressing and then tamp and rub the excess away with your soft, dry brush. Save all the flakes or “skewings” for future gilding projects!
Step 7: Topcoat
Wait overnight then, if you wish, apply the Acrylic Clear Coat using a foam brush wherever you wish to protect the gilding from abrasion/tarnish.
Step 8:
Your guests will cherish these unique gold place card frames long after the festivities!


