Introduction: Handmade Mailable Envelopes


Make handmade envelopes from one you already have on hand. Add a bit of color to the mail box!
Step 1: Gather Supplies

- Envelope (not shown - sorry)
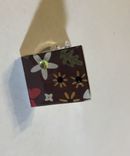
- Scrapbook paper (or other paper you'd like to use as the envelope) I used 8.5" x 11" for the envelope type I had (link provided for 8.5" x 11" scrapbook paper)
- Scissors
- Pencil
- Eraser
- Glue Tape or Scotch Tape
- Mail Labels
Step 2: Neaten Up Paper


My scrapbook paper had this white strip on the top of it. If you're making these for the first time, my suggestion is to remove it, so you don't accidentally draw your template onto that part.
Step 3: Take Apart Your Envelope.

Unseal the glued edges of your envelope. All I did was peel the glued piece apart. You'll need all the folded pieces available so don't cut them.
You can try to run a hair dryer over the glue to melt it a bit to unfold it. I wasn't to concerned with it if it tore, I just needed something to trace.
Step 4: Draw Your Template

Trace the opened envelope on the BACK of your paper. Fold your little 'wings' back into the original place and trace with dotted lines to show where you need to fold your paper.
Step 5: Cut Your Template


Cut your envelope out on the BOLD lines ONLY.
Step 6: Fold on the Dotted Lines


Simple enough fold on the dotted lines. Read the next step for a tip!
Step 7: FOLDING TIP

Take a thin piece of cardboard and line it up just before your dotted line. Take the wing that you need to fold and fold it over the cardboard giving yourself a straight line. Remove the cardboard and press on the seam to flatten it.
Step 8: Fold It Up and Glue/tape
Add glue to the small wings only and press the large wing on top of it to stick together. Stuff and seal by folding the unfolded wing down and tape closed. Tape works best if you're trying this for the first time.
Step 9: GLUE TIP

Trace the small wing lightly onto the large wing. This will show you where the glue will go so you don't glue the envelope so it doesn't let you put anything fully in it. Add glue to the inside of the traced marks, fold again to seal. I did mine with glue tape and placed it under wax paper. I rolled the tape on, letting any go onto the wax paper as to not stick everywhere and then sealed.
(NOTE: I added glue to the edge of the large wing instead of the small wing. It can be done both ways. When adding glue to the small wing you want to be careful that you cover enough that it will cover the large wing, but not so much that the small wings are tacky. You'll see when you fold up the envelope.)
Step 10: A Word on Paper Types


