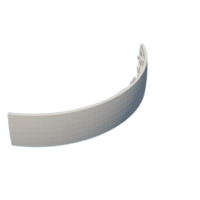
Introduction: DIY Headphone Repair- Designing Custom Replacement Part
Welcome to our DIY Headphone Repair Guide! In this project, we'll show you how to design and create custom replacement parts for your headphones. With simple techniques and a bit of creativity, you can fix your headphones and also contribute towards environmental sustainability and reusability. Let's see how DIY and 3D printing will save those headphones from getting into scrap!
Supplies
- 3D printer
- Digital caliper
- Scale
- Compass
- Protractor
- Pencil
- Pen
- Paper
- Screwdriver set
- Cutting pliers
- 120 grit sandpaper
- Super glue
Step 1: Identify the Broken Part
Start by identifying the broken parts in your headphones. In this case, you can see, it's the top headband part that supports the entire headphone.
If some other part of your headphones is broken and needs replacement, this guide will help you in your repair as it also goes through the same process.
Step 2: Opening the Headphones
Carefully open the headphones to access the broken part. Take note of how the part is designed and how it fits within the headphone structure
.The process of opening the headphones differs with each brand make sure you check the manufacturer's guide for opening.
Step 3: Access Repair Needs
Determine whether the broken part needs repair or replacement. Attempt to repair it using glue or other methods, but if it doesn't work or compromises the functionality, replacement is the best solution.
It doesn't work in my case so I am now pursuing the replacement of the part.
Step 4: Measurements
The measurement process is a critical aspect of designing and fabricating a 3D-printed part.
Process for measurement :
- Use digital calipers and rulers for precise measurements.
- Identify critical dimensions like lengths, widths, diameters, and angles.
- Take multiple measurements for accuracy.
- Document measurements and locations for reference.
- Verify measurements with original parts or drawings.
- Review and adjust measurements before proceeding.
Step 5: Sketch
Sketching serves as a fundamental step in the design process, providing a tangible visual representation of the 3D-printed part before translating it into a digital format for CAD design.
Process of sketching :
- Sketching helps visualize the design before digital work.
- Use basic tools like pencils, rulers, and digital calipers.
- Ensure dimensional accuracy by measuring key dimensions.
- Include details like connectors and stress points in the sketch.
- Iterate through multiple versions for refinement.
- Annotate the sketch with critical measurements and notes.
- Review and finalize the sketch before moving to CAD design.
Please don't mind if you can't understand my sketches.
Step 6: CAD Design
Utilize CAD software (e.g., Fusion 360) to design the replacement part. Input your measurements and design the part according to your sketch.
Steps to design the part :
- Start by designing the arch of the headband part.
- Add connectors to the arch for attaching to cushioning and other components.
- Create a housing to securely connect the headband to the ear cups.
- Incorporate features for effective cable management within the design.
Designing custom components and parts may require a certain level of experience in using CAD design software.
Step 7: Final Design
After Integrating all components seamlessly into the final design, take a look and check the measurements to ensure perfect fit with other headphone components before proceeding to 3D printing.
Also try to understand the design, and how every part connects, it's very interesting to see how engineers design those parts.
Step 8: Export STL File
Export the final designed part as an STL file from your CAD software.
For reference, I have attached my STL file below.
Attachments
Step 9: Slicing
Use a slicer software to slice the STL file into layers and generate the G-code file for your 3D printer.
Select the appropriate configuration for printing, considering factors like layer height, infill density, and support structures.
Configuration : (for reference)
- Layer height - 0.2 mm (0.1mm is recommended)
- Infill density - 100%
- Print speed - 50mm/s
- Printing temperature - 230 C
- Printing material - PLA+ (PETG recommended)
Consider printing the final parts at lower speeds to get a cleaner and good-looking print.
Step 10: 3D Printing
Before printing the actual part, print a small test part to see if the printer needs some calibration. Then upload the G-code file to your 3D printer and initiate the printing process.
Here I used tree supports, which works well for me.
Step 11: Post-Printing Steps
- Remove Supports: After printing is complete, carefully remove any support structures from the printed part.
- Sanding: Use sandpaper to smooth out any rough edges or imperfections on the printed part.
Step 12: Inspect the Final Printed Part
After removing supports and sanding, carefully inspect the final printed part for any defects or imperfections. Ensure that it matches the design specifications and is ready for assembly.
It doesn't need to look so identical but instead has to work and fit well with other parts.
Step 13: Testing and Iteration:
Install the printed part in your headphones and test its fit with other components. Check for proper alignment and functionality.
If necessary, make adjustments to your design and print new versions until you achieve a perfect fit and functionality, then only move to assembly.
Even, I also printed several versions of the part until I achieved the perfect fit. (as you can see)
Step 14: Assembly
Once satisfied with the printed part, assemble it into your headphones as a replacement for the old, broken part.
Steps for assembly :
- Fit the printed headband with the ear cup by aligning them correctly.
- Secure the connection with screws to ensure stability.
- Repeat the process for the other side.
- Connect the cushioning below by snapping it into place through the connectors on the headband.
- Finally, attach the end caps to both ends of the headband to complete the assembly.
Here steps are only for reference, Assemble all the parts as you opened them in step 3.
Step 15: Testing the Headphones
Test the headphones with the new part to ensure they are fully functional and comfortable to wear.
You can see it's the top shiny part that's 3D printed, looks amazing yeah! and I think that's more durable than what the manufacturer provided. Sorry for the lamp! :)
Step 16: Well Done!
I believe this project showcases how our small repairs through DIY and 3D printing can not only save money but also contribute significantly towards environmental sustainability. By repairing and reusing items rather than discarding them, we actively reduce waste and minimize our environmental footprint.
"Let's take inspiration from each other towards reusability and environmental sustainability, creating a brighter, greener future together."

Participated in the
Fix It Contest


