Introduction: How to Make Leather Fringe
The unique structural qualities of leather make it ideal for creating all kinds of interesting textural design details. Because leather doesn't fray like fabric it can be cut and manipulated without worrying about finished edges.
One especially fun decorative leather treatment, that also happens to be a popular fashion statement at the moment, is fringe. Leather fringe has a very specific aesthetic that can come across as cliche, but I've also seen people use this basic technique to come up with all kinds of other interesting and creative designs.
If you want to incorporate leather fringe into a design, and you're looking for more basic instruction in leatherworking techniques check out my free Beginning and Intermediate Leatherworking Classes!
Step 1: Tools and Materials
Tools
- x-acto knife
- fringe cutter (optional)
- clear and metal rulers
- awl
- cutting mat
- strong sharp scissors
Materials:
- Leather between 2 and 6 oz (thin enough to make flexible fringe)
Step 2: Cutting Fringe by Hand
Making fringe from raw leather is really quite simple. Basically all you do is cut slashes in a piece of leather in order to create a series of parallel strips that are connected on one end, and free on the other end (though I have also seen some interesting designs made with fringe that was left connected on both ends). Fringe works best in leather that is not too thick or stiff, something flexible that will have a lot of movement is ideal.
Before you start cutting, you just have to decide how long you want the fringe, or if you want it to vary in length, how wide the whole section of fringe needs to be, and how wide you want to make each individual strip. The width of the strips depends a little on the scale of your project, but somewhere between 1/8" and 3/8" is a good range. Any thinner than 1/8" is too thin to cut by hand, and wider than 3/8" tends to look like a cheap costume.
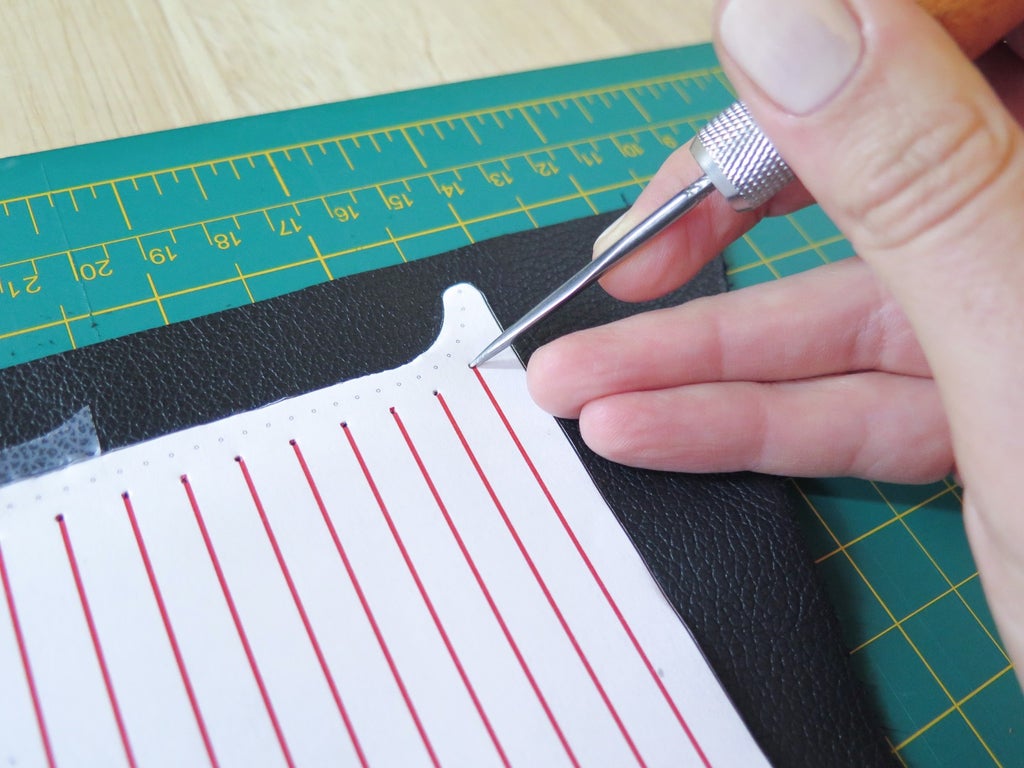
You can create a pattern for your fringe piece, or just measure and mark the strips on your leather itself with a clear ruler. You don't need to mark each line, just mark the ends of the lines with your awl. If you are creating fringe to use as a trim, leave an uncut band about 1/4" to 1/2" at the top of the fringe depending on how you are going to attach it to the rest of your design. Fringe can also be incorporated directly into another pattern piece so it doesn't need to be attached separately.


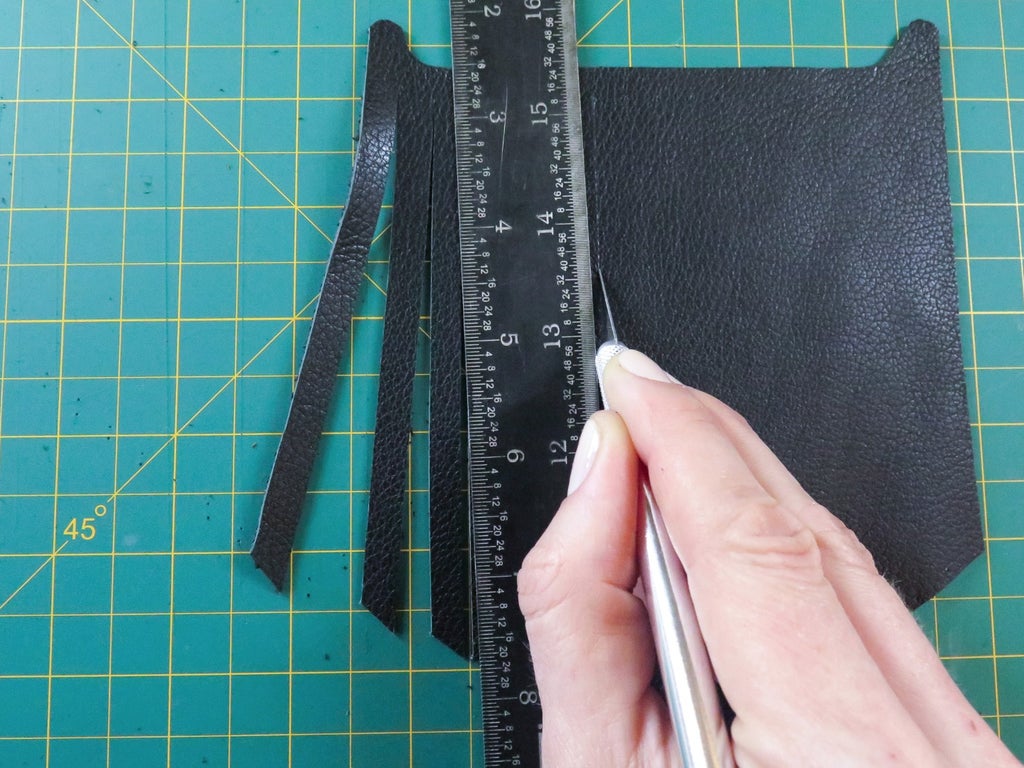
Once you've marked the position of your cuts, use a metal ruler and an x-acto knife to cut each line, separating out the fringe pieces. You made fringe!


Step 3: Cutting Fringe With the Fringe Cutter
If you want a slightly more efficient way to create fringe you can invest in a fringe cutter. The fringe cutter is a very analog machine that lets you set the spacing of a series of razor blades to cut many strands of fringe at once. It can also be used to cut straps and wider leather strips. It's a little annoying to set up, but if you are planning to cut a lot of fringe the same size, it can be worth the effort.
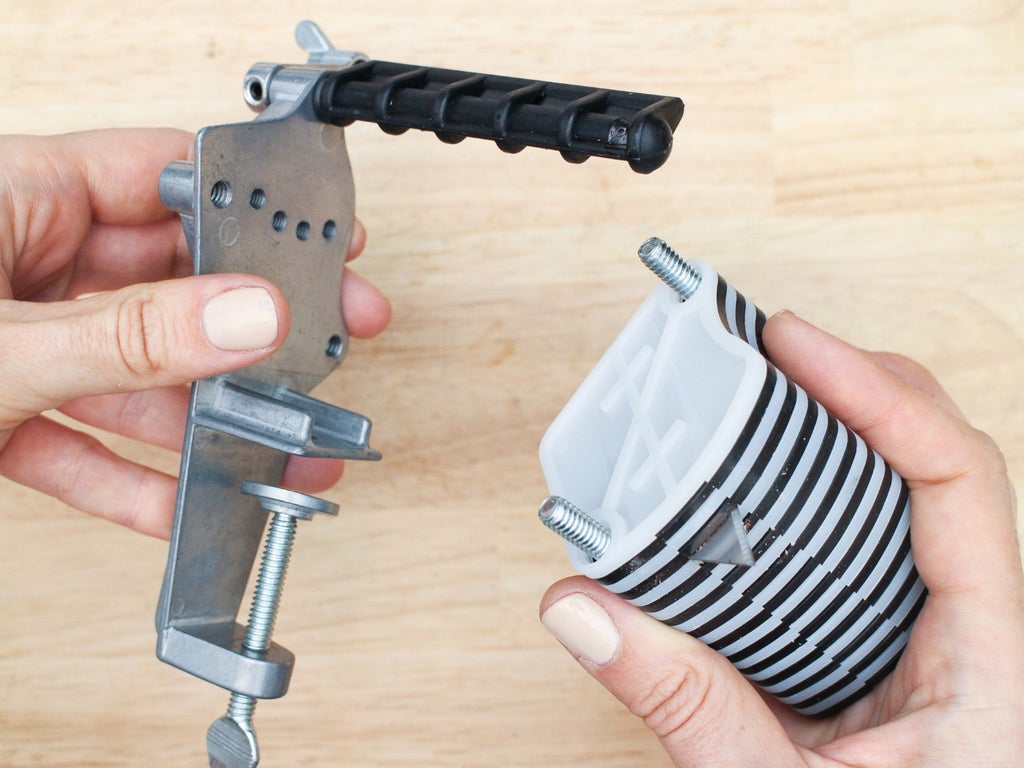
To set it up, unscrew the set of black and white spacer bars and take them off the rest of the base.


Use the different sized spacers to position the razor blades at the appropriate distance by nesting them in the slots on each spacer.


When you have it all assembled, clamp it onto the edge of a table or bench. Since my bench was too thick for the clamp, I clamped onto my quartz slab at the edge of a counter.


Open the lever and push your leather down over the razors at the top of the fringe. Then close the lever so it presses your leather flat against the base, but still lets you pull it through.


Grabbing your leather on both sides, pull it slowly and evenly towards you so the razors cut the fringe as you pull.


Try to cut the entire piece in one motion to avoid jagged cuts. It's also very important that you pull the piece straight through, or you will cut weirdly curved for uneven fringe and ruin your leather. When you're done, trim off one end so the fringe hangs freely.

Step 4: Add Fringe Details to Your Designs
As you can see, making leather fringe is a really easy way to create some interesting details. With a little variation you can use fringe to create some quite unique looks. Layering, cutting fringe at different angles, varying the size and color of the fringe... there are many possibilities. Now that you've seen a few options for creating fringe, I'm sure you can imagine how you might use these techniques to add a fringe details to a lot of different leather designs.
If you want some inspiration on simple projects that use fringe, check out my Multi Functional Leather Bag and No-Sew Leather Bra Instructables. And for more general beginning leatherwork instruction, take my free Beginning and Intermediate Leatherwoking Classes!


