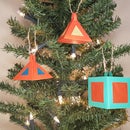
Introduction: How to Make a 3D Snowflake Tree Decoration
It's almost time to get ready for Christmas!
This is a tutorial on how to make recyclable eco-friendly decorations for your tree.
I will show you how to make 3D snowflakes to give your tree a nice wintery look.
You can use paper or card for this. I have used natural twine for the string but you can use any string, try and reuse some string you already have if you can.
I have not used glitter or sequins or paint but that's entirely up to you.
If you can find an alternative to glitter please do, however if you want to use normal glitter you won't be able to recycle it after as it is not recyclable.
If you do not want to draw the snowflakes from scratch you can download the template and print it on paper or directly onto card if you can.
Attachments
Supplies
You will need:
- Paper/Card
- Compass/ round object
- Pencil
- Scissors
- Glue
- String
- Ruler (optional)
Step 1: Making the Snowflake
If you have printed out the template, cut out the snowflakes and move onto the next step
- Start by drawing two circle shapes on the paper/card using your compass or round object.
- Cut out the circles.
- Fold the circle in half.
- Fold the semi-circle into thirds.
- Draw a symmetrical pattern on one of the sides.
- Cut around the pattern
- Unfold the circle.
You should now have two symmetrical snowflakes.
Step 2: Make the Springs
Cut out four thin strips of paper/card from the scraps you have left.
They should be around 5cm long.
Fold them using a concertina/zig-zag fold so they look like paper springs.
Step 3: Glue the Snowflakes Together
Place glue on the end of each spring and stick them around the centre of one of the snowflakes.
Place glue on the other end of the springs and place the other snowflake directly on top of the springs. Make sure that it aligns with the snowflake at the bottom.
Put a small amount of a glue at the end of each spoke of the snowflake on the inside. and glue the ends of both snowflakes together.
Step 4: Hang It Up
Make a hole at the end of one the snowflakes spokes big enough to fit the string through.
Cut some string that is about 14cm long but it is up to you if you would like it longer.
Thread it through the hole in the snowflake and tie the two ends of the string together.
You can now hang it up on the tree!
Try making snowflakes with different patterns to make it look more interesting.


