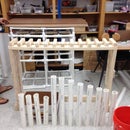
Introduction: How to Make a Desk Divider
Are you a teacher who needs a surefire way to keep your students from cheating on tests? Do you work in an office and feel you need more privacy from co-workers? Then a Desk Divider is just what you need. And you can build one easily just by following these simple steps.
Step 1: Gather Materials
2 3D printed PVC pipe
Ply wood that measures
Cardboard that measures
Duct tape
Scissors
2 pieces of plywood that are the same dimensions as the cardboard but the width is 1/4 inches.
(If you do not have two pieces of plywood you can use multiple pieces of cardboard cut in the correct shape.)
Piece of plywood to go with the Cardboard cut out
Step 2: Cut the Cardboard So That It Is Equal to the Dimensions of the Table You Are Using
Step 3: Put Duct Tape on Every Inch of the Cardboard
This makes the cardboard thicker which will be helpful later on. Also, if your cardboard has flaps on the end this will keep them from causing a problem. It will look better too.
Step 4: Hot Glue the Piece of Cardboard to a Piece of Plywood of the Exact Same Dimensions
This will make the divider thicker so that it will fit better in the PVC pipe.
Step 5: Design 1 PVC Pipe on Solid Works
Make sure you design the PVC pipe with a small hole across the top for the cardboard to fit into.
Step 6: 3D Print the PVC Pipe
Step 7: Cut Out 6 Pieces of Cardboard That Looks Like This:
Step 8: Glue Three of the Cardboard Cut Outs Together in Two Groups
Step 9: Glue the Pieces of Cardboard to the Piece of Plywood
Make sure that these pieces of cardboard can attach to the table and also be taken off.
Step 10: Put the PVC Pipe on Top of the Long Flat Piece of Plywood and in Between the Pieces of Cardboard
Step 11: Hot Glue the PVC Pipe
Step 12: Put the Cardboard/Wood Into the PVC Pipe
Step 13: Paint It
Make it look good!


