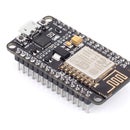
Introduction: IoT ESP8266 Series: 2- Monitor Data Through ThingSpeak.com
This is part two of IoT ESP8266 Series. To see part 1 refer to this instructable IoT ESP8266 Series: 1 Connect to WIFI Router.
This part aims to show you how to send your sensor data to one of the popular IoT free cloud service https://thingspeak.com. The data could be any data you would sense such: Temperature, Humidity, air pollution measurements or even GPS location .
Step 1: Set a ThingSpeak Channel
Open ThingSpeak.com
To set your ThingSpeak configuration do the following steps
- Sign up
- Make a new channel
- Name the channel (e.g. Weather, if you are monitoring weather data)
- set Fields ( e.g. Temp, if you are welling to measure temperature). You can add up-to 8 channels for every channel
- Remember your Channel ID
- Go to API Keys and remember yourWrite API Key
Step 2: Required Components and Circuit
- ESP8266 ESP-12E NodeMCU
- ts USB cable
- Potentiometer
- Breadboard and wires
The Potentiometer output goes to A0 in the ESP8266, one side to GND and the other to 3.3 V
Step 3: Code
Download ThingSpeak Library and import it.
Download my code
Set myChannelNumber toyour Channel Number that you have already remembered.
Set myWriteAPIKey to your Write API Key that you have already remembered.
Step 4: Result
Enjoy Watching your data
Step 5: Next Part
See part 3 of the series to learn how to control two LEDs through ThingSpeak and an Android application.
IoT ESP8266 Series: 3- ThingSpeak-Android Control NodeMCU's Ports


