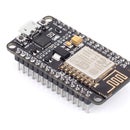
Introduction: IoT ESP8266 Series: 3- ThingSpeak-Android Control NodeMCU's Ports
Step 1: Circuit
Connect and LED to D1 through 330 ohm resistor
Step 2: Read API Key
in addition to things you remembered from the last parts, this time you need to remember your Read API Key, because you are willing to read data from a channel field which are ( 0 and 1 )'s
Step 3: Android Mobile Application
Download this free application ESP8266 IoT Control DevicesOR this "Relay Control Internet". This application is very simple, all you need is to set your Channel ID and Field. Unfortunately, your are only allowed to control two device ( actually you will send data to maximum two channel fields).
Note that you need to set your Write API Key in the Android Application and Read API Key in the Arduino code.
Step 4: Code
Download my source code.
Inside the program, you will find this code:
readValue = ThingSpeak.readIntField (myChannelNumber, 1, myReadAPIKey);
Number 1 stands for the field number. this ThingSpeaks's function returns the last value ( in our case 0 or 1 ) which has already written from the mobile appliction


