Introduction: Make Your Own Music Sheet Ring!
Hello fellow makers,
In one of my earlier Instructable I showed you guys how to make your own rings by using a DIY paper composite from old books and while that is still one of my favorite looks it is a lot more labour intensive and requires more tools that the one we will be making this time around.
If you would like to check out my previous rings you can CLICK HERE.
The ring we are making in this Instructable will be using old book pages and sheet music that has been soaked in epoxy resin and wrapped around a cylinder to create the layers for the ring.
![]()
If you enjoy my Instructables and would like to support my future projects you can Buy Me A Coffee.
Step 1: What You Will Need:
To make your own you'll need the following:


- 2-Part Epoxy resin
Amazon - Epoxy Resin 64OZ - Crystal Clear Epoxy Resin Kit
- Release agent
Amazon - PVA Water Based Mould Release
- Book pages of your choosing
Amazon - 150 Sheets of Scrapbook Paper
- Ring sized cylinder to use as a mould
I used a offcut piece of stainless steel rod
- Painters tape
Amazon - Blue Painters Tape 1/2 Inches x 30 Yards
- Elastic band (small)
Amazon - Mini Rubber Bands Soft Elastic
- Clear lacquer
Amazon - Rust-Oleum 1906830 Lacquer Spray
- Sanding paper
Amazon - 45PCS Sandpaper, Premium Wet Dry Waterproof Sand Paper


*As an Amazon Associate I receive a small percentage from sales made through provided links at no cost to you, this helps fund future projects.
Step 2: Prepare Your Mould:
First step is to prepare your mould as it needs some time to dry.
For my mould I'm making use of a stainless steel rod that is the same size as ring I want to make.
Now in order for us to be able to remove the ring from the mould after it has been made we need to cover the rod in a release agent.
There are a lot of products out there from waxes to spray cans but I've been using PVA release agent since I've first started working with resins and have never encountered any problems, plus it costs a fraction of other fancier release agents.
To get a smooth glass like surface on the inside of the ring we will need a smooth coat of release agent as any imperfections will transfer over to your resin.

The best method I found was to simply dip the rod into the PVA, then placing it upright on some old newspapers to let gravity do its work and get rid of the excess.
I repeated this process twice to get a nice thick coating, letting each coat dry completely in-between.
Step 3: The Paper:
With your mould ready we can get to work on the layers of our ring.
The bulk of the layers are always made from book pages I take from no longer usable books, it doesn't matter if there are damage to the pages in fact I think it just adds to the character of the finished product.
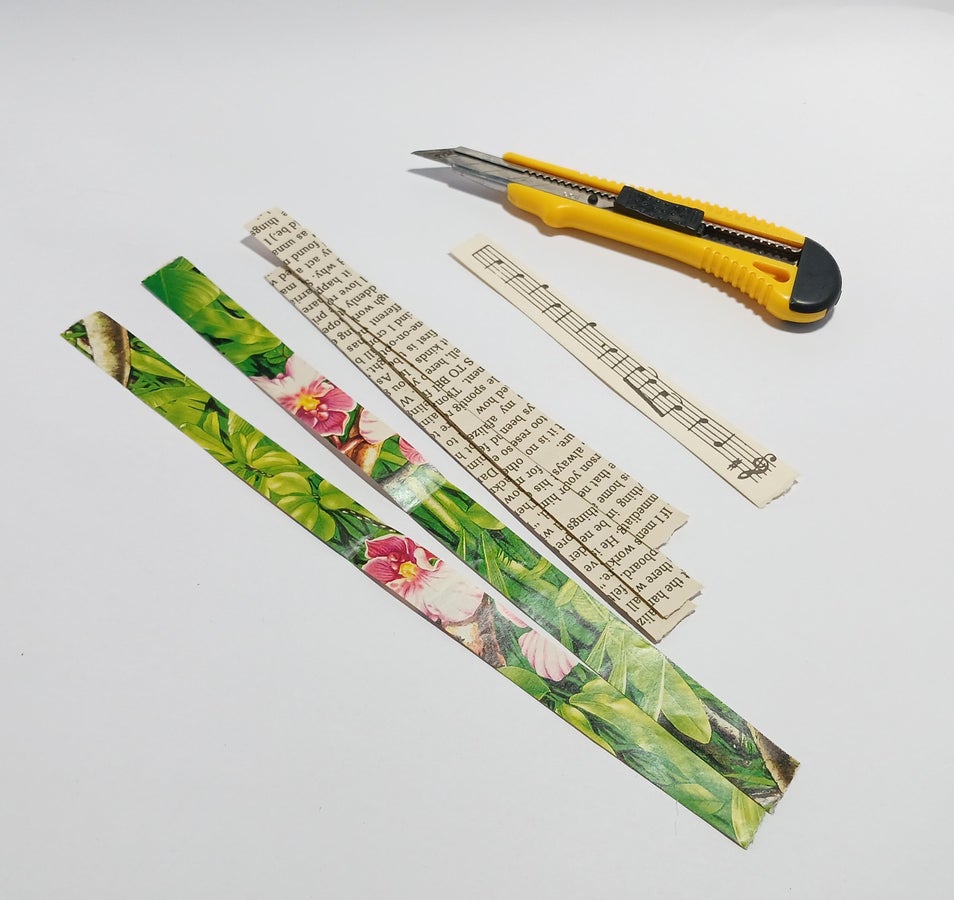
For the top and bottom most layers we will use a more decorative paper, with this ring I went with some tropical pictures from a magazine for the inside to add a pop of color and then the outermost layer will be an old music sheet.

I used a sharp hobby knife to cut down the papers into strips of about 10mm (it needs to be about 20% bigger than the width of the ring you want) the amount of strips needed will depend on the thickness of your ring, all together my strip was about 80cm long and gave a ring thats about 1mm thick.
After all your strips are cut they need to be soaked in the epoxy resin.
I mixed up 80mg of epoxy resin for the paper, this is way more than needed but will ensure that the paper strips get coated evenly as unsaturated paper will cause the ring to not be waterproof.
Always wear proper skin, raspatory and eye protection when working with resin and other chemicals.

Follow the mixing instructions of the manufacturer carefully, my resin is a 100:60 mix ratio so I used 50mg of part A and 30mg of part B.
As this resin has a few hours of working time I can let the paper strips lay submerged in the resin for a few minutes to ensure proper saturation.
Step 4: Laminate Your Ring:
Now to laminate your ring.
With gloves on, grab your first strip from the resin this will be the inner of the ring so I chose the colorful tropical strip pinch the strip and slide your fingers down it to rub off most of the excess resin.
Start wrapping the strip around the mould, I tore all of the start and ends of the paper strips as I think it gives a nicer transition than a straight cut.
After the first strip I wrapped around two story book strips followed by another strip of the colorful tropical strip and then finally I finished with the strip of sheet music.

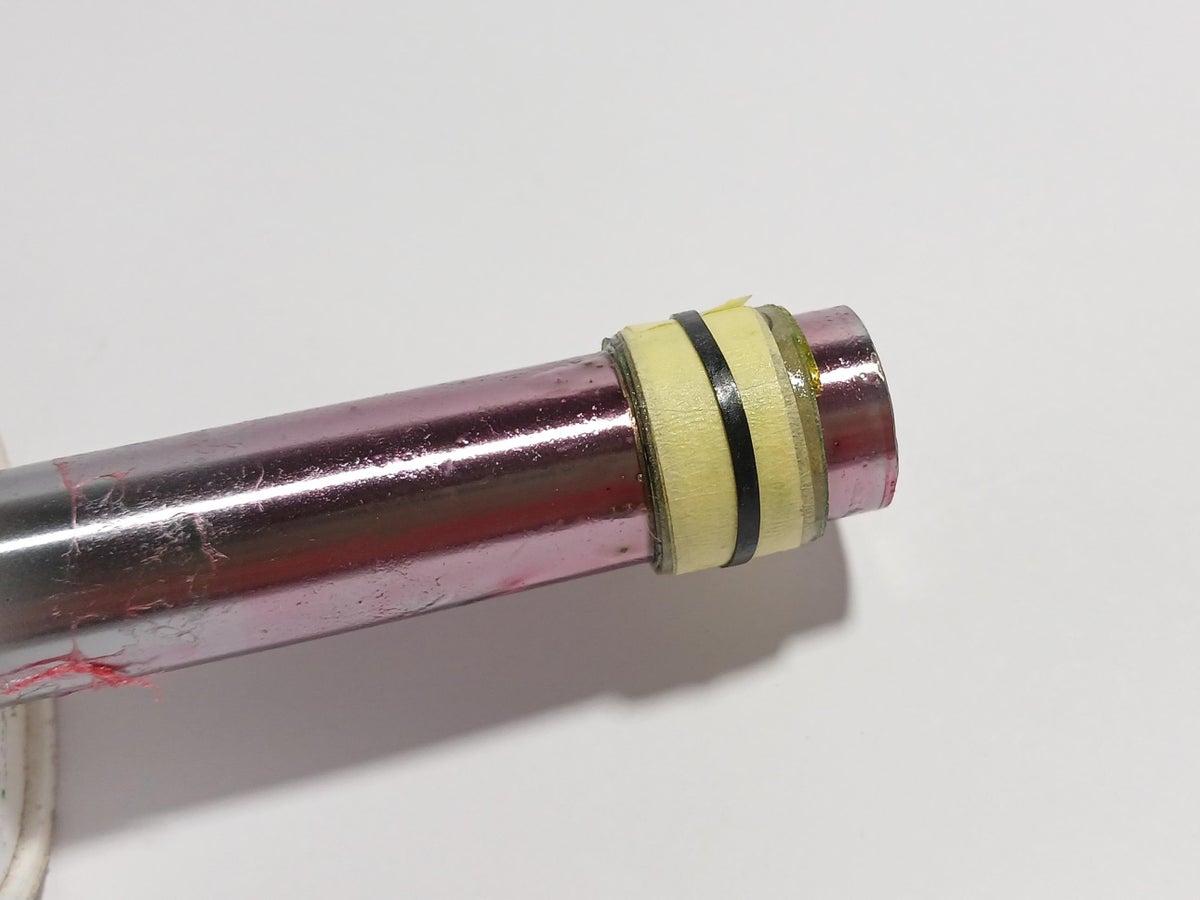
To keep the lamination compressed and free from air bubbles I wrapped the finished ring in some painters tape and added a elastic band around it to prevent it from coming loose as the resin will prevent the tape from sticking.
Set aside and allow the resin to cure for at least 24 hours.
After 24 hours I removed the elastic band and painters tape from around the ring and placed to mould into water to let the PVA release agent dissolve.
After about 30 minutes I removed the mould from the water (make sure the PVA is washed away) and tapped the top of the rod with a small hammer while holding onto the ring and it popped loose.

Thoroughly wash the ring to get rid of any PVA residue.
Step 5: Refining the Ring:
With the basic ring now completed its time for some refining.
With my rings I always start with some wetted 400 grit sanding paper placed on a plane of glass to sand the sides, this leaves you with perfectly flat sides.

Next I made a little DIY jig that I can place into my drill in order to sand around the ring and bevel the edge.
I simply took a piece of 10mm aluminium pipe and put two rubber grommets onto it this held the ring perfectly and made sanding a breeze.

With the top and sides done I just used the same 400 grit sandpaper to smooth the inside edges for extra comfort.

Step 6: The Finishing Touches:
Time to give your finished ring some shine.
Usually you finish off a jewelry piece with a good polish to make it shine but this doesn't work well for fibre composites and most of the time just results in a dull stained piece.
We will be using a can of clear lacquer to seal our ring and give it a beautiful shine, I went with two light coats letting it dry in-between coats.
Step 7: Enjoy!
I hope you guys find this Instructable useful and if you have any questions please feel free to leave me a message or comment bellow.
Thank you for taking the time to read through my project and as always..
Happy making!


Participated in the
Jewelry Contest


