

Introduction: Making a 3-way Switch Button From a Refurbished Computer Mouse.


Since the advent of the wireless computer mouse, many old mice have cluttered our drawers or, at best, ended up in a special bin for recycling electronic products.
However, these mice hold substantial value for electronics engineers due to their component makeup :
- Basic NPN transistor
- Actually a 16x16 pixels camera
- Resistor
- Capacitor
- IR LED and IR detectors
- Press buttons.
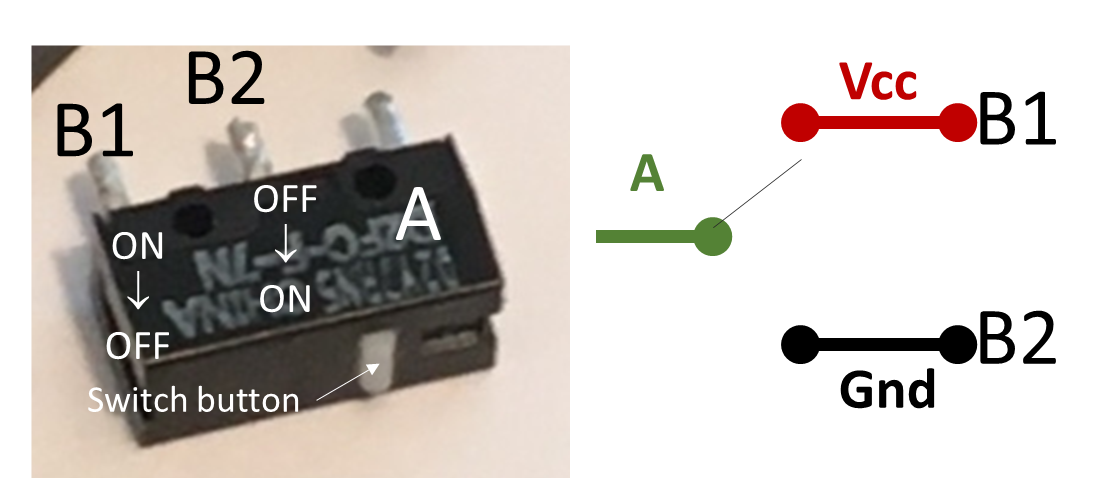
The dual-lane feature of these switches is noteworthy. The main pin located close to the button is connected to the end terminal when idle [B1]. When pushed, it connects to the nearest pin [B2]. This design streamlines the assembly process by eliminating the need for resistors in pull-up or push-up assembly.
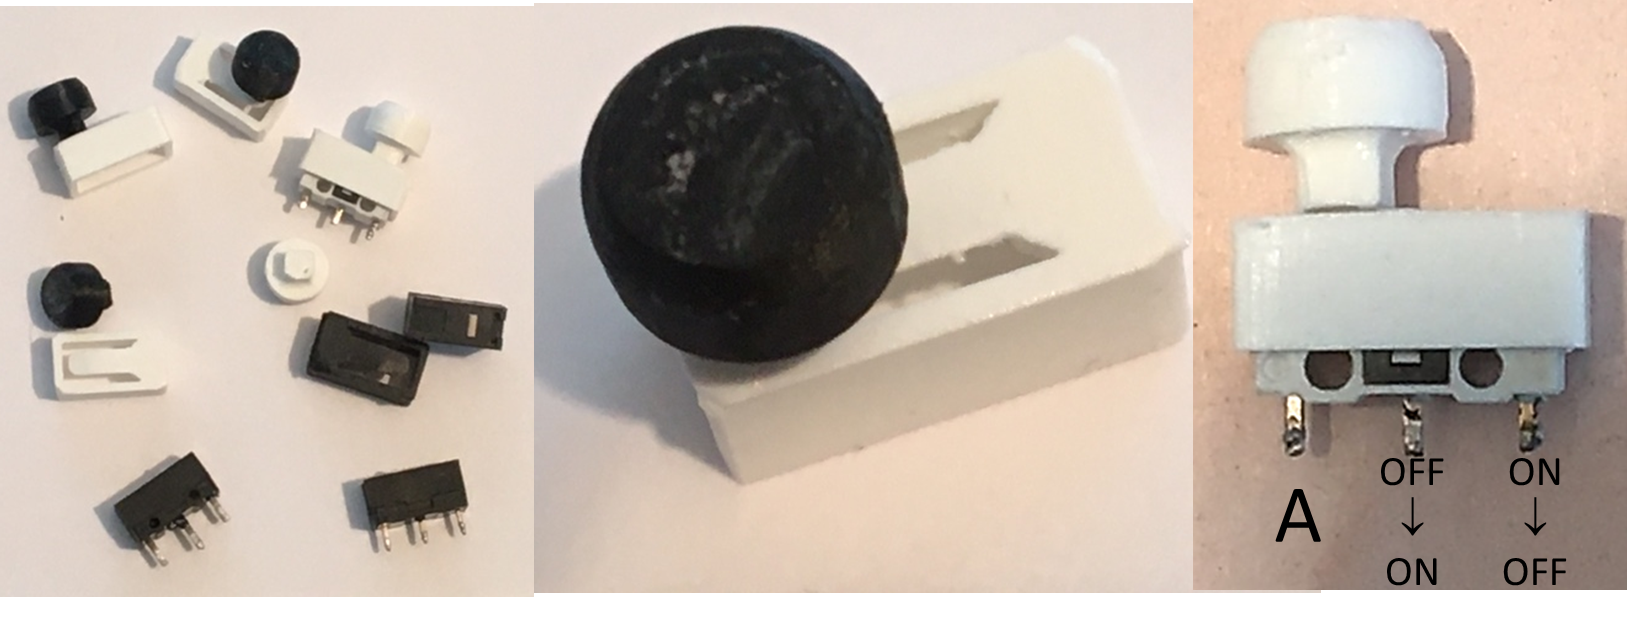
The switch button is tiny, making it hard to operate. To make it more user-friendly, we created a 3D-printed housing.
Supplies


Step 1: The Housing
The housing is the first element, with a cavity corresponding to the size of the switch: L= 13 mm; l = 6mm, h = 6mm. The thickness of the walls is 1 mm. The cover is partially finished and consists of a flexible strip of 0.5 mm thick.

Step 2: Button Head
The second part is the button head. Its dimensions are tailored to fit the fixation tab's width (4x4 mm) and to the size of a normal finger (surface area of about 12 mm²).

Step 3: Final Assembly
Final assembly is accomplished by gluing the various parts together with a cyanoacrylate adhesive.


![Tim's Mechanical Spider Leg [LU9685-20CU]](https://content.instructables.com/FFB/5R4I/LVKZ6G6R/FFB5R4ILVKZ6G6R.png?auto=webp&crop=1.2%3A1&frame=1&width=306)


