Introduction: Making a Puzzle for Kids Using a 3D Printer


In this Instructable I will show you how to make a puzzle for kids using Inkscape, Tinkercad, and a 3d printer.
Let's get started!
Step 1: Find a Free Sketch

Winter is coming! I wanted to make a puzzle representing a snowman to celebrate this amazing season. Sadly, my drawing skill is very lacking so I went to Google and searched for a free snowman picture using: "snowman svg". Don't forget to use the search tools to search for free images to work with.
I found a cute little snowman. The sketch will be relatively easy to work with as pieces are already created. If you want to choose another sketch, you will probably need to separate the main image into many pieces.
Step 2: Clean the Sketch With Inkscape

I used Inkscape to cleanup the image. It is a free SVG manipulation software that you can download here: https://inkscape.org/release/inkscape-0.92.3/
I first opened my image.
Step 3: Simplify the Sketch


Then I tried to remove every useless details in the sketch. I started by deleting the background, the snowflakes, the shadow, and the sky. I also deleted all the details on the snowman itself, only the basic shapes remain.
Step 4: Save the Simplified Snowman


After simplifying the snowman, I selected all the remaining pieces with CTRL+A, clicked the "Object" menu, and filled the shapes with black clicking on "Fill...".
The first part of the snowman is now ready to be saved.
Attachments

Step 5: Create the Snowman's Contour
We basically have all our pieces for the puzzle but we still lack the enclosure. To make a perfect frame we need to somehow get the envelope of the snowman. To do so with Inkscape, some manual operations are required.
Step 6: Join the Shapes Together


First, we will need to join all the pieces together. To do so, you will need to use two tools: the zoom and the drawing tool. Use the zoom to focus on an area and use the drawing tool to create new shapes that join pieces together like in the pictures above.
Here are some tips to make cleaner joins:
- disable the stroke and fill the new pieces with red for a better contrast with the other pieces
- put the new piece on the lower layer to see if the join is clean or not
- adjust the points of the new piece to get a smoother join
If you chose a plain picture for your puzzle, you will need to do the opposite which is splitting the picture into many pieces. You can create gaps using the drawing tools and instead of joining everything you will just subtracting from the picture the gaps you just created.
Step 7: Create the Envelope


Now to create the envelope, select all the pieces, the original pieces and all the joins. In the "Path" menu, click on "Union", it will create a single piece from all the other pieces. Finally, in the same menu, click on "Outset", it will enlarge the snowman shape a little bit.
Step 8: Import the Snowman in Tinkercad


It is time to import both SVG, the shapes and the envelope, inside Tinkercad. To do so, create a new design. Click on the import button at the top right corner of your window. A prompt will ask you to select an image, select the one with the snowman shapes, choose a small size like 200, and import. Repeat this process for the envelope. You should have two 3d models in your working area.
Step 9: Resize the Snowman


At this point, you can choose the final size of your puzzle. Choose a size for your snowman by uniformly resizing (resize with shift pressed) the shapes and the envelope. To ensure that everything will fit together, align the shapes and the envelope and make sure the envelope is just a little bit bigger than the shapes.
Step 10: Create the Frame


I created a frame with a box in which I replaced the corners by cylinders to create a round box. I choose this approach instead of adding a radius to the box to ensure a good print.
First create a box big enough to put the snowman in it. Remove the corners by creating little boxes at all ends, set them as holes, and group the bigger box and all the small boxes together. You can now add some cylinders at all ends to create a round shaped box. Group everything to create your frame.
Step 11: Create a Place for the Snowman Inside the Frame


To finish the frame, you need to align the snowman envelope with the frame. Select all the parts, click on the align button, and center everything. You will need to set the envelope as a hole.
At this point, you can set the thickness of your puzzle. I chose a 4 mm height for the frame and the puzzle pieces. Just remember to move the envelope upward a little bit to ensure the pieces will lie inside the frame; I chose 1 mm as the thickness for the bed. Once everything is set, group the frame and the envelope together.
Step 12: Export the Models for Printing


The 3d model of the puzzle is now ready. Before exporting the models, ensure both the frame and the snowman shapes are on the same level. It will ease the printing setup.
Click on the export button, and export all the shapes as STL files.
You can also use my models here: https://www.tinkercad.com/things/itJUBVsDpk6-surp... or the STL files I joined.


Step 13: Prepare the Print


It is time to create the gcode for the print. I used Slic3r as it comes with my 3d printer (Prusa i3 mk3), you can use any software you want to slice the models.
I printed the model at 0.1 mm layer height with 20 % infill.
Step 14: Print an Test


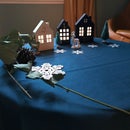
You can now print the puzzle and enjoy the result. At this point I shared the puzzle with my kids without any post-processing and the reception was amazing!
I didn't have any more adjustment to make. If you encounter some issues and your pieces doesn't fit together, you can try to increase the envelope size.
You know kids, they always want more, more puzzles, more colors. So I printed another puzzle and I tried to paint the puzzles to better match the original sketch.
Step 15: Paint the Puzzle


I didn't want to do any post-processing on this project, so no filler, no heavy sanding, and no primer. I just used some sanding sponges to smooth everything up before applying 3 layers of acrylic paint. I tried to stick to the original colors as much as possible.
The puzzle is basically done. I already printed and painted three of those puzzles and kids love it!
I hope you liked it!
Runner Up in the
Puzzle Challenge


