Introduction: Nap Tub
Take your napping to the next level by transforming a claw foot tub into a relaxing day lounger, combining two favorites into one: style, and napping.
The classic aesthetic of the claw foot tub shouldn't just be relegated to the bathroom, but celebrated out in the open for all to admire. This real cast iron bathtub was transformed from a stationary soap suds station, into a rolling relaxation retreat, complete with an operable light that looks like a shower head.
The entire inside has been carpeted, and there's an electrical outlet in the drain to plug in your electronics, keeping them charged while you rest and recharge. Take the comfort of falling asleep in a tub, but forgo getting wet.
Follow along and I'll show you how I took an almost abandoned classic claw foot tub to a unique piece of furniture that everyone is envious of.
Ready, steady...Let's make!
Step 1: Supplies
You're going to need a tub, obviously. The type of tub and what it's made from is up to you. I wanted an authentic claw foot tub, which are cast iron. Since this tub is going to be painted and carpeted, there was no need to go new, so I bought one off the classifieds for cheap (it had been in someone's backyard for "a decade or so").
Shop around, you can probably find a tub like I did for under $100. Here's what I used to bring this tub back to life:
Tub:
- Wire brush
- Razor blades (for scraping paint)
- Knoted wire wheel
- Conditioning discs
- Blue painter's tape
- Roll of white paper (for template)
- carpet (discounted carpet)
- Spray primer
- Spray paint - off-white (for tub feet)
- Spray paint - leather brown (for tub body)
- Spray clear matte acrylic
- Bathtub caddy (for your beverage)
- Rug traction tape
- E6000 (adhesive)
- Strong mounting tape
- Bathtub soap caddy
Tub Frame:
- Square steel tubing
- Drilling oil
- Casters (200 lbs. capacity each)
- Permanent marker
- Welding magnets
- Angle grinder
- Flap sanding disc
Shower Light + Power:
Step 2: Brush Clean + Assess Tub
Depending on the condition of the tub, you may have to do some triage to get it in a condition decent enough to start. My tub was in a residential backyard for years, covered in dirt, and had evidence of being poorly covered in some kind of paint over the original enamel finish.
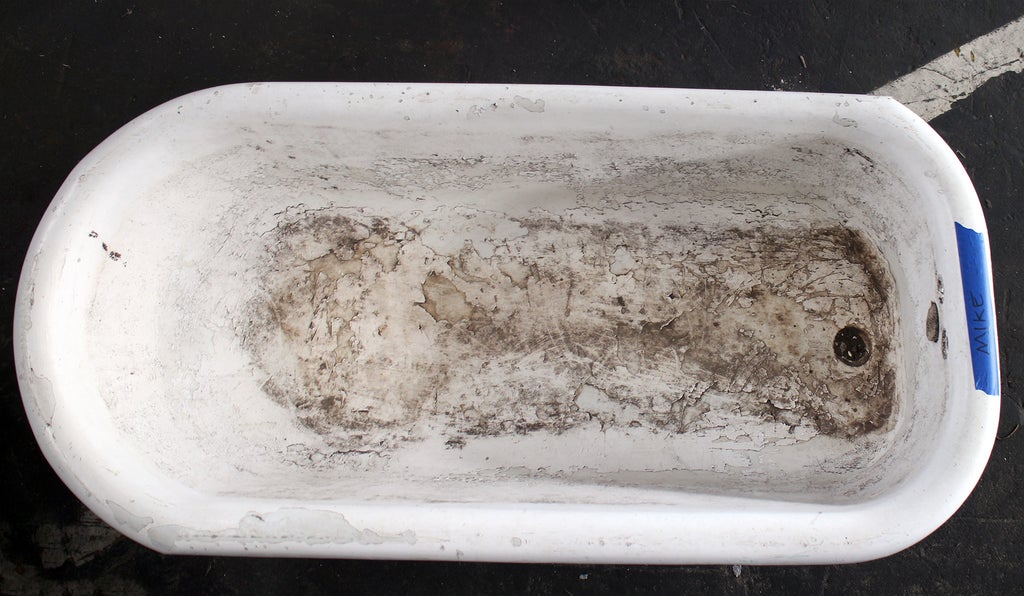
First thing was to sweep the tub to get out as much loose material as possible, and then examine the tub to see what kind of condition it was in under all the debris.
Step 3: Clean Tub Inside
After a quick cleaning it was clear the tub has some kind of paint coating the original enamel, the paint was peeling badly and could come off just by scratching with my thumbnail.
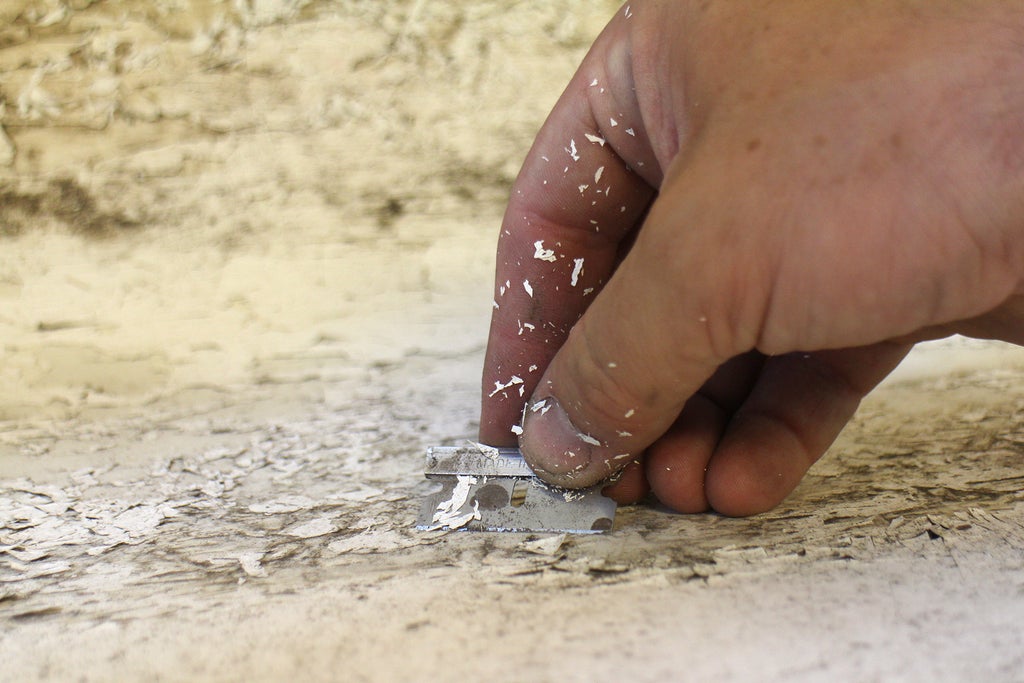
Knowing I needed a clean base to stick the carpet to, I started chipping off the paint with a razor blade. With the razor at a slight angle I ran the blade firmly across the entire inside of the tub to scrape away all the old paint.
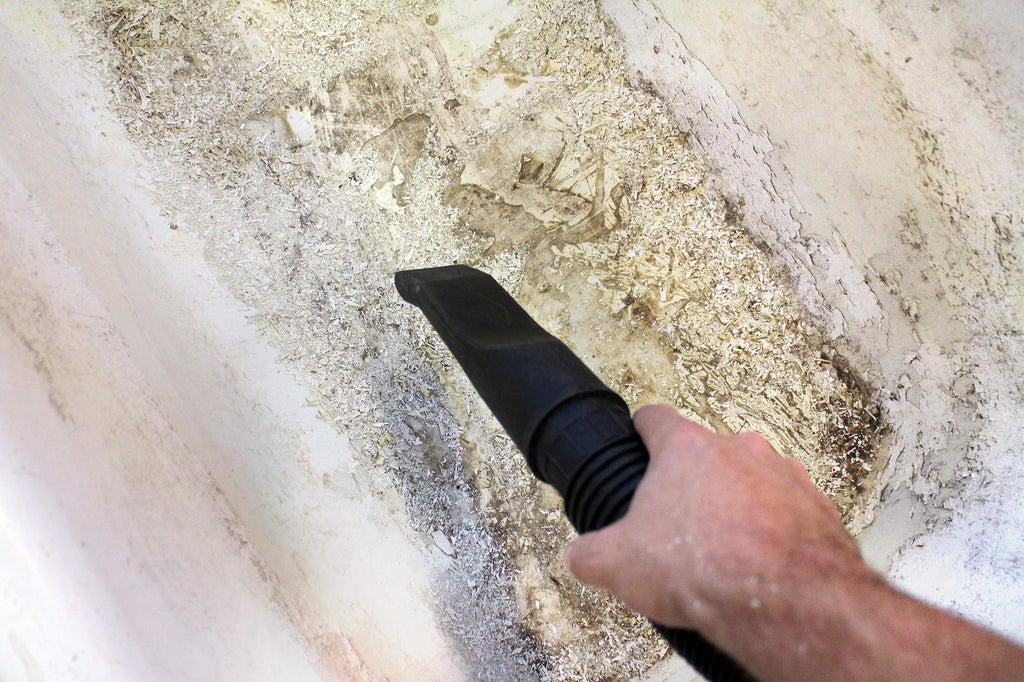
After a razor dulled and was no longer effective I got a new one and continued until I had a nice pile of paint accumulated, then vacuumed it all up.
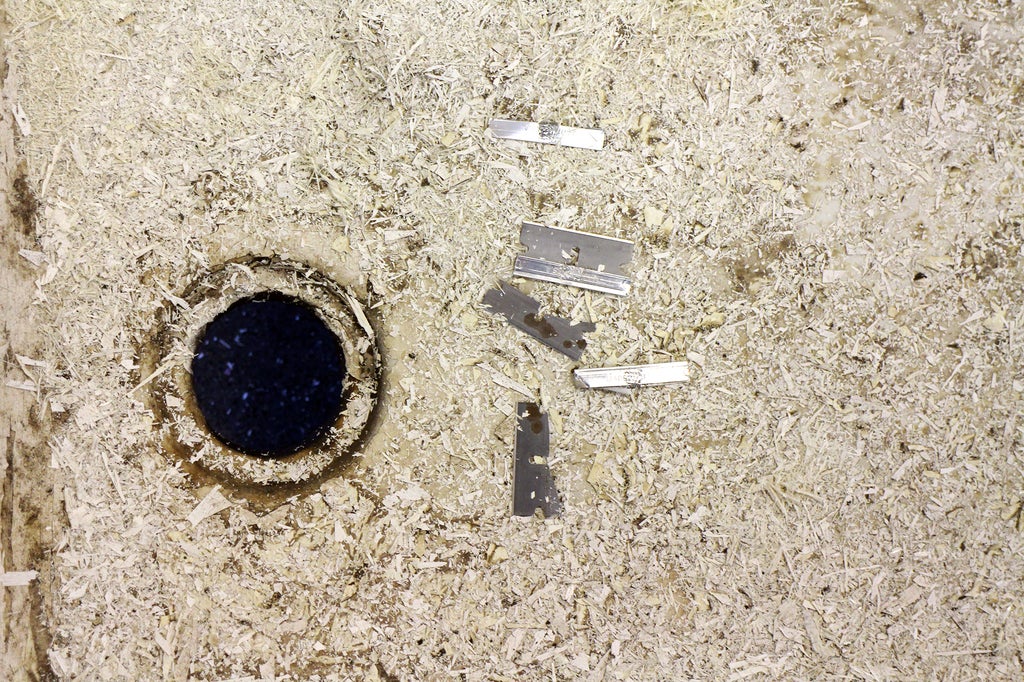
Some razors broke from scraping, and I went through about 40 blades to fully remove all the paint from this tub. Luckily, blades like this are inexpensive and sold in bulk.
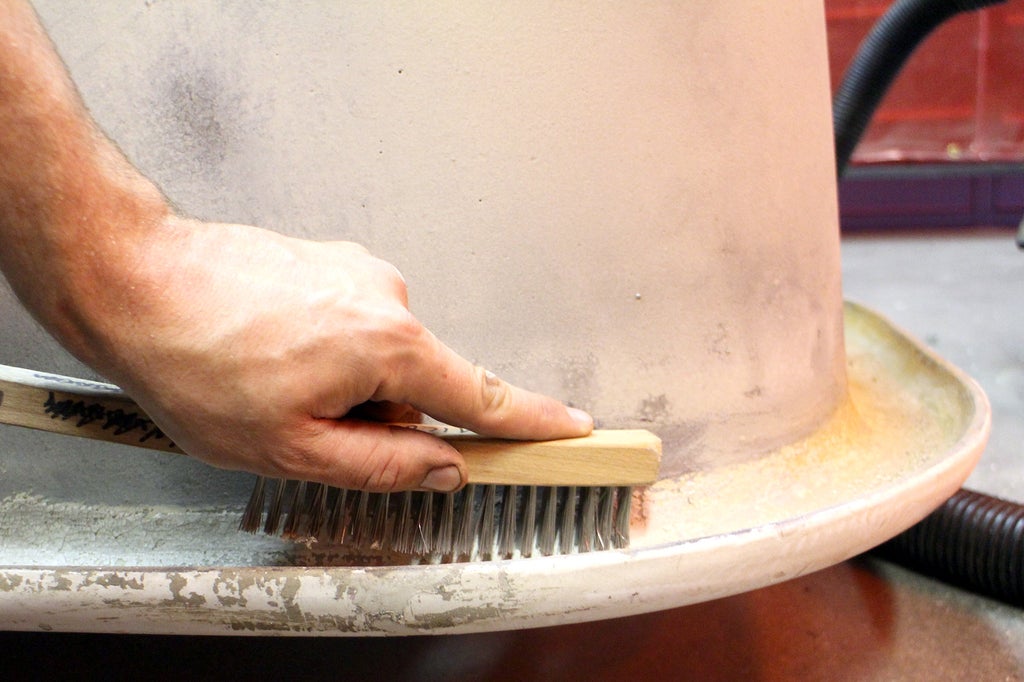
In the few areas where the blade was unable to remove the paint, due to contours or the paint just being really stubborn, I took a wire brush and scrubbed as much of the surface detritus off as possible.
Step 4: Wipe Clean With Cloth
A solid day of scraping later the tub inside could be cleaned with a liquid cleaner of your choice.
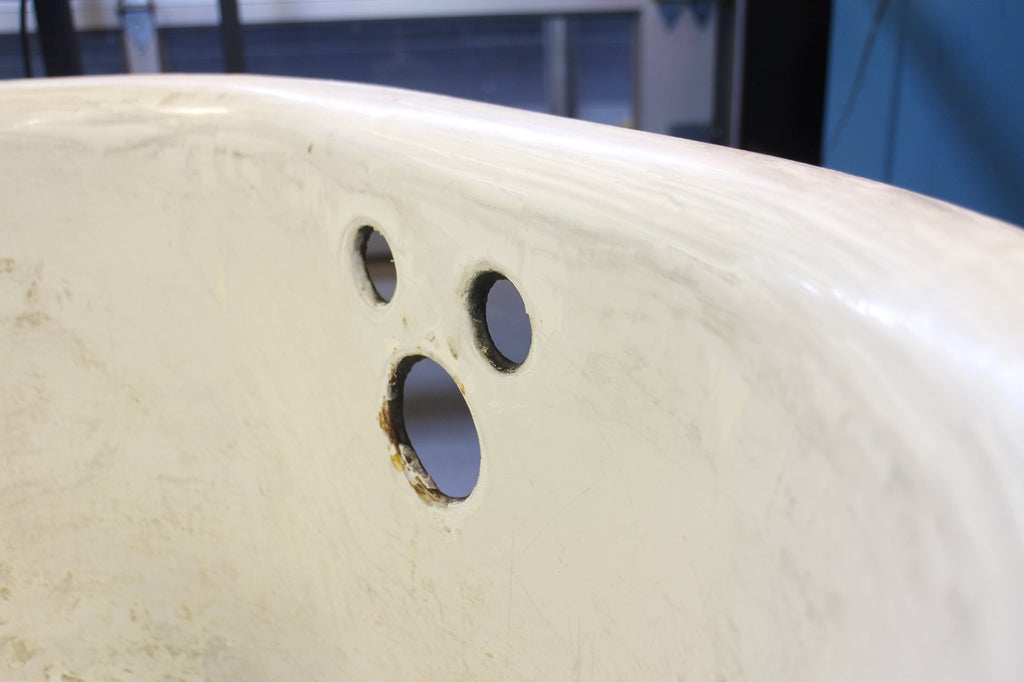
Since it's going to be covered with carpet it really doesn't have to look nice and shiny, just clean enough that the glue has a place to adhere to.
Step 5: Clean Outside of Tub
The exterior of this tub was in rough shape. Having been outside for so long the tub had rusted in some areas.
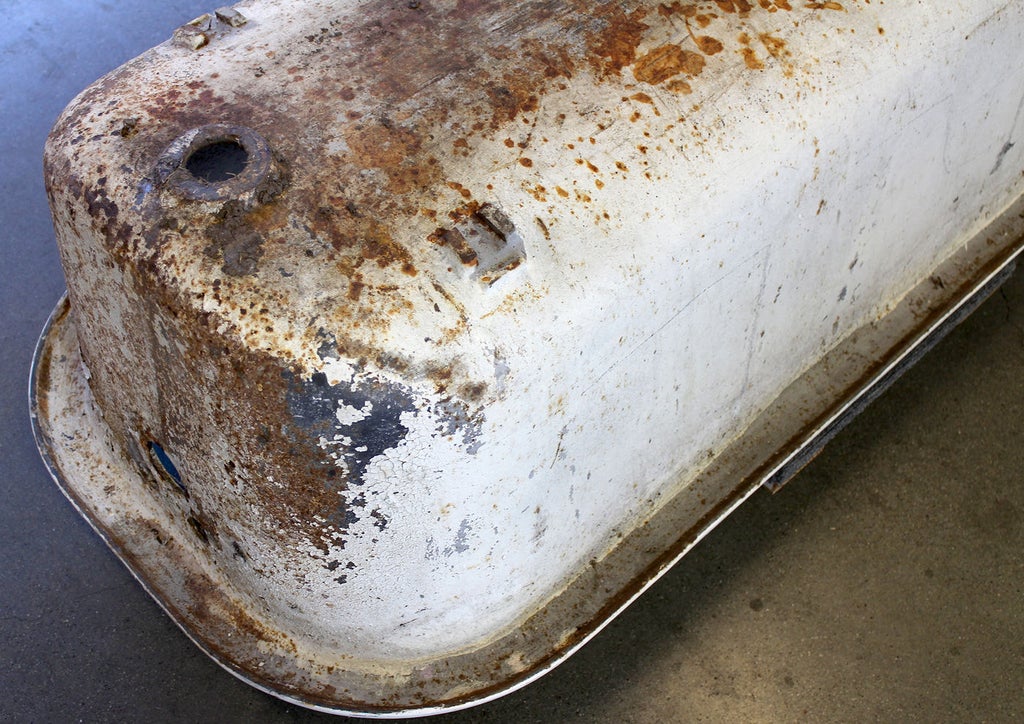
Though cast iron rusts, the metal is fairly hardy and can easily be brought back to life by grinding away the rusty parts until you get good metal underneath. To do this I used a knotted wire wheel on an angle grinder.
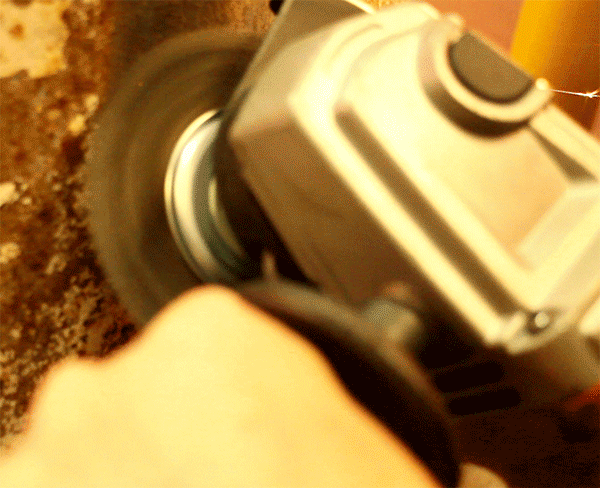
Working in a well ventilated area (outside is even better), and with PPE (face shield, respirator)
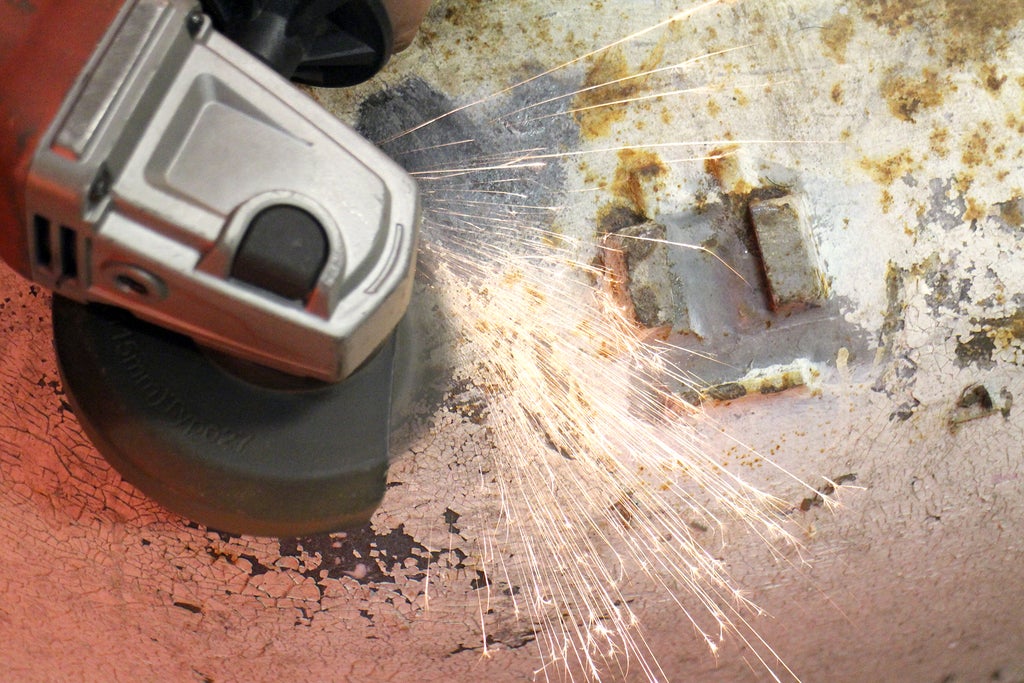
The wire wheel was applied to the outside of the tub, throwing sparks and paint everywhere.
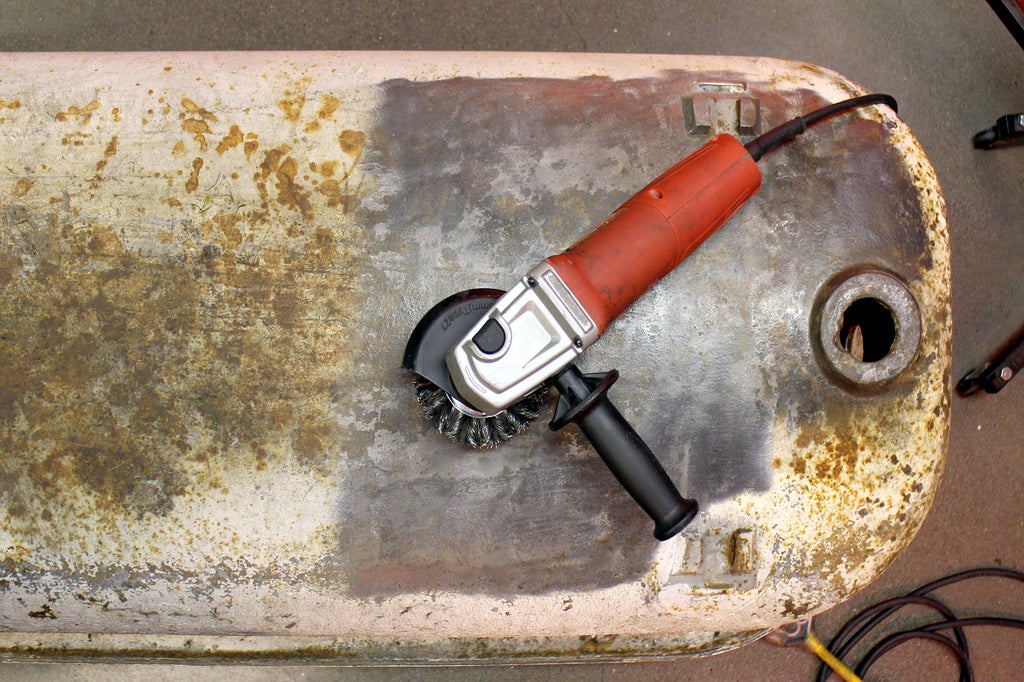
It took about 2 hours of solid grinding to get the tub down to bare metal.
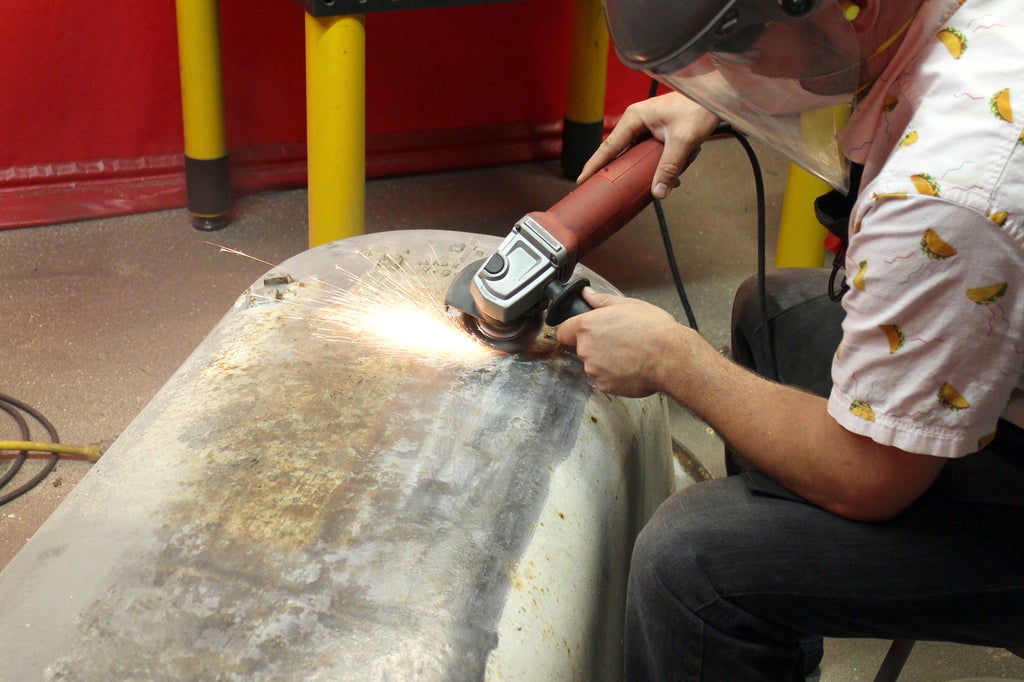
I went through an entire wire wheel, leaving only a nub left after hours of grinding.
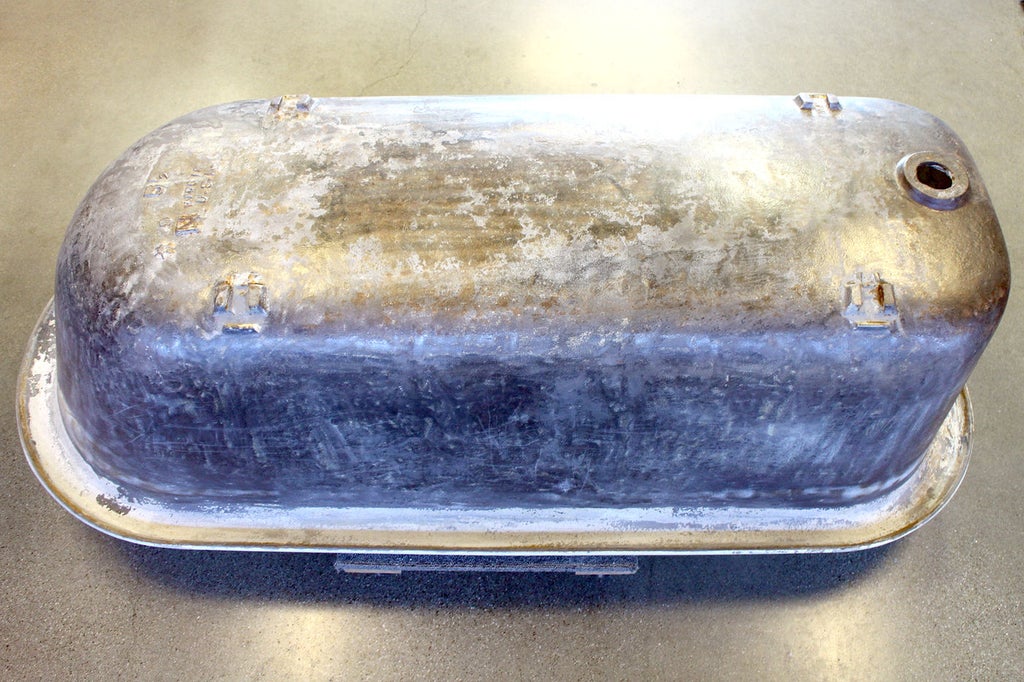
Here's the tub after grinding. I didn't pay much attention to the underside of the lip, since it's not visible and would be covered with carpet later.
Step 6: Wipe Clean
After grinding off all the rust and getting down to bare metal the outside was wiped down with slightly damp cloth, followed immediately with a dry cloth to wipe up any moisture.
Step 7: Primer + Paint Tub Exterior
When the tub outside was clean and dry I sprayed on a flat white paint primer. After the first coat I waited about 20 minutes and applied a second coat to ensure good coverage. The tub was left to dry for a few hours before moving onto paint.
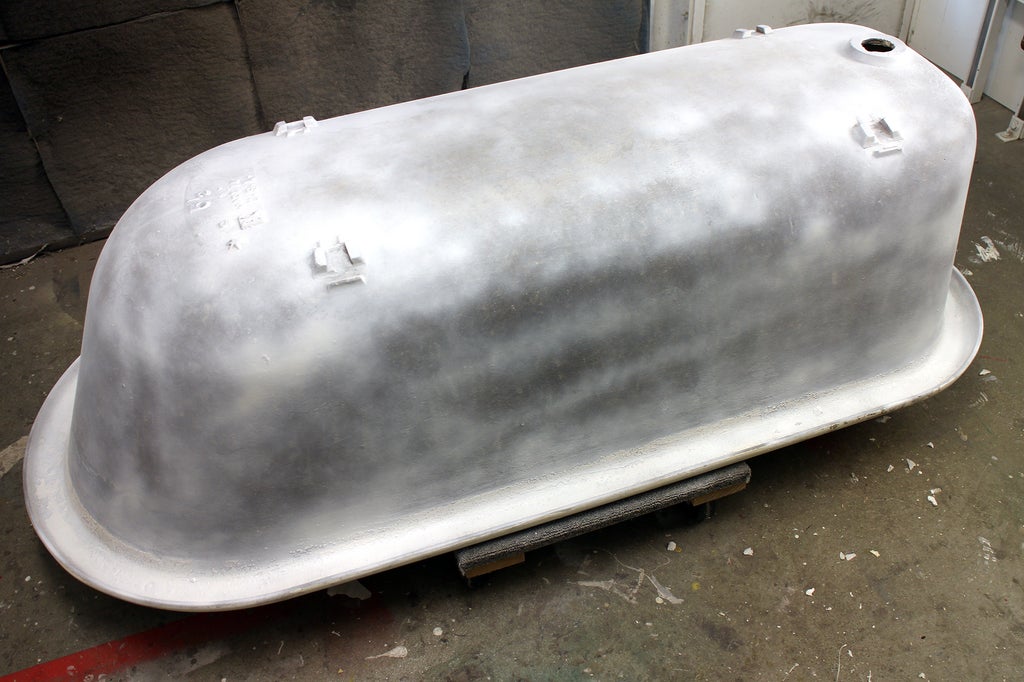
I was thinking about color when choosing my paint. I originally was going to do black outside and a white interior, but thought about a dark chestnut brown and light cream would be a more regal look.
I found a semigloss brown spray paint and coated over the white primer, waiting about 30 minutes between coats. To get a nice even color I used 3 cans of dark brown spray paint.
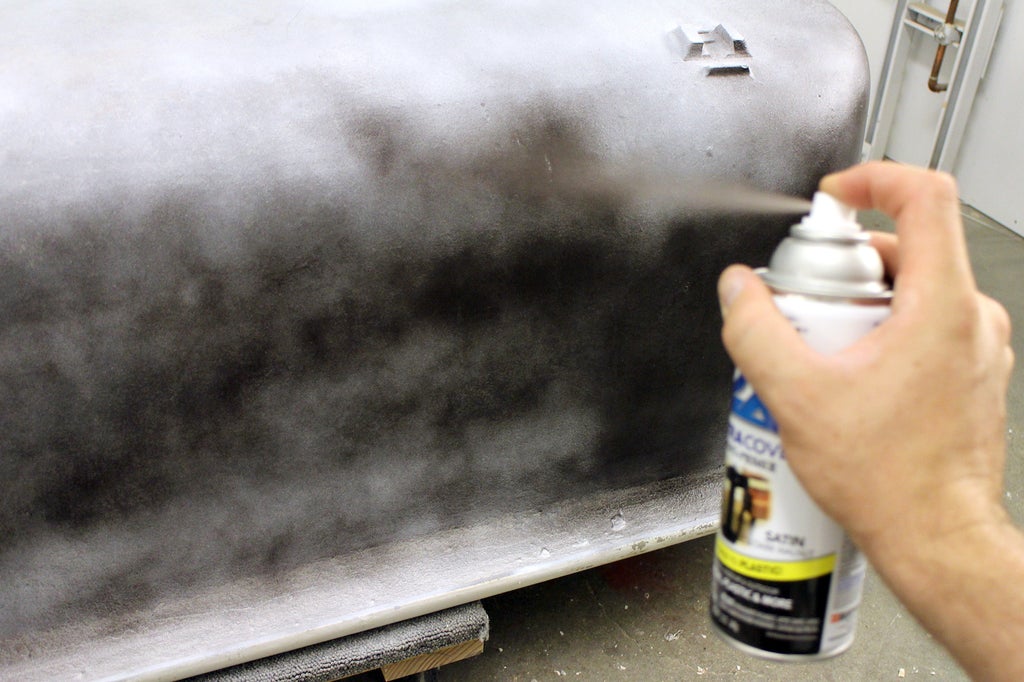
After the last coat of paint I let the paint dry overnight before moving the tub.
Step 8: Clean Feet
The claw feet that came with this tub had been removed when I bought it. The owner was smart and kept them inside the tub while it was in storage. Unfortunately the feet suffered the same damage as the rest of the tub being exposed to weather and time, and were in terrible shape.
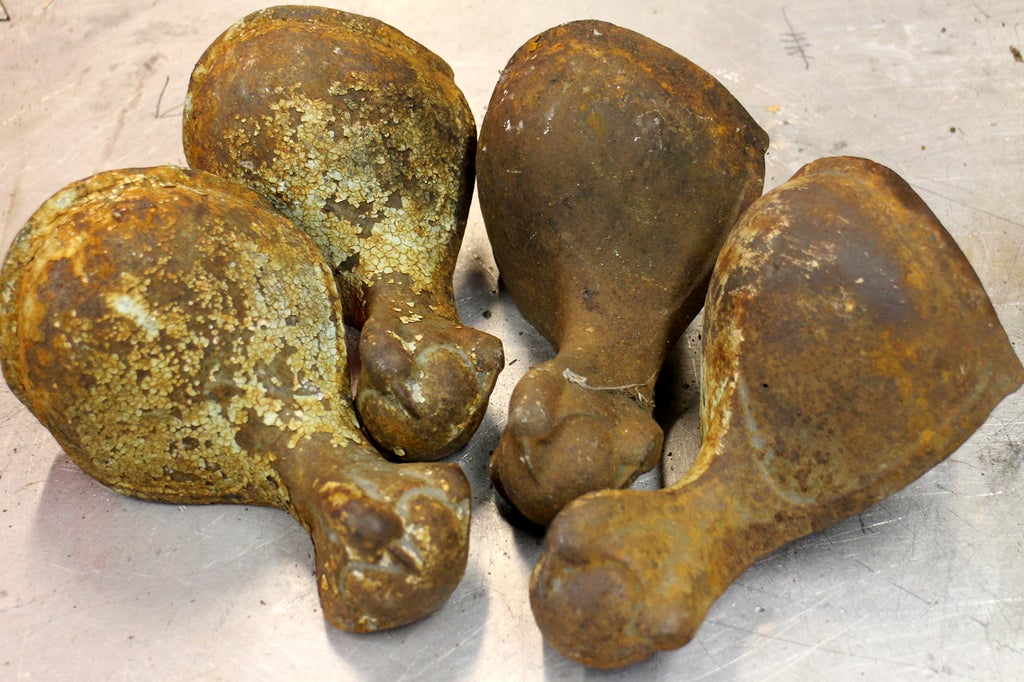
Using a similar method as cleaning off the outside of the tub, I used a combination of wire brush, abrasive pads, and conditioning discs to bring the feet back down to clean metal.


Here's all four feet after they had been cleaned.
Step 9: Remove Seized Feet Bolts
After cleaning I found that the tub was so old and weathered from being exposed to the elements that the bolts holding the feet to the tub base had seized. I was planning on using the tub feet in my build to hide the casters I wanted to have, so I had to clear out the seized bolts in order to make way for the new ones.
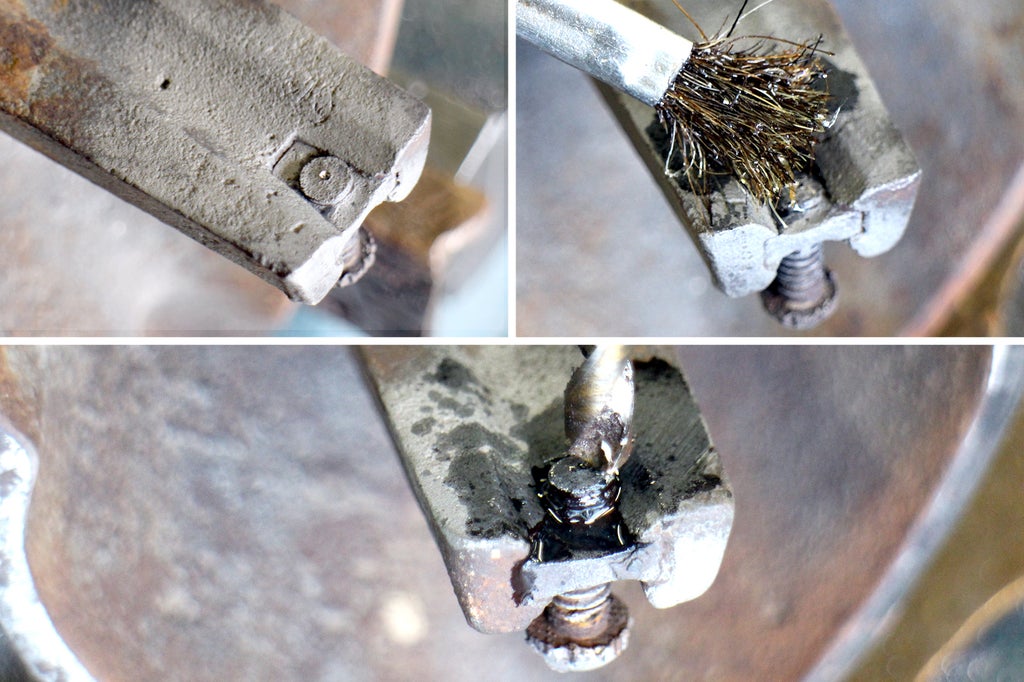
Wrenching these bolts out wasn't an option, so I decided to drill them out. The first step was to use a metal punch to mark the center of each bolt end, then apply a liberal amount of cutting oil to assist in the drilling. There's a detailed section all about this process in our Beginner Metalwork Class, if you're interested in learning more.
With the foot securely fastened in a bench vise I used a drill bit the same diameter as the bolt to drill down into the bolt until it was freed from the opening.
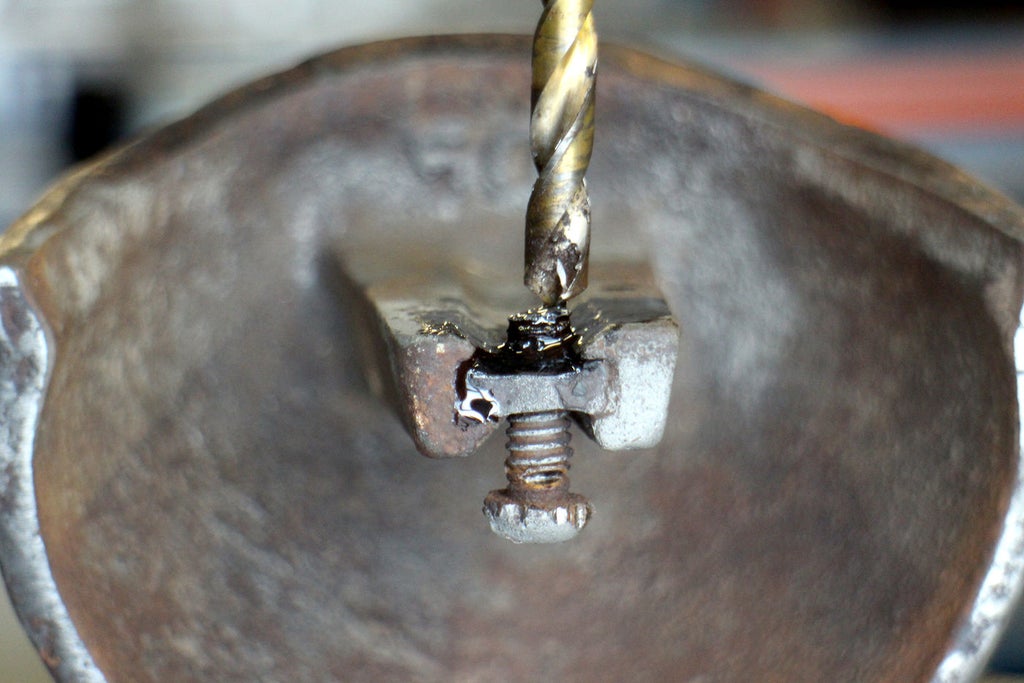
I wanted to use the existing opening in each foot, so I tried to keep the drill as perpendicular as possible to only drill out the bolt and not enlarge the opening.
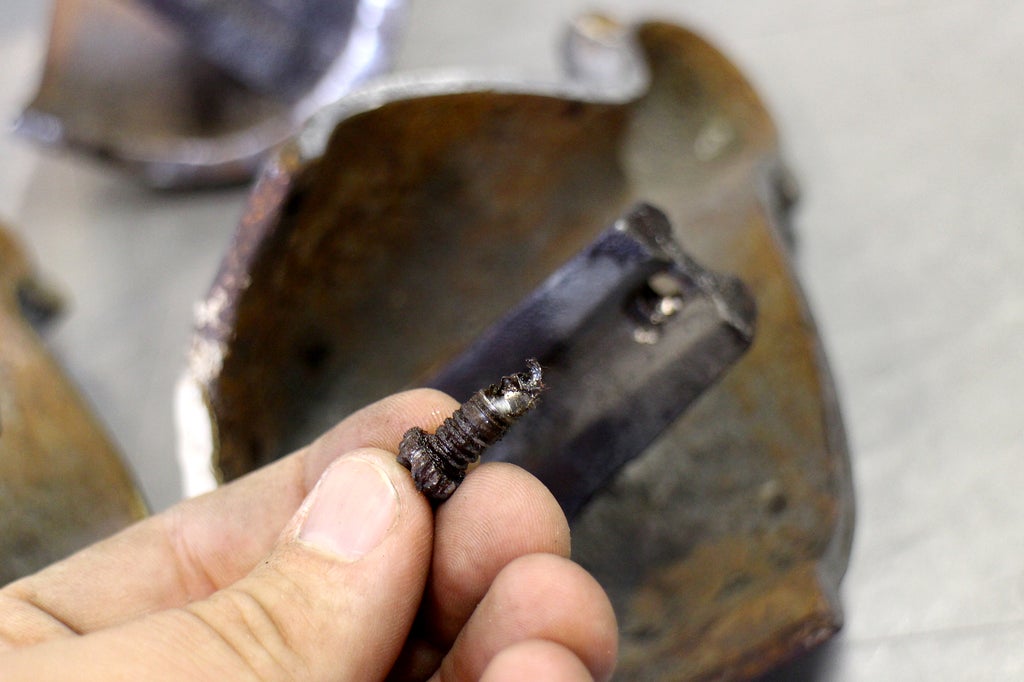
Eventually the drill gets deep enough into the threads of the opening and the seized bolt can break free with a little torque from a wrench.
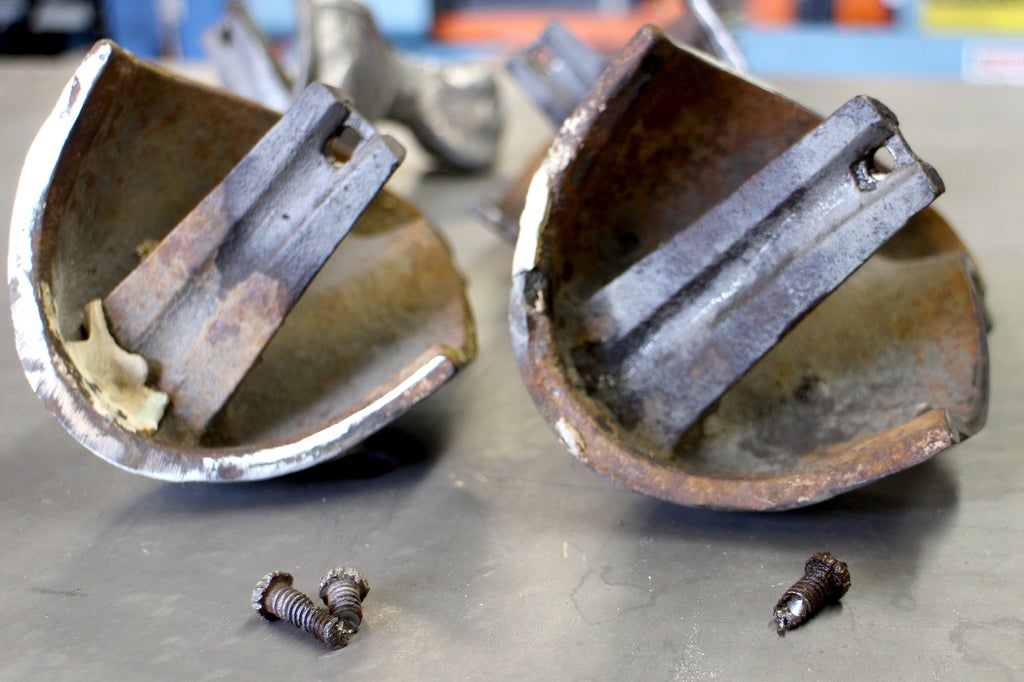
Here's the seized bolts after being removed. Excess oil from drilling was cleaned up in preparation for priming and painting the feet.
Step 10: Prime + Paint Feet
As I did when I painted the tub, a few coats of primer were applied to give a good base for the paint.
I chose a light off-white creme color for the feet, I think it compliments the dark brown of the tub nicely. After painting the feet were left to dry overnight.
Step 11: Fit Feet + Measure Frame
Being cast iron, I'm guessing this tub weights about 300 lbs. Wanting this tub to be easily movable I decided to put it on heavy weight casters, making it easy to be rolled around by hand. To do this I built a frame to go under the tub, inside the feet, which would hold the casters and obscure them from view.
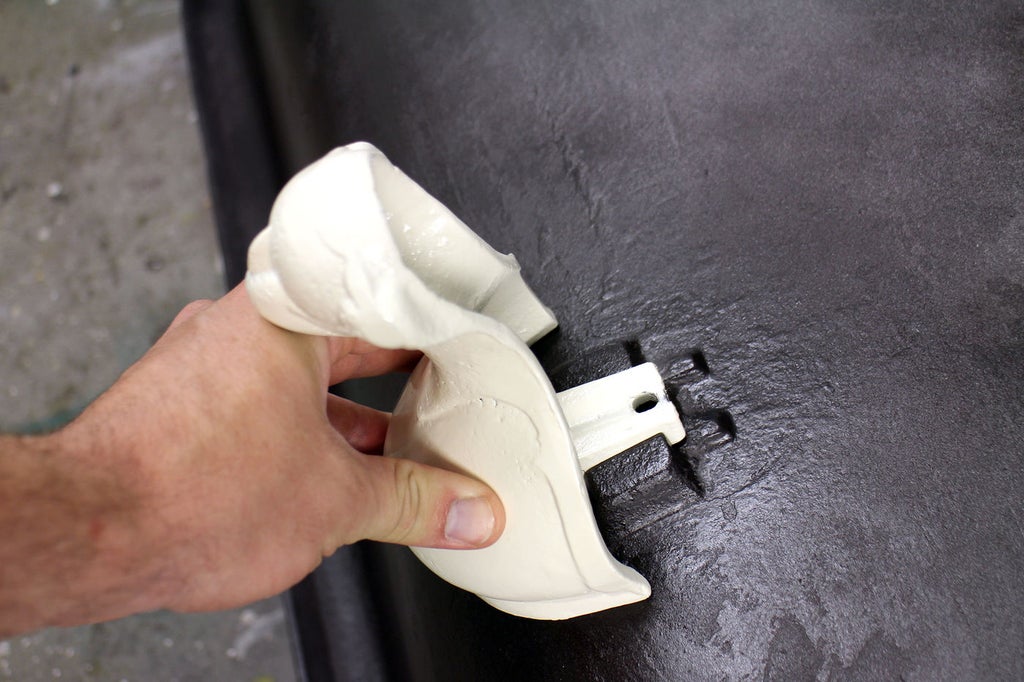
The feet fir into slots on the underside of the tub. The bolt that I drilled out would have been inserted into the opening and tightened, holding the feet firmly in place. Instead, I plan on using these openings to attach a square tube frame.
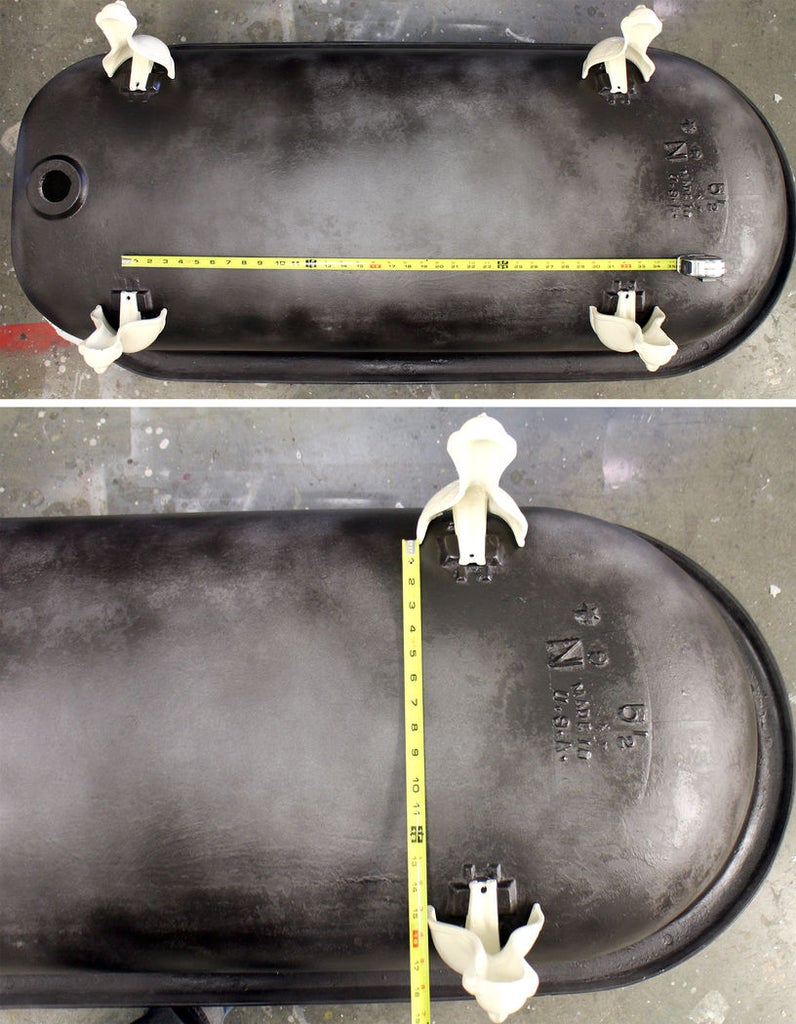
With the feet inserted into the slots I took measurements to create a rectangular frame that would fit in behind the feet.
Step 12: Cut + Prepare Steel
After measuring I cut the pieces I needed from 1" square tube stock. The next steps were to prepare the metal for welding, then welding up the frame. Welding might seem intimidating, but it's super easy. Here's a great resource for how to cut, clean and prepare your metal, and make great welds - Beginner Welding Class.
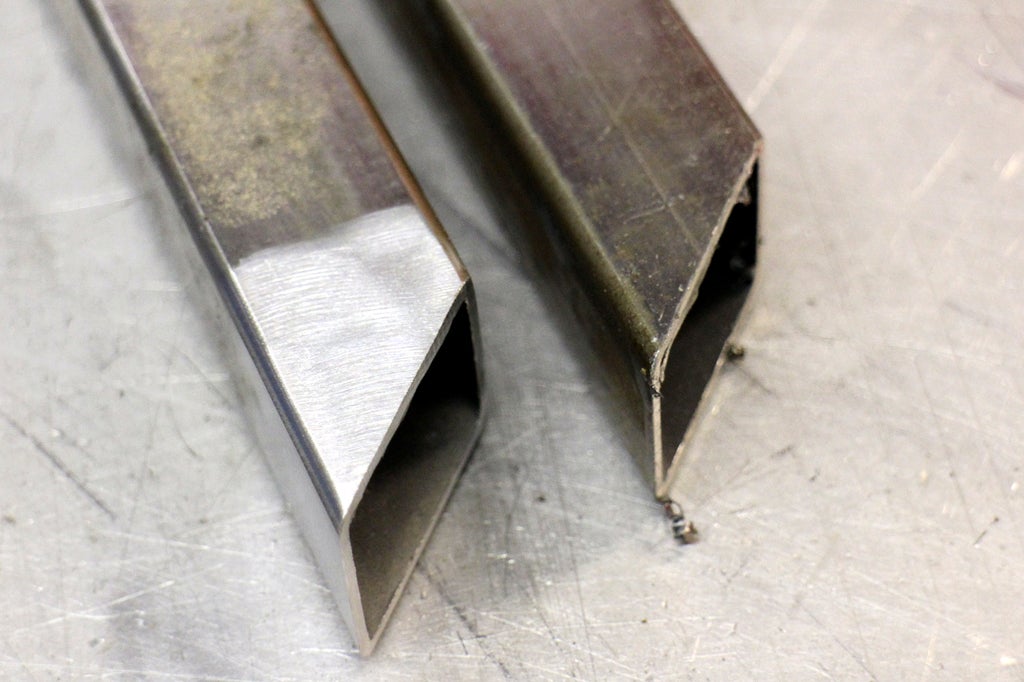
I cut my pieces with 45° angles which would be butt joined and welded, after cleaning them up. Using a flap wheel on an angle grinder I cleaned the ends of the cut pieces to remove mill scale and prepare a bare surface to weld.
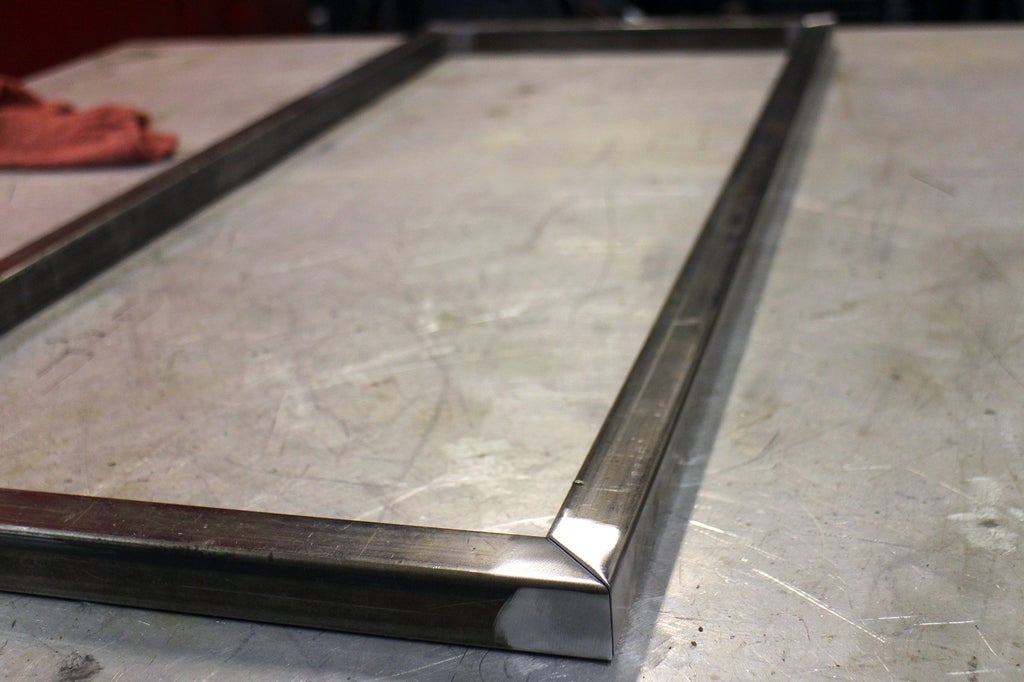
When all the ends of the cut pieces were prepared the frame was laid out on a flat surface.
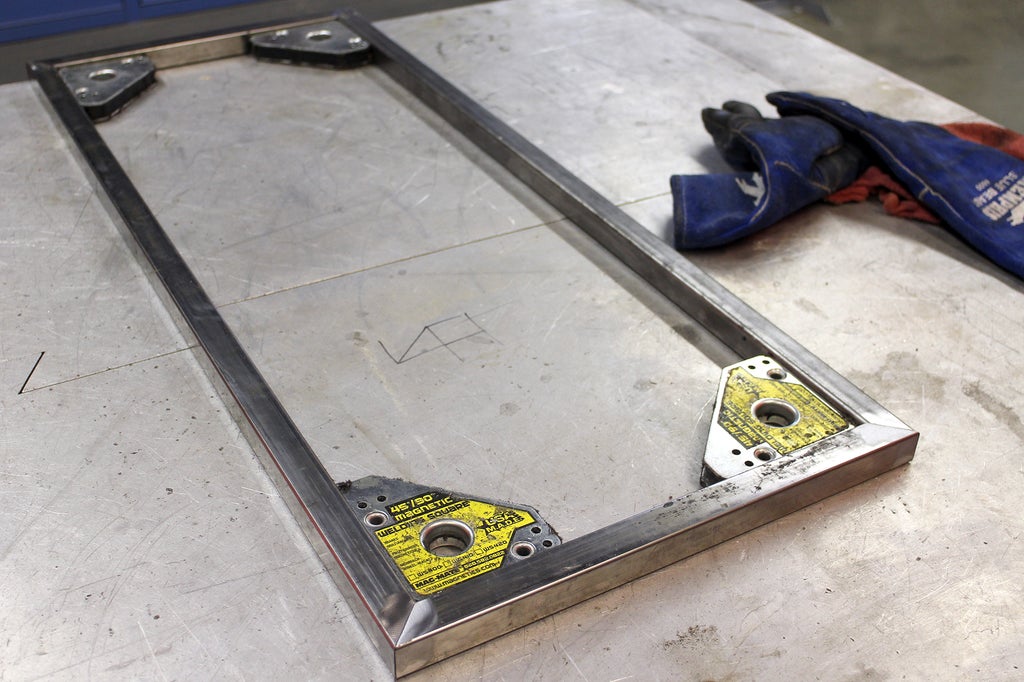
I used welding magnets to help square up the frame and keep everything in place. Once I had all the pieces square and true (and double checking my measurements) I started welding.
Step 13: Weld + Grind Frame
Welding is a great skill, and really not as difficult as it might seem. Sure, the sparks are dramatic, but the process is really easy and after a little practice you'll be busting out welds like a pro. Here's a total beginner welding class that you can learn for free.
With all my pieces lined up I made tack welds at each corner to hold things together, then flipped the frame over and made tack welds on the other side. Working on opposing corners, I made full weld at each corner, then flipped the frame again and completed the welds at each corner on the other side.
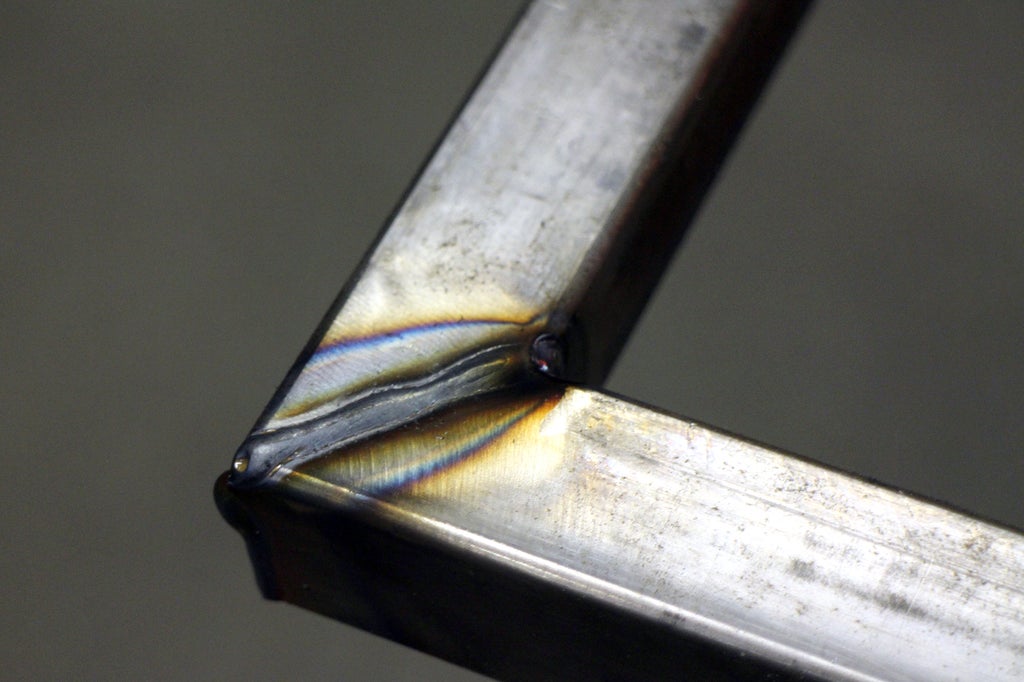
With the frame welded together the welds can be ground down to be flush.
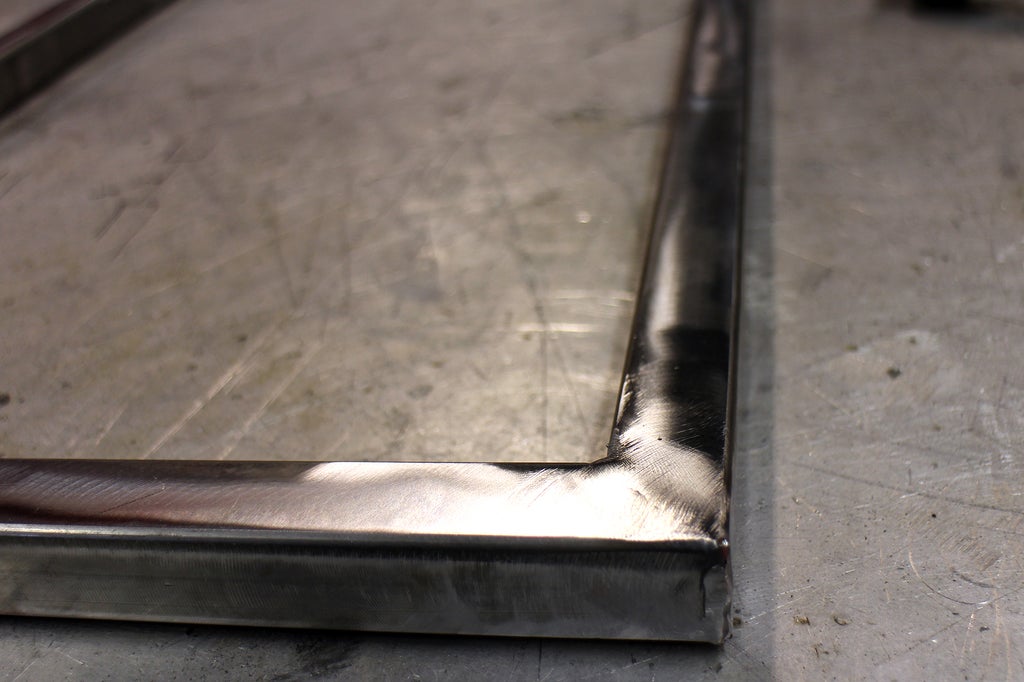
Using a flap sanding disc on an angle grinder the welds were ground down until flush with the tube stock, then I continued grinding the entire surface of the square stock to clean up any mill scale and prepare for painting.
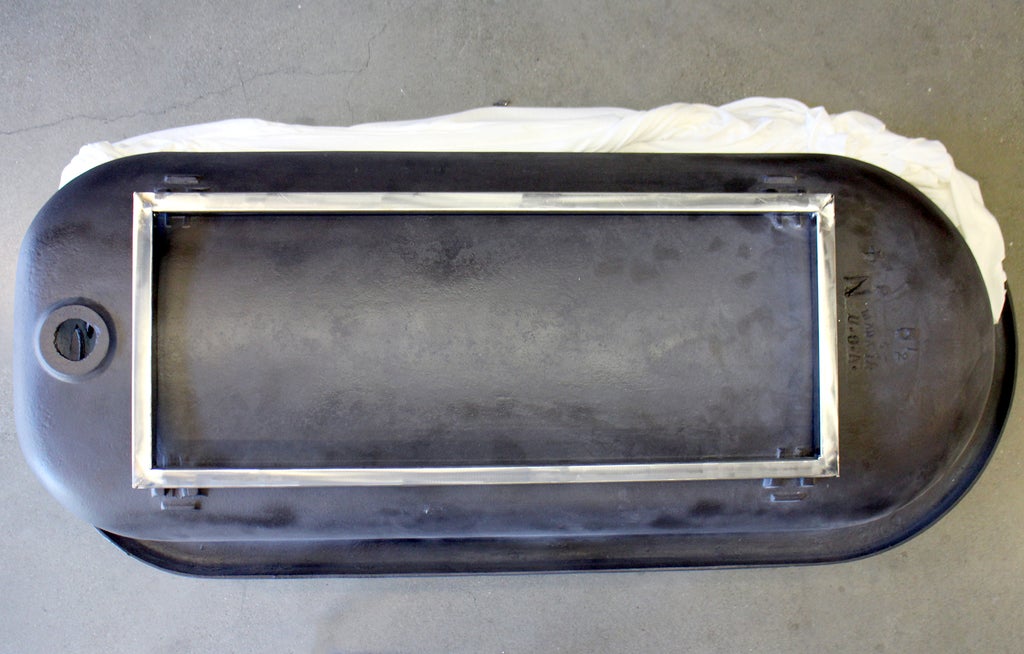
The frame was placed on the upturned tub to ensure I got the measurements right. With everything looking good I moved onto drilling openings for the casters.
Step 14: Place Frame / Measure / Drill
The claw feet were slid back into the tub and the frame placed over them, squaring the frame up to fit directly over each foot opening.
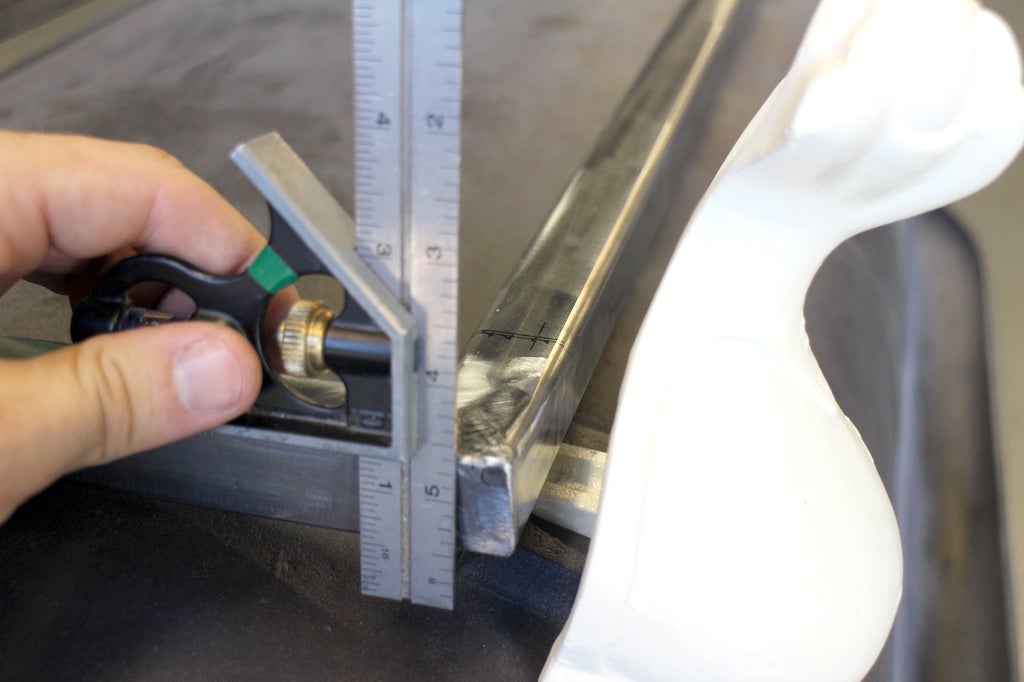
The location of each opening on the claw feet were transferred to the steel frame using an indelible marker.
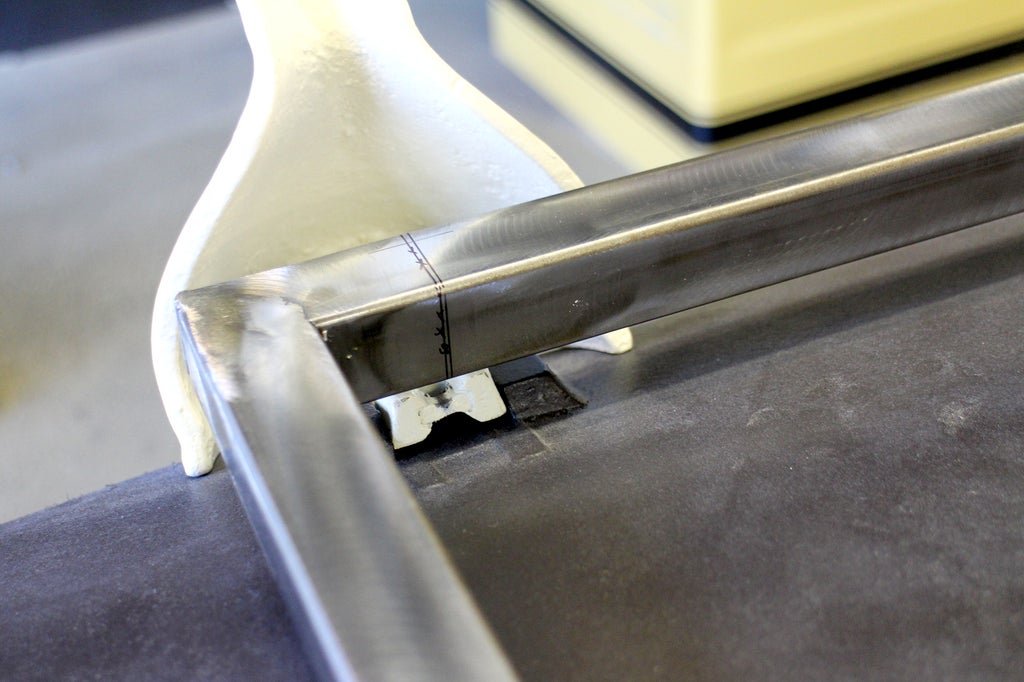
There's no room for error here. If a opening is drilled into the frame and it doesn't line up with the opening in the foot the bolt will not be able to hold the frame to the foot and tub. In the image above you can see the first marking I made was slightly off, a new line was marked showing the correct location to drill.

Once marked openings were drilled in the frame. I used a tap to thread the opening in the frame and screwed in a bolt. The bolt was held in place by the threads, and the end of the bolt, threaded through the foot opening) held the foot in place because of a retaining lip on the tub.
Step 15: Caster Risers
In order to get the height needed for the casters to contact the ground I needed to make some risers reducing the distance from the frame to the ground.
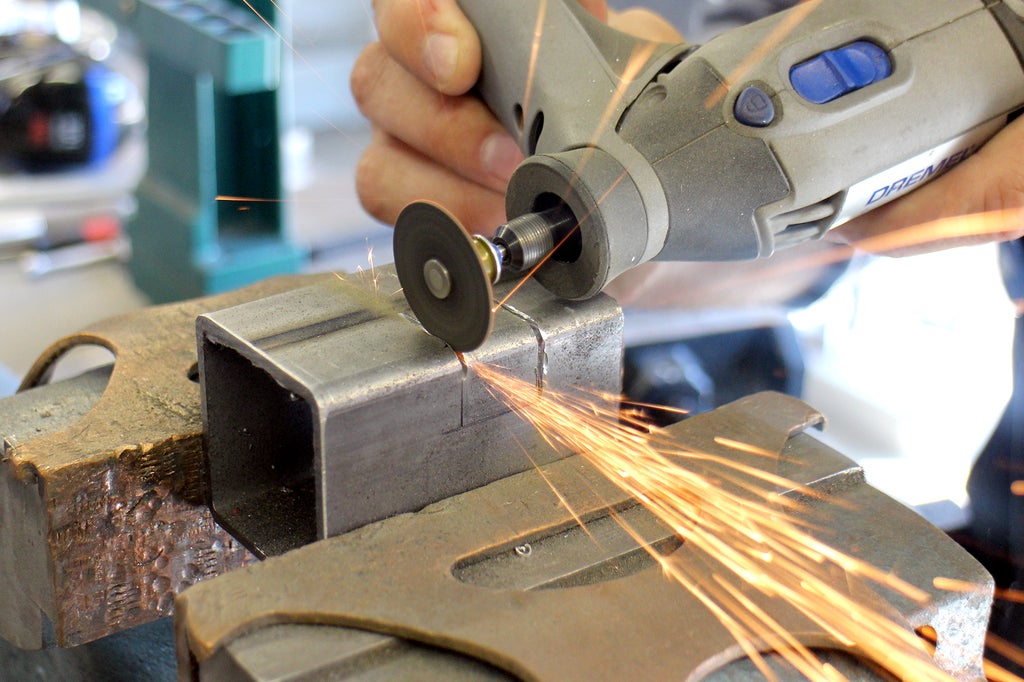
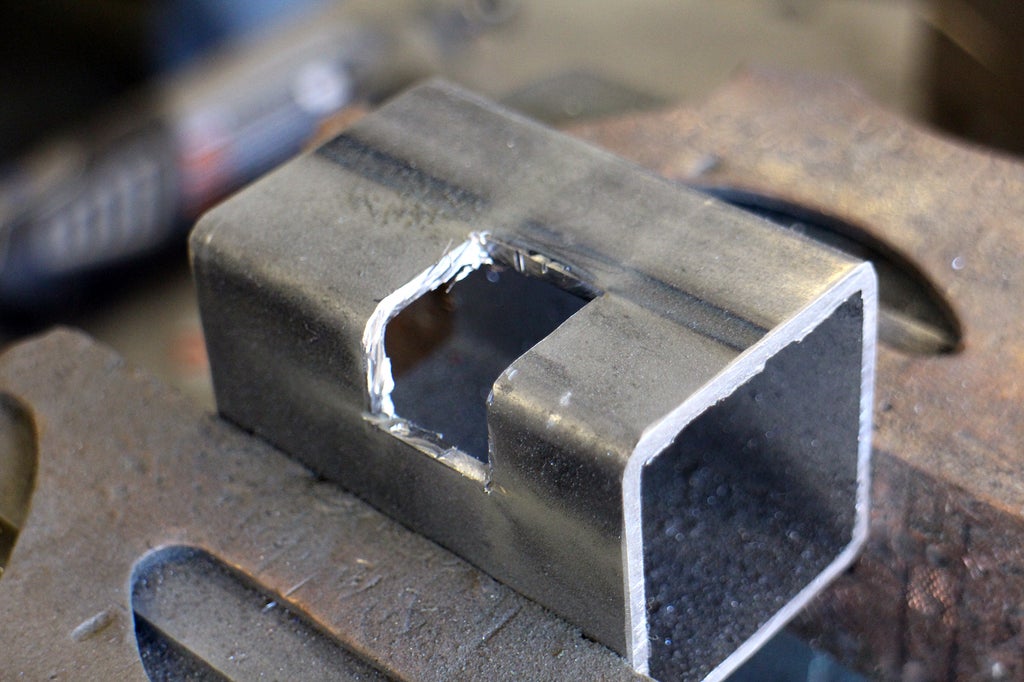
For this I used more square tubing stock, cut into 4" sections. A notch was cut into one edge of each section somewhere around the middle of the piece. This notch would allow access to the bolt that attaches the frame to the tub, which will be difficult to access once the caster risers are installed (you can see more details in the next steps).
I used a rotary tool with a cutting disc to cut out the notch I needed.
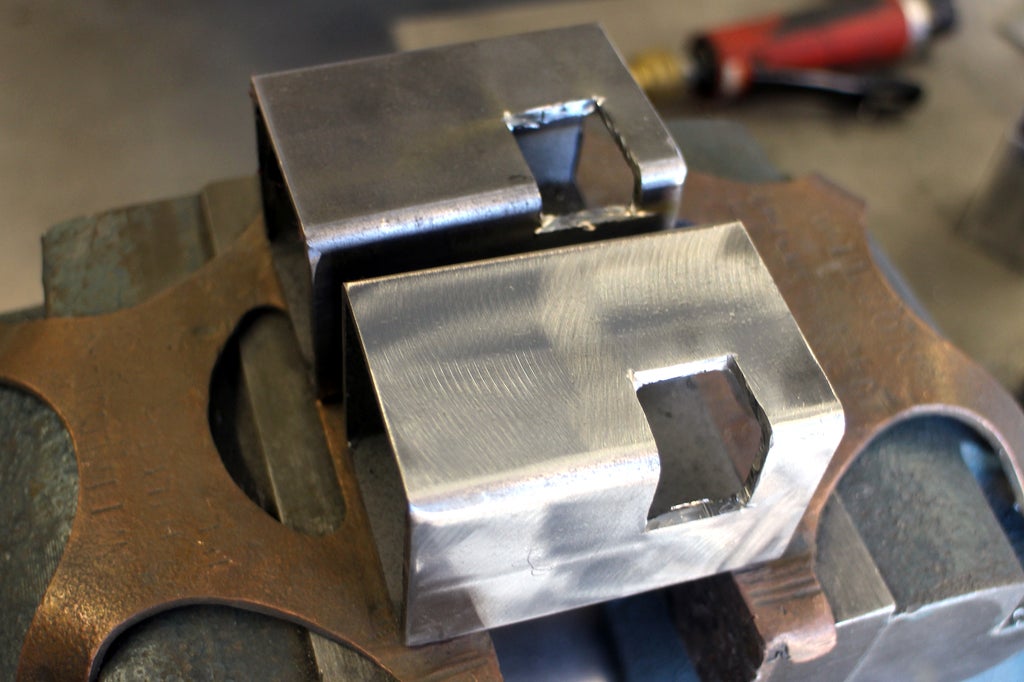
I cleaned up the edges of the notch, and removed all the mill scale from the riser with a flap disc in preparation for welding and paint.
Step 16: Weld Risers + Drill Caster Pin Opening
I missed pictures of this step, but I'll try and explain. An opening was drilled into the riser on the opposite side of the cut opening. This drilled opening will accommodate the caster pin after the riser is attached to the frame. You can see this in the next few steps.
With the cut and drilled openings in each riser the risers were welded to each corner of the frame, lining up the drilled opening in the riser to the drilled opening of the frame.
Step 17: Paint Frame
Once the risers are welded to the frame, and the welds were ground down, the frame was painted to match the tub exterior - dark chestnut brown.
Step 18: Attach Frame to Tub
The notches in the risers allow narrow access to the bolt that attaches the frame to the tub. Since I wanted the casters obscured by the claw feet the caster opening had to be lined up with the frame to tub openings. With everything stacked on top of each other the notch was the solution to get access while keeping things tight.
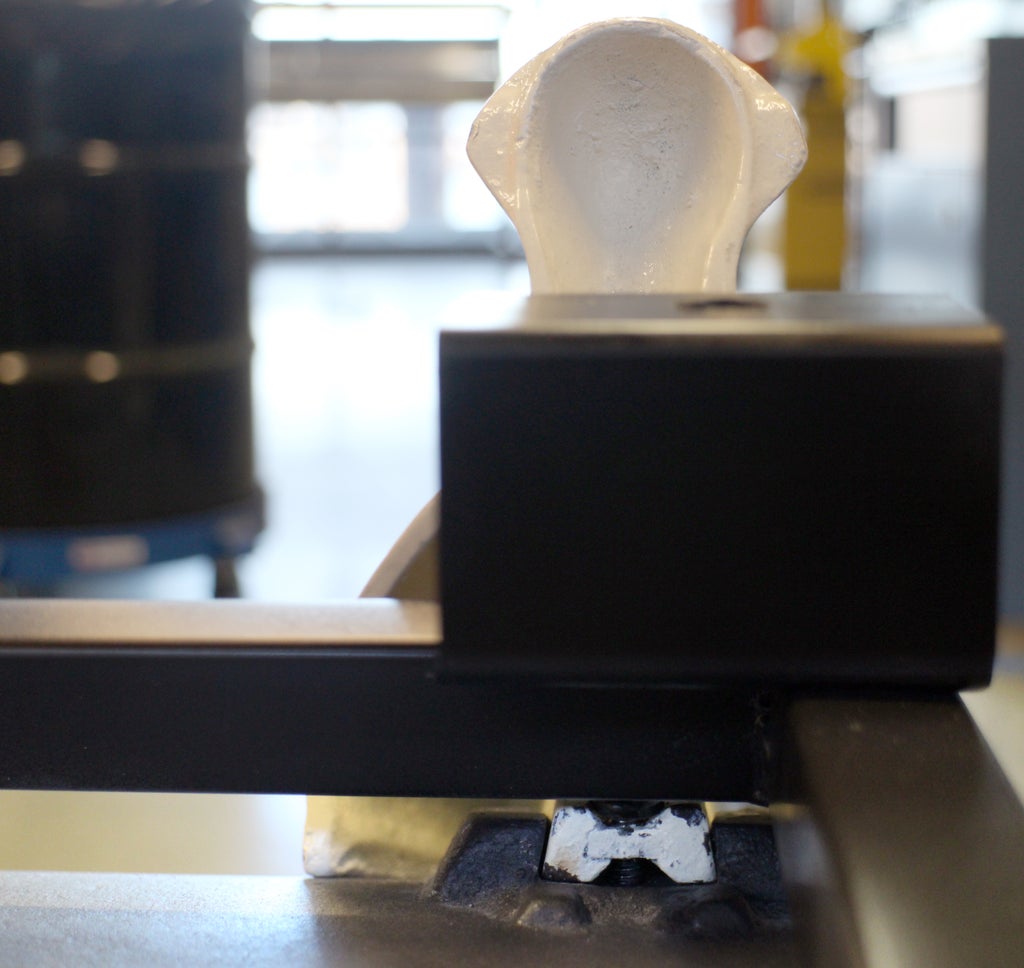
I used an Allen Key bolt, long enough to reach through the frame and make contact with the retaining notch on the tub bottom.
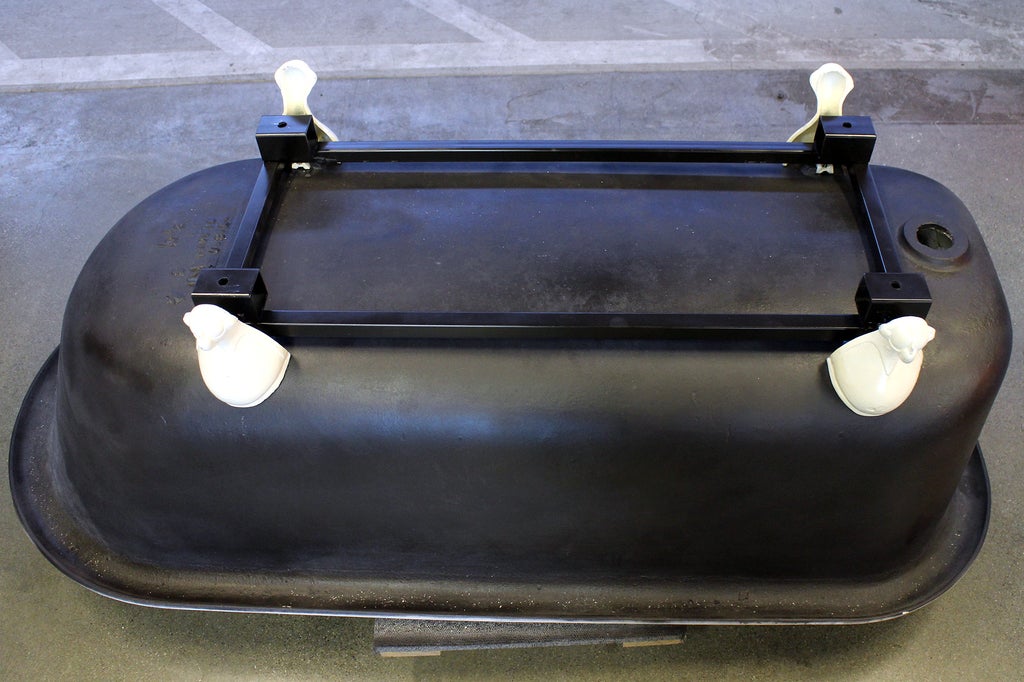
After all 4 feet were installed with the frame the casters can be installed into the risers.
Step 19: Attach Casters
The casters I used were post casters, meaning they have a single threaded post that they sit on rather than a flat base that gets screwed in.
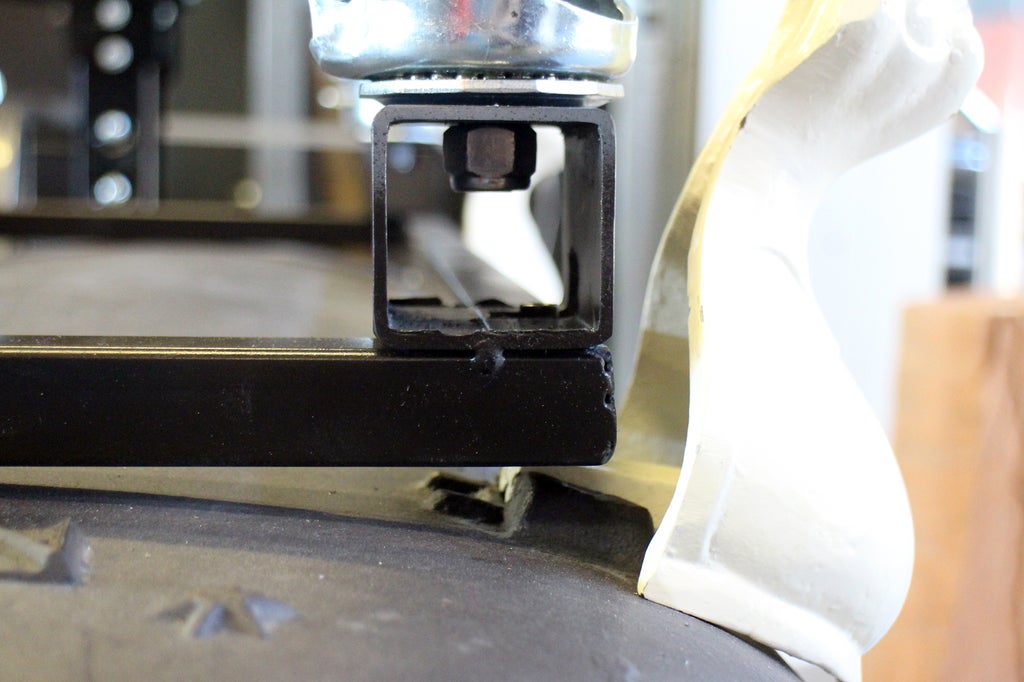
The casters were inserted into the riser openings and the corresponding nut was placed on each caster and tightened, securing them in place.
Step 20: Flip That Tub
With the casters on the bottom of the tub was complete. The tub needed to be flipped in order to start work on the inside.
In order to flip the tub safely I needed help, both physically and with a mechanical advantage. I got a few strong friends together to help me flip the tub over, using a block of wood as a ramp to allow us to gently ease the weight of the tub over.
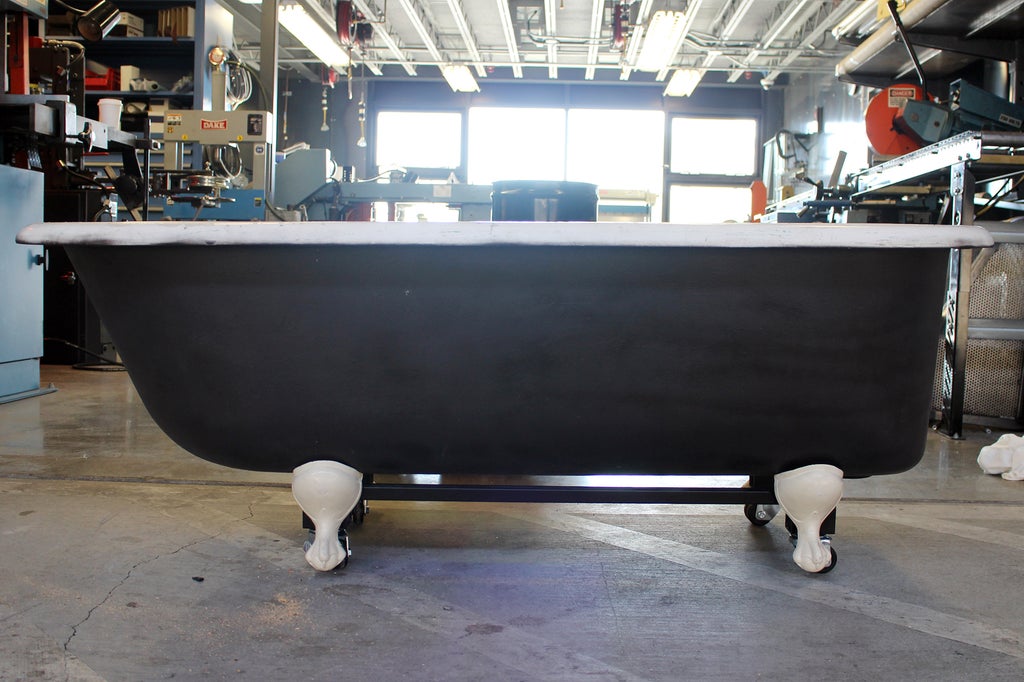
The wood had an additional benefit of not damaging the finish of the tub during flipping. Once it was right side up the inside of the tub could be worked on.
Step 21: Goof Around With Rolling Tub
Step 22: Carpet
To line the inside of the tub I used carpet. I had originally wanted a thick piled carpet, like shag, but realized that I should probably go for something more durable. I went to my local discount carpet wholesaler and browsed until I found something that was attractive and that matched the color scheme I was going for.
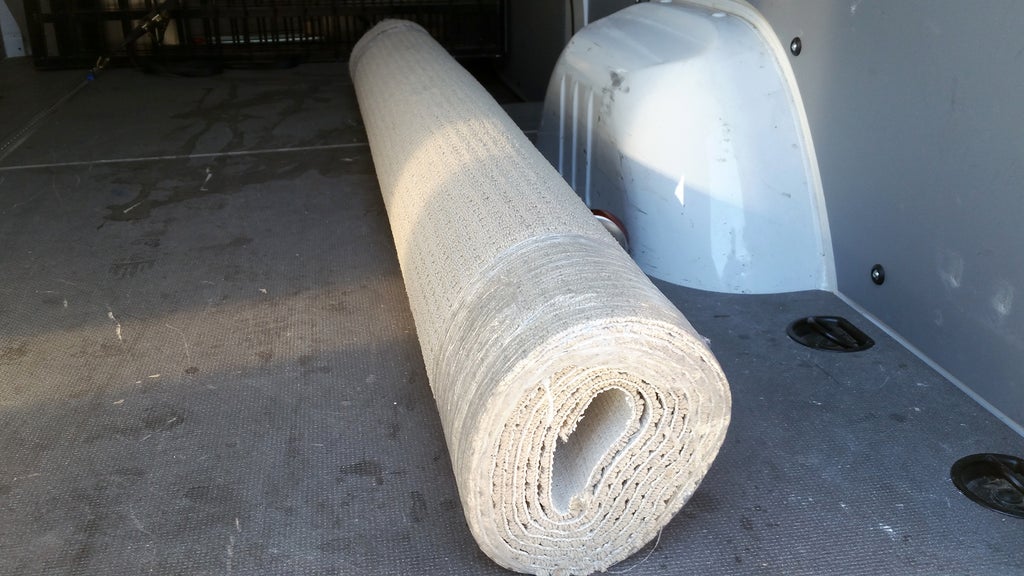
I settled on a waffle synthetic carpet with a medium pile. The wholesaler only sold carpet by the roll, and even though it was more carpet than I needed the price was right at $50.
Step 23: Paper Template
Before committing to cutting up carpet, I made a paper template of the inside of the tub so I'd know what I needed to cut out exactly.
To get the curved tub interior geometry I first identified the largest and least complex curve, which was the middle of the tub. I could use a large roll of paper and lay it down in the middle of the tub without making any folds, this formed the base of my template.
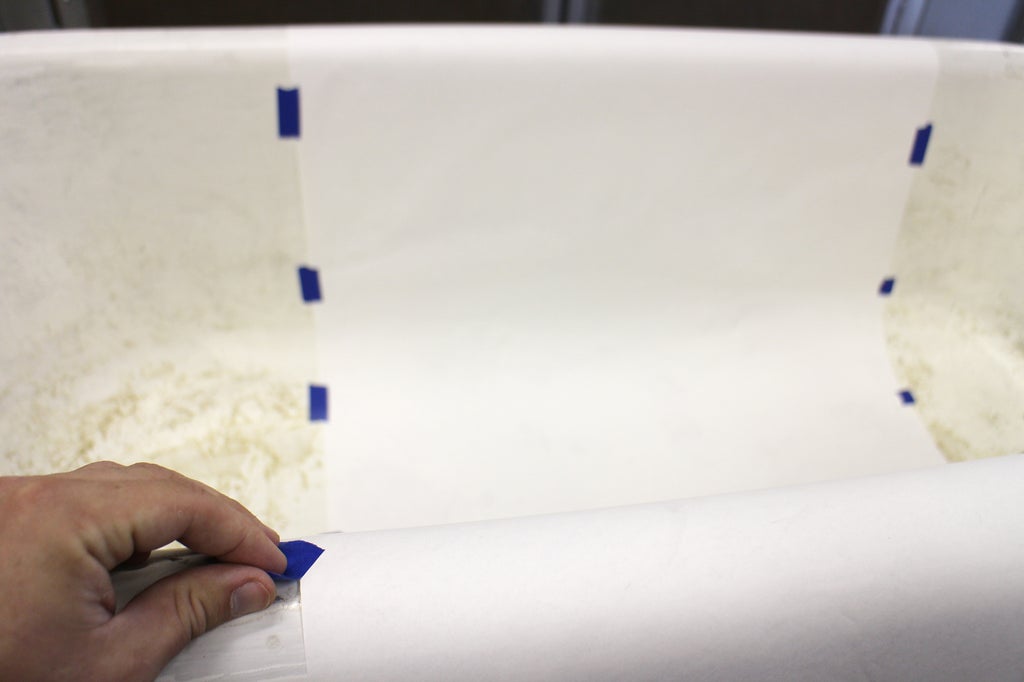
I used painter's tape to hold the paper in place, then cut it deliberately longer than I needed to allow for more material on my template - I can always cut the carpet down in size, but can't add more.
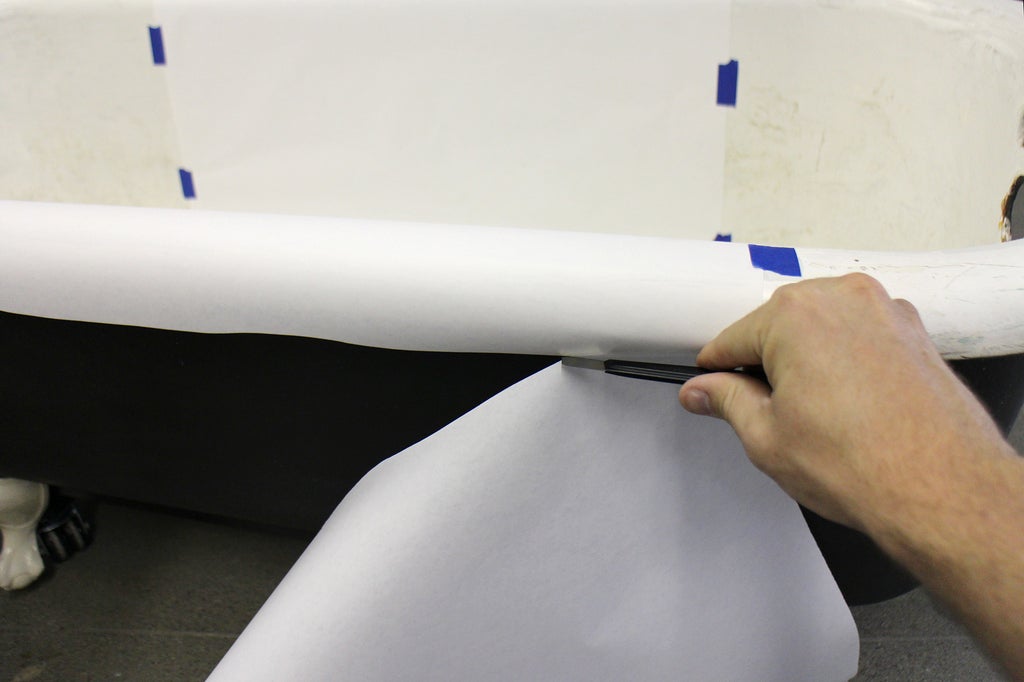
The cut ends were secured with more blue tape. I spent the time to get this first section of the paper template right since all other pieces would be joined on to this piece.
Step 24: More Paper
More paper was unrolled and pressed into the tub bottom to get the contour shape right.
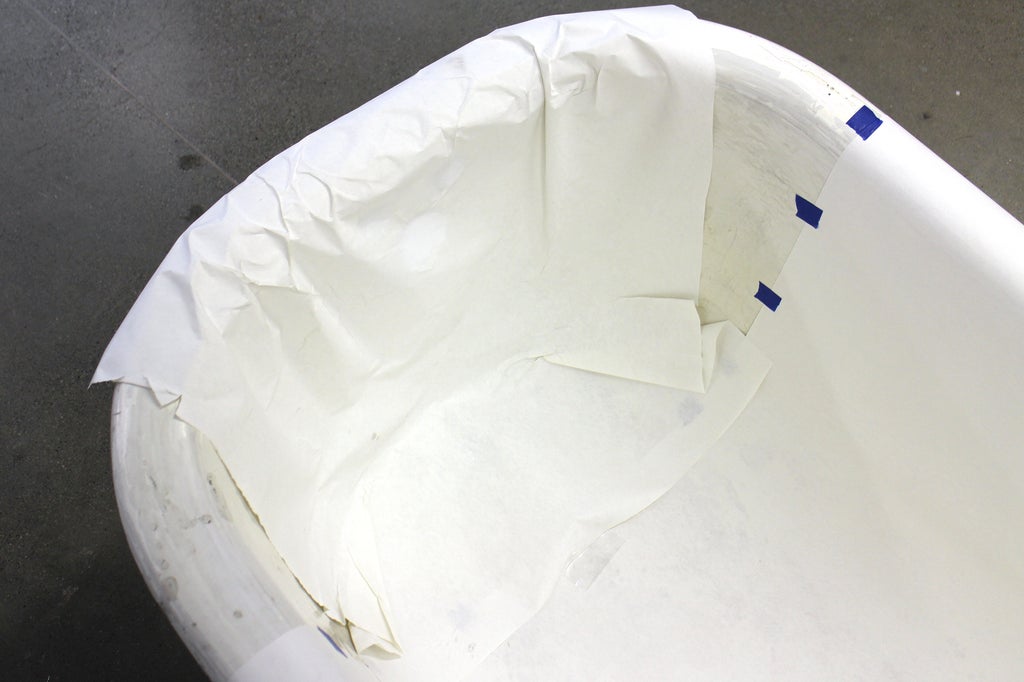
I started on the next easiest portion of the tub, which was the back. The vertical back of the tub is straight, allowing the paper to lie mostly flat. THe top to the back was slightly curved, which made the shape a little difficult to capture.
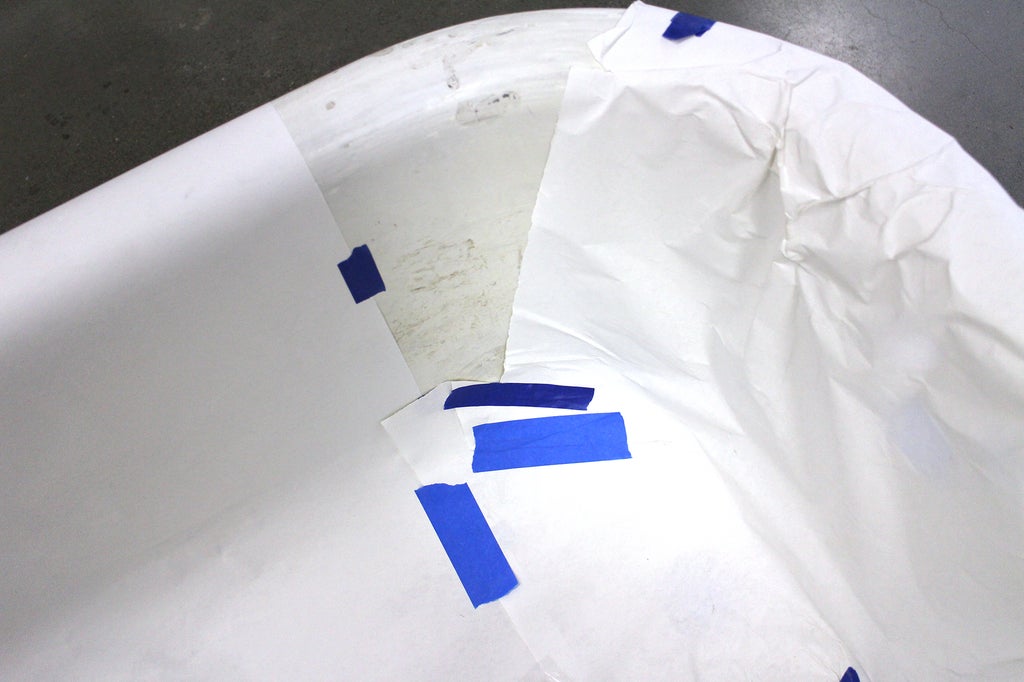
Painter's tape was aggressively used over the folds to hold the shape of the back and bottom of the tub.
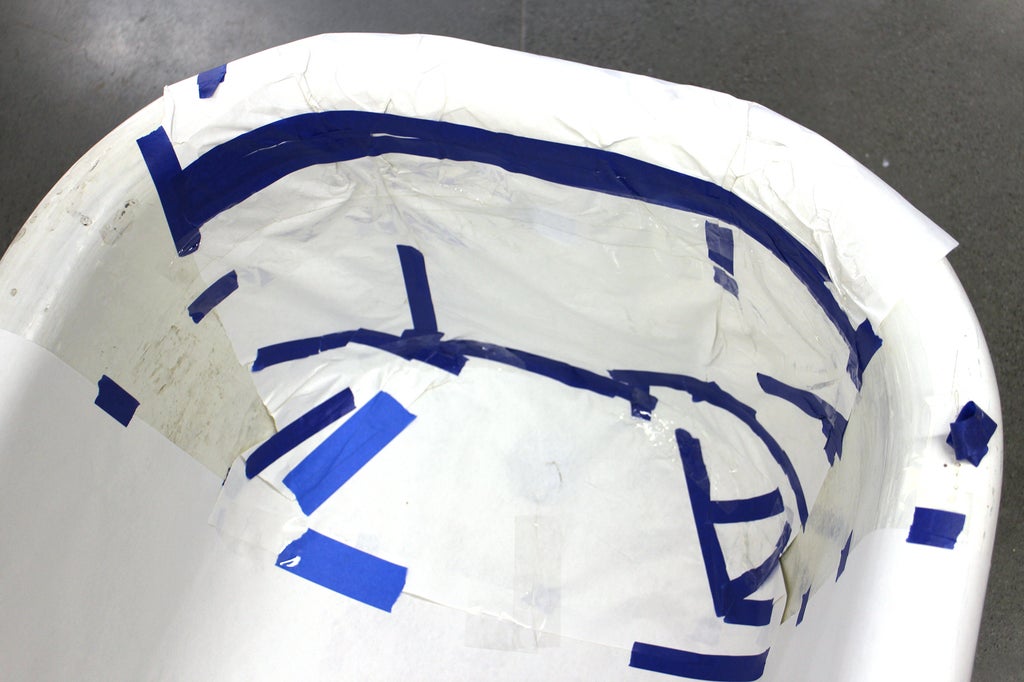
When in doubt, use more tape. The most difficult part were the bottom corners, and the curved front of the tub. Spending the time here to get the shape right is critical, otherwise the carpet won't fit correctly.
Step 25: Remove Paper Template
Getting the tub template the right shape is a great, but only if you can get it out of the tub without ruining the contours.
Since I taped the paper to the bottom of the tub it wasn't easy to remove the template, and every time I thought I was getting it loose the tape would stick again to the tub. This was an exercise in patience.
Step 26: Cut Template
After removing the template it was time to cut it so it would lie flat. Cut lines were traced onto the template using an indelible marker, trying to make the least amount of cuts lines as possible.
I tried a few approaches with my trace lines, trying to stay symmetrical and make the least amount of cut lines.
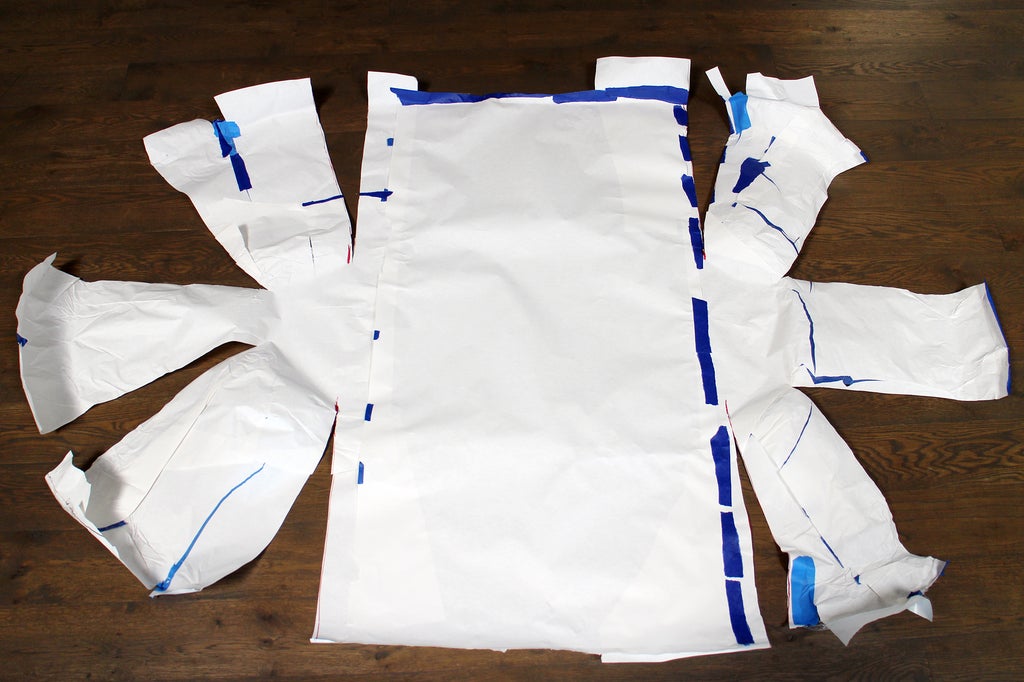
Once I was satisfied with the cut lines I cut the paper template with scissors.
Step 27: Transfer Template to Carpet
After cutting the paper template lay it flat on top of the upside down carpet.
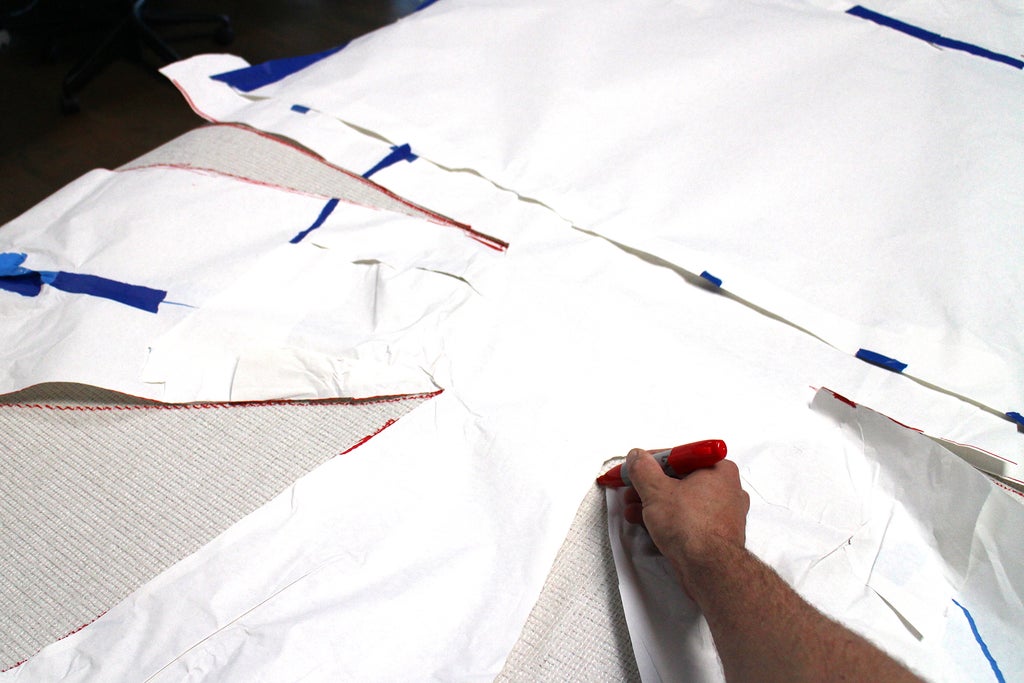
Transfer the cut template shape to the underside of the carpet using an indelible marker. I offset my marker outlines to be slightly larger than the template outline, giving myself some additional fabric at all the cut lines, allowing me the ability to cut excess fabric away instead of needing more.
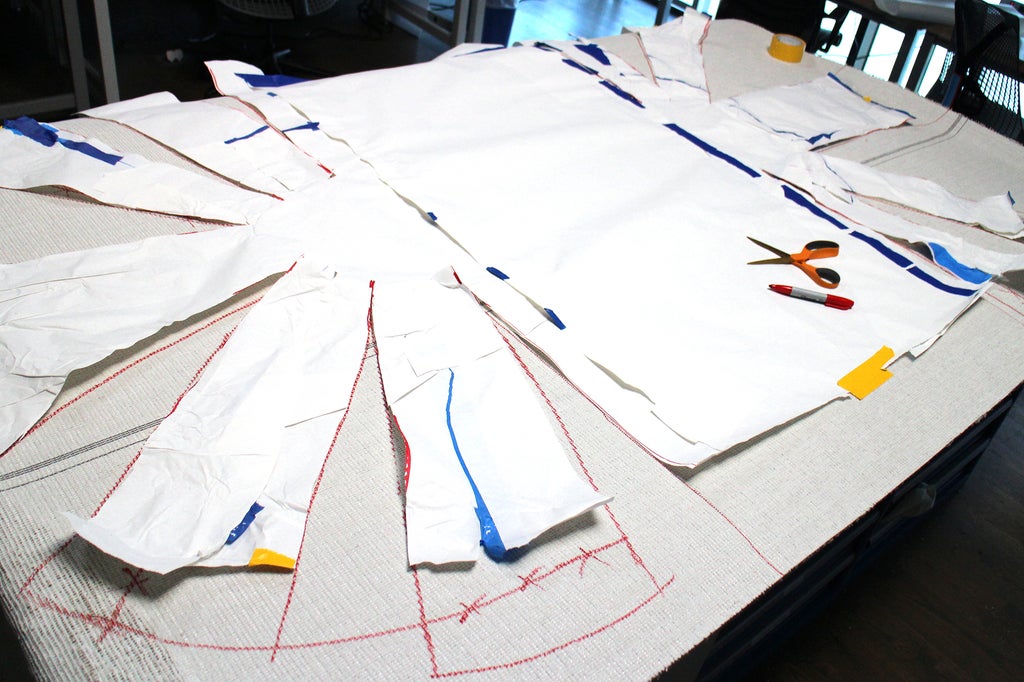
I also added additional fabric along the outer perimeter of the paper template. This excess fabric would just drape over the edge of the tub and can be trimmed away later. The thinking is that I'd rather have too much fabric on my carpet and trim away excess.
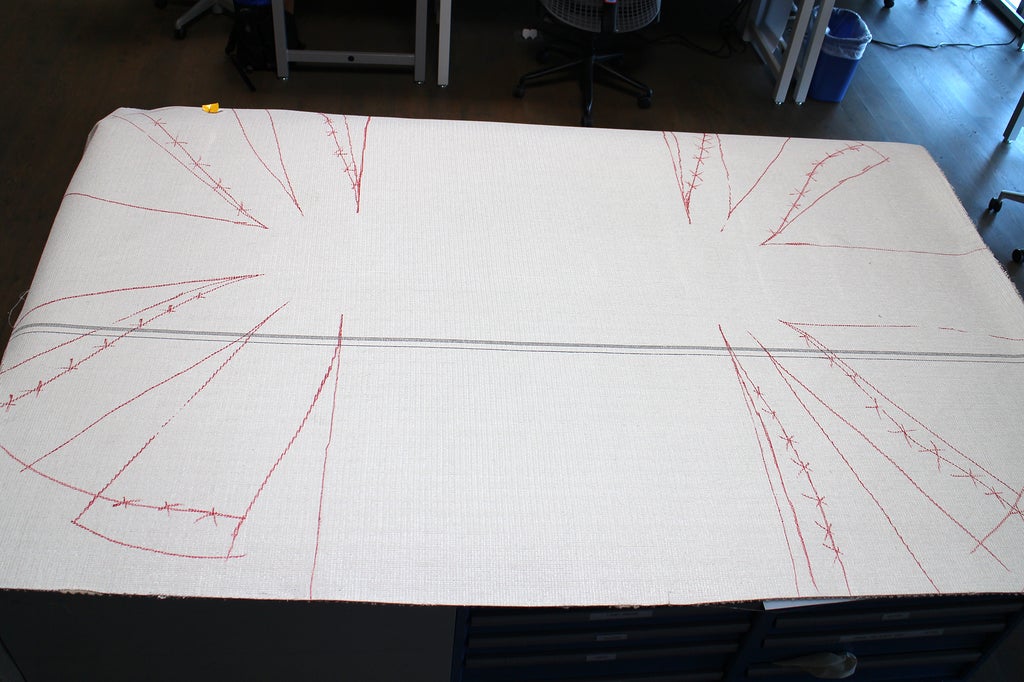
I rechecked all my markings before removing the template and pumping myself up to make the cuts. Wanting one monolithic piece of carpet makes for less seams in the carpet, which will give a better appearance. Once you start cutting carpet it's really hard to fix any mistakes.
In the above picture you can see some errors I made which I crossed out with X's, reminding myself not to cut these lines.
Step 28: Cut Carpet
Using a sharp hobby knife with a cutting mat underneath I cut along all the marker lines. I cut with the carpet underside facing upwards, since the interface and glue is the toughest part to get through.
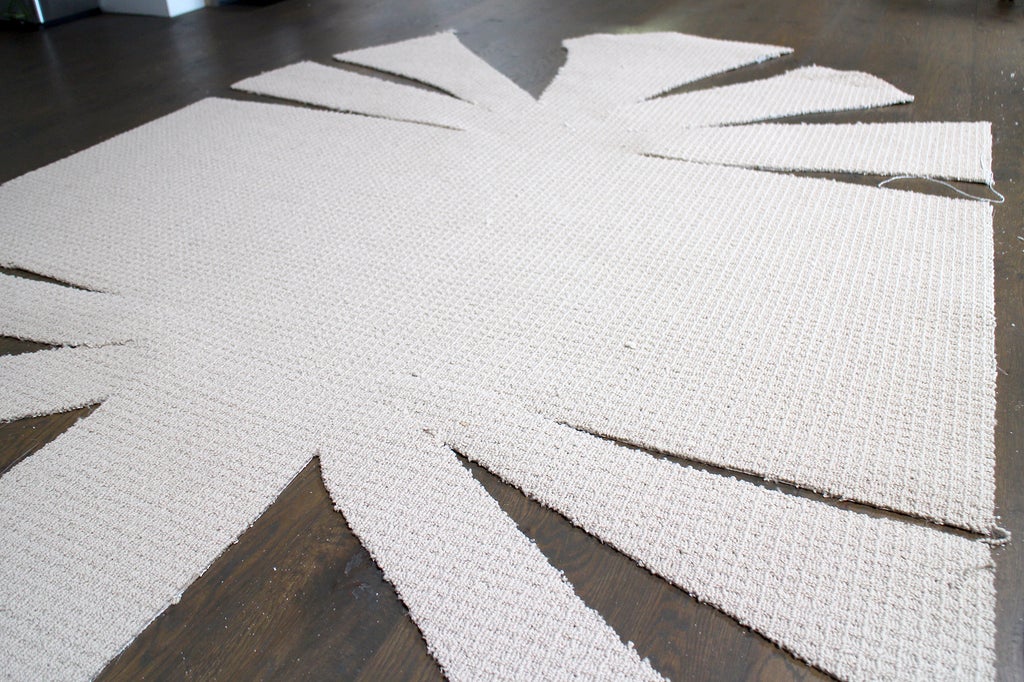
The cut lines look irregular and weird here, but I know that I made sure the template lines were correct. Any irregularities here will be made right when the carpet is installed in the bowl of the tub.
Step 29: Glue Carpet Bottom
After cutting the carpet can be glued to the inside of the tub. To achieve this I used a few adhesives, rug traction tape, my favorite ultra adhesive E6000, and strong mounting tape - each has a specific use to help hold the rug in place.
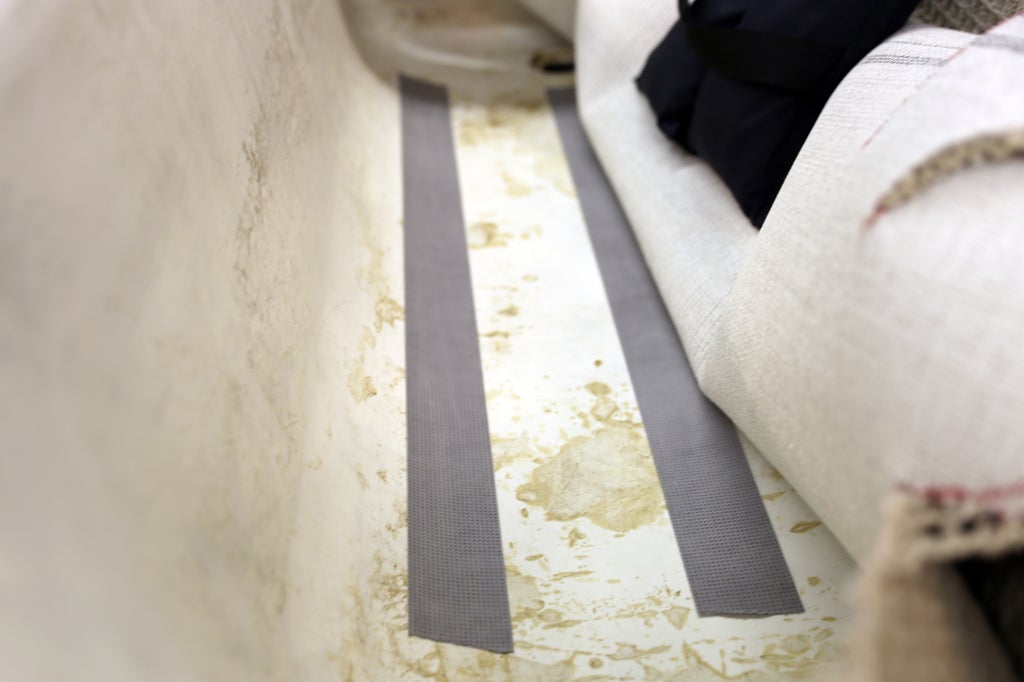
The rug tape has an adhesive back and a non-slip top, which is perfect for placing in the bottom of the tub to keep the rug in place while I position it to fit perfectly.
Once the carpet is in the right position, E6000 is used in between the strips of rug tape to hold the carpet permanently. Only the bottom of the tub is glued right now, using weights on top of the glued area to hold the carpet to the glue and ensure good adhesion.
I waited 24 hours for the E6000 to cure completely before removing the weights and gluing up the sides of the carpet.
Step 30: Glue Carpet Sides
Once the bottom of the tub has carpet securely glued the sides can be secured. I started by using E6000 on the two largest side flaps, applying glue along the side of the carpet and using clamps to hold in place until the glue has cured completely.
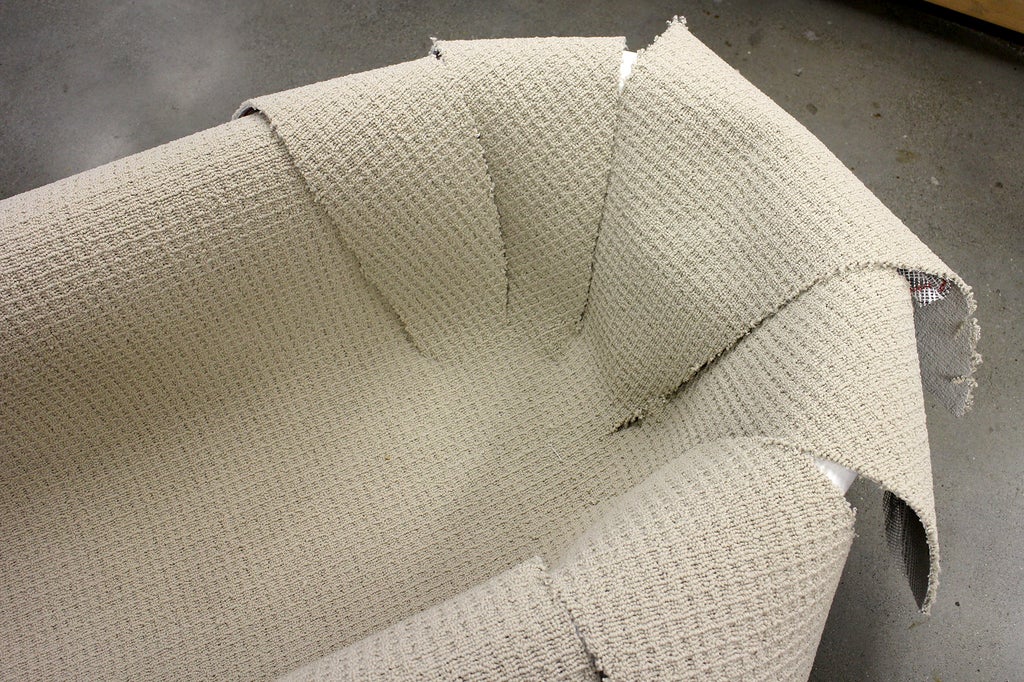
After gluing, but before clamping, I made sure to push the carpet down to conform to the shape of the tub and eliminating any air pockets.
Step 31: Clamps + Weights
Each section of carpet was carefully glued in small sections, then weights and clamps were applied liberally to ensure good adhesion between the carpet and the tub.
This process was slow, taking at least a week to work my way around the perimeter of the tub, gluing small sections and clamping along the way.
Step 32: Electrical Diagram
Once the glue had dried and the carpet was securely installed in the tub I could focus on the electronics. For this project I wanted to have a power outlet in the drain of the tub, and a light dimmer that would control an overhead light disguised as a shower head.
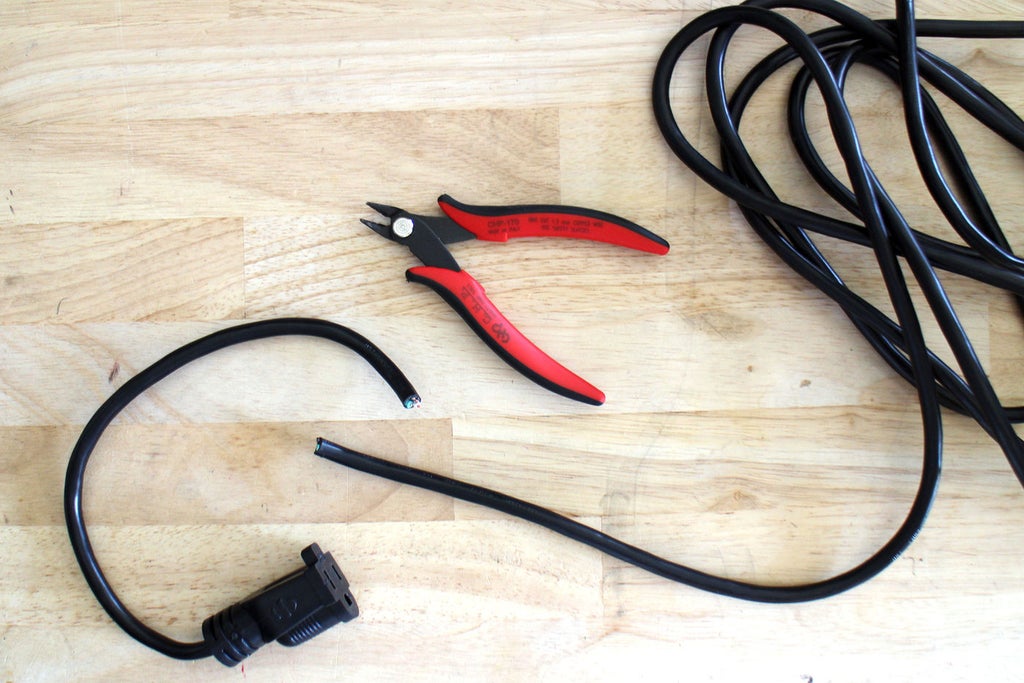
The electrical is fairly simple for this build. An extension cord is clipped and wired to the outlet and the light dimmer, the dimmer then controls the light bulb through the shower riser. All grounds are grouped and wired back to the extension cord.

With the end of the extension cord clipped the end of the wires were stripped.
Step 33: Drain Outlet
Locating the drain hole in the tub from underneath, I pierced the carpet with a sharp hobby knife.

From the top side of the tub I cut into the opening like I was cutting a pizza, making triangular cuts. The idea is that these cuts can be folded back to the outside of the tub and leave a nice roundover edge.
The round electrical receptacle I used has a nice large flange around the socket.

This flange was glued to the underside of the tub with E6000 and held in place overnight until the adhesive had cured.
Step 34: Shower Riser Light
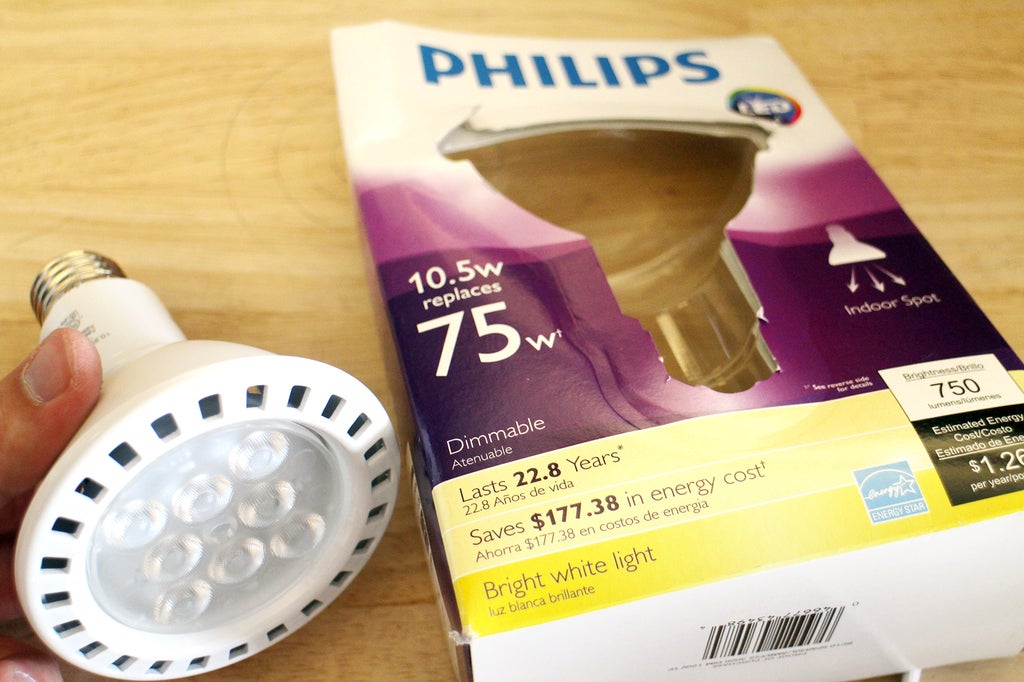
Using a standard light socket power cord, the plug end was cut off and the wire fed through the shower riser. I went with a large white LED bulb, more for aesthetics than lumens.
Instead of mechanically fastening the shower riser to the tub I decided to make it magnetic, allowing the ability to move the riser wherever you wanted on the tub to suit your needs.

I found a heavy duty magnet that would stick perfectly to the cast iron tub. This magnet has a threaded insert which would allow the shower riser to be attached.

Though not a pretty connection, a metal bracket combined with plenty of E6000 made the shower riser stick to the magnet. After curing, the shower riser magnet was easily peeled off the tub and can be repositioned anywhere on the tub body.
Step 35: Dimmer Switch Tap
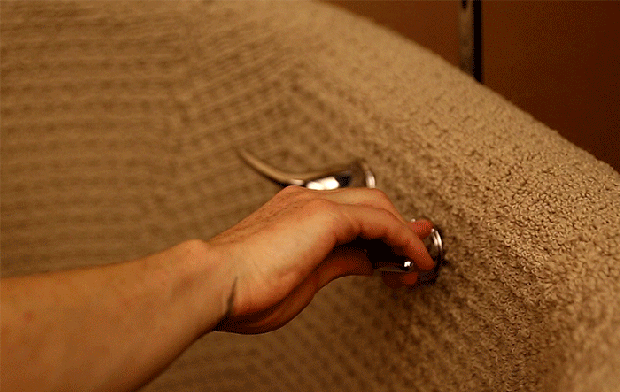
To operate the shower light I installed a dimmer switch in place of the hot water tap handle. The knob of the rotary dimming switch was removed the dimmer unit stripped down of its housing.

The knob of the dimmer switch was trimmed down to match the diameter of the faucet handle, then was fit snugly inside the handle.

More E6000 was used to bond the knob to the inside of the handle.

With the knob drying, the dimmer housing was glued to the outside of the tub where the tub faucets would be located. A small hole was made in the carpet to allow the dimmer switch post to protrude through.

The dimmer switch was clamped in place until the glue cured completely. The electrical wiring was then completed linking the dimmer switch to the power cord, and the shower riser light to the dimmer.
Step 36: Tub Napping
With all the electrical complete the nap tub is ready for the first visitor. I put some extra pillows in the tub to add comfort for those with bony bottoms. When the tub is plugged in, here's the tap dimmer switch in action.
A powered tub means you're able to work on your laptop in the tub and relax while answering emails. If you're laptop is running low on juice, just plug it in!

Being on casters means that this tub can easily be rolled around wherever it's needed. If the location doesn't have any power outlets the extension cord is wrapped up and hidden underneath the tub on top of the frame, tidy and out of reach.

To really help the ambiance of being in a tub I used a bathtub soap caddy, which is actually a small moveable shelf that hooks onto the tub ledge.

This tub is now a staple in the office, and we have people from other departments coming over to take turns for a quick nap. Why sit in a boring lunch room at work when you can lie down and get comfortable in a tub?

With or without the shower riser light, this tub looks great anywhere you put it.
The nap tub was a lot of work, but totally worth it for a unique piece of furniture that delights all who climb inside. I'd love to hear your thoughts on this build, and if you're brave enough to try it yourself please share your results!
Happy making!

Participated in the
Epilog Contest 8

Participated in the
Trash to Treasure Contest 2017

Participated in the
Make it Glow Contest 2016


