Introduction: Pack 333 Den Advancement Boxes


Re-Used out of old MS Surface Go boxes.
Reusing some really nice boxes that MS Surface Pads came in. These boxes are super nice quality and trust me I know, I work for a carton company. I’m serious these boxes are incredibly made. Sharp scored edges and thicker than usual material than your standard paperboard cartons. All wrapped with a printed marketing design on both the exterior tops and interior nested bottoms.
Hard to believe these were being thrown away. Their loss is my gain, or rather my Cub scout pack’s gain.
Not only am I veteran scouter (as you might have figured out if you’ve seen any of my other posts) I am at present Tiger Den leader and a Pack Advancement Chairman. I saw these as a perfect way to re-purpose them to be individual Den Advancement Boxes.
Some back story: Each month at Pack meeting all Dens present Awards, Rank Advancements, Patches, Pins and Belt loops. Depending on each Den’s achievements and size of their respective dens there can be quite a few items. And in the past we’ve just been handing out each dens items in a zip lock baggy. Not that that’s a bad thing. But with these boxes I think we can step it up a notch.
Step 1: Measureing Old Boxes


I recorded all the areas I wanted to cover on the box with stickers. Lucky for me there were three areas to deal with: Top, 1 side on top section, & Bottom of box. I didn't measure the exact size of the box I brought my measures just inside the actual edge of each area.
The top 7.5” x 10.5”,
the bottom 7.25” x 10.25”,
and one side of the top lid 1.25” x 10.5.
Step 2: Design Art for Stickers


For each Den I already a design elements that I had created for our Pack T-Shirts. So I used each Den Critter and some simple word placement for each box front. And a similar treatment for each side.
For the bottoms I came up with a design for each Den’s rank advancements of belt loops or pins depending on the rank. Also at the bottom are all the other possible awards the Cub scouts could possibly earn at that specific rank. I did all of these designs in Adobe Illustrator. Almost all the Belt Loops, Pins and other Awards I was able to find on BSA website. I made all of them similar in layout.
Once I was happy with my setup.... Spell check, Double Check to confirm measurements of designs to correspond with the box surfaces, and check color groupings for each Den. As well as all awards were correct per den.
Step 3: Print, Cut, & Apply


To save paper I grouped my designs into two groups of three.
Most Packs have typically 6 Dens depending in participation.
Our Pack currently only has 5 Dens. Lions, Tigers, Bears, Webelos, & Arrow of Light Webelos (AOL). Even though we only have 5 dens, I did boxes for all 6 including Wolves. With the groups set up I then printed out each group to large format color proofer on to adhesive backed paper.
I then cut down each section. So three sections per Den box. Simply cutting apart using scissors initially.
Take a steel ruler and X-acto blade I trim each piece down as close to the edge of the guides indicated. Taking the X-acto to pic at the backing to slowly remove the thin paper from the sticker portion. With only a portion pulled back I then line up and apply each section to the exterior of the boxes.
This takes patience, being sure to start at the edge to where you can be sure to center it from left to right. Burnishing down the exposed sticker portion to the box. Slowly peel the backing off in 1-2" increments burnishing as you go. Continue till the backing is off and sticker is completely attached.
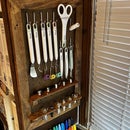
I take the rounded back of a spoon to go all around the edgers to make sure it has a tight seal.
TIP/NOTE: if for some reason you end up with bubbles where the sticker wasn't flat enough and formed air bubbles after you've finished. Don't freak, simple take your X-acto blade and make as small a slit as possible in the bubble. Then slowly burnish the bubble towards the slit. Forcing air out and sealing the sticker to the surface.
Step 4: Interior Divider Design


Now just having and open void interior of the box would work just fine. But for better organization of items I designed a divider system with 5 sections. One large section which is half the opening & 4 equally divided smaller sections.
The large area will be used for patches and the smaller sections for pins and belt loops.
Admittedly, I worked with our in house structural engineer to help with the folds and nesting feature. We then cut out 6 copies of the two part structure. Scoring and folding the finish pieces together. I then put a segment of double sided duct tape to the bottom to hold the two pieces together. I positioned them into the bottom of the boxes.
This simple addition will help me organize the awards by separating them by award group, pins & belt loops.
Attachments

Step 5: Pick Up Awards and Sort for Dispersal


Now every month when I pick up the Dens awards I can simply sort into appropriate den boxes. Along with organizing the items into the Den boxes I’ll also print out a document listing awards by scout via Scout Book. With this the Den Leaders will have an easier time sorting out and handing out awards.
So far they've been a big hit with the den leaders.
I'm a firm believer in re-purposing things. For that reason I find it hard to throw stuff away.
I hope this inspires you to reuse something that would have more than likely end up back in a landfill.
AFTER THOUGHT ADDITION:
Having used the boxes for a couple months it occurred to me that I need to add the stickers that were on the back of the box bottoms to the inside lids, cause its kinda of hard reading the bottom of the box with awards still inside. Reason being most of the awards don't physically say what they are on them. This way we can read and match the name of the award as we pass them out to the scouts.


