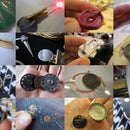
Introduction: Stretch Sensitive Bracelet
Knit from conductive thread, resistive yarn and regular yarn. This bracelet does not light up unless you stretch it, remaining off while you wear it.
The conductive yarn used to knit the stretch sensor in this bracelet has a high resistance to it, that decreases when stretched. This means that the more the bracelet is stretched, the lower the resistance, the more voltage can flow. The more voltage that flows means the LED can light up brighter.
V = i x R
The conductive yarn is an Inox steel fiber and polyester blend made by Schoeller wool - Nm 50/2 80% Polyurethane, 20% Inox steel fibre. Unfortunately they do not manufacture this wool in small quantities but we are trying to find a supplier who is interested to purchase in bulk and then re-distribute.
More information on the bulk order can be found here:
>> http://www.kobakant.at/DIY/?p=2205
To help us get an idea of how many people are potentially interested in this kind of conductive yarn, let us know by filling out this form (no obligation to buy!):
>> http://spreadsheets.google.com/viewform?formkey=dGNIRFhSbjU0RTdoeDBacEpneHNNbFE6MA
VIDEO
Step 1: Materials and Tools
Materials
* Regular knitting yarn
* Schoeller conductive yarn - not (yet) available commercially - Nm 50/2 20% Inox steel fiber, 80% Polyester
* 117/17 2ply conductive thread
* Sewable button battery holder
* Lilypad sewable LED
* 3V button battery
Tools
* Knitting needles
* Sewing needle
* Scissors
* Regular knitting yarn
* Schoeller conductive yarn - not (yet) available commercially - Nm 50/2 20% Inox steel fiber, 80% Polyester
* 117/17 2ply conductive thread
* Sewable button battery holder
* Lilypad sewable LED
* 3V button battery
Tools
* Knitting needles
* Sewing needle
* Scissors
Step 2: THE PATTERN
If you don't already know how to knit, then it would be best to spend some time teaching yourself how to do a very basic knit. Here is a great Instructable by rachel to get you started:
>> https://www.instructables.com/id/How-To-Knit/
Before starting to knit the bracelet you'll want to take a good look at the knitting pattern.
basically you'll be knitting with the following yarns and threads:
* regular yarn (gray in illustration)
* conductive yarn (blue in illustration)
* conductive thread (red in illustration)
And you'll want to use size needles that are slightly larger than your regular yarn, so that the knit is tight, but not too tight. Too tight knitting would result in less stretch sensitivity and could cause your LED to be always on.
The basic principal behind the knitting is the following:
The conductive yarn has a high resistance that decreases when stretched and can thus be used to sense stretch. But the conductive yarn is fragile and tears easily so it is not good for sewing on components. this is why we add the conductive thread, which is great for sewing on components. Instead of simply knotting the conductive yarn to the thread in the places that the components have to be sewn on, we add and remove the conductive thread to the knit, leaving loose ends which which we can then sew on the components.
Step 3: KNITTING
Throughout the knitting process it will be important not to cut the ends of your yarns and threads because you will need these to sew on the components (battery holder and LED). And you want to have at least three rows of regular knit between two contact that are not meant to be electrically connected. This is important for the battery and the LED so that the electricity is forced to flow through the LED and not to short the battery by connecting plus and minus.
Start knitting with all three yarns, but only build up the conductive yarn and thread on one half for the first three rows. Do this by simply not knitting them for the part of the row that they are not part of, and then picking them up again on your way back. After two or three rows get rid of the conductive thread, by simply cutting it and knitting with it until it runs out. Continue with the regular yarn and conductive yarn until you have reached half your bracelet then add the conductive thread back in and knit one full and then one half a row. Cut the conductive yarn and thread at this half point in your row, but leave the end of the conductive thread long enough to sew to one of the leads of your LED. Continue knitting for five or so rows with only the regular yarn. Then introduce the conductive yarn and thread back at half row again, so that you are knitting with all three again. Again leave the conductive thread long enough for stitching to the other lead of your LED. Cut conductive thread after two or so rows. continue with only regular and conductive yarn for the other half of the bracelet. And finish similar to how you started. See illustration and photos for details!
Start knitting with all three yarns, but only build up the conductive yarn and thread on one half for the first three rows. Do this by simply not knitting them for the part of the row that they are not part of, and then picking them up again on your way back. After two or three rows get rid of the conductive thread, by simply cutting it and knitting with it until it runs out. Continue with the regular yarn and conductive yarn until you have reached half your bracelet then add the conductive thread back in and knit one full and then one half a row. Cut the conductive yarn and thread at this half point in your row, but leave the end of the conductive thread long enough to sew to one of the leads of your LED. Continue knitting for five or so rows with only the regular yarn. Then introduce the conductive yarn and thread back at half row again, so that you are knitting with all three again. Again leave the conductive thread long enough for stitching to the other lead of your LED. Cut conductive thread after two or so rows. continue with only regular and conductive yarn for the other half of the bracelet. And finish similar to how you started. See illustration and photos for details!
Step 4: SEWING
First attach the LED by sewing using the loose conductive threads. Since the LED is the first component you are attaching it does not matter which way is plus and which minus.
Once the LED is on you'll want to sew your bracelet together so that it becomes a tube. Then you want to connect the battery pouch the same way you connected the LED, by sewing with the loose conductive threads. Make sure that the plus of your power (battery) connects to the plus of your LED and the minus to minus!
Place the battery in the holder.
Step 5: TROUBLE SHOOTING
Ideally, if all goes well, when you stretch your bracelet (and you might have to stretch it really hard) the LED will light up and dim as you stretch and relax the bracelet.
If the LED is always on:
- did you mix up the conductive thread and the conductive (resistive) yarn?
- using a multimeter, measure the resistance across the bracelet - it should be in the range of: 20M Ohm - 1K Ohm
- you might have knitting too tight of a knit, so that the conductive yarn is so tightly pressured that its resistance is already at it's lowest without being stretched.
If the LED never goes on:
- is your battery empty?
- if you connect the battery directly to the LED (jump the stretch sensor) does the LED light up?
- are battery and LED connected plus to plus, minus to minus?
- using a multimeter, measure the resistance across the bracelet - it should be in the range of: 20M Ohm - 1K Ohm


