

Introduction: Harvest Bluebonnet Seeds


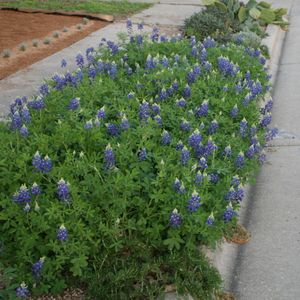


To be quite frank, my bluebonnets look absolutely revolting right now. Granted, I had a few weeks of beauty, but I'm glad to be at the point where I can harvest the seeds that the bees have graciously pollinated. Hopefully, I'll have another gorgeous blue-petaled display next spring, and the plants struggling underneath the yellowing foliage haven't suffered too badly.
This Instructable shows how to harvest bluebonnet seeds for either yourself or as a gift for others. I might be giving away a few (hundred) seeds for Christmas this year as I suspect I'll have plenty for my own landscape.
This Instructable shows how to harvest bluebonnet seeds for either yourself or as a gift for others. I might be giving away a few (hundred) seeds for Christmas this year as I suspect I'll have plenty for my own landscape.
Step 1: Materials

You'll need:
- Large bowl
- Utility scissors (for cutting the stems from the plant)
- Mature pods
- Storage container (optional)
Step 2: Selecting Ripe Pods


There's one clear indication that a pod is ripe - it's already splitting.
Another is to inspect the stem. If it's still green, then it's not quite ripe yet. If the stem is turning red/brown or already is red/brown, then the pods are ripe or nearly ripe.
Green means sit on your hands.
Another is to inspect the stem. If it's still green, then it's not quite ripe yet. If the stem is turning red/brown or already is red/brown, then the pods are ripe or nearly ripe.
Green means sit on your hands.
Step 3: Seed Collection


Work over a large bowl so as not to lose seed.
Note: I didn't do this over a bowl for the sake of photographing it.
With one hand, hold the pod, and with the other hand, hold the petiole. Pull the pod down, partially breaking it from the petiole, and then pull the pod up, breaking a binding thread. This will start a split in the pod and remove it from the stem.
Using a fingernail, loosen the pod halves. Run a finger over the seeds to remove them.
Once the seeds are collected, store in a cool, dry place, or immediately plant in the landscape for next year.
Participated in the
Garden Contest


