

Introduction: Humpty Dumpty--Fall Guy No More!


Everyone knows that Humpty Dumpty fell off the wall and couldn’t be put together again…until now, that is. This is not a yolk. No longer will Humpty have to suffer scrambled innuendos about his clumsiness. Instead he can fall over easy and come back with his sunny side up! How is this possible? It’s all thanks to the amazing 3D printer and egg-citing Arduino Controlled Fall. Now Humpty Dumpty can be the hard boiled character he was always cracked up to be!
Step 1:

Everything has to start somewhere and a crude sketch is my first step.
Parts needed include:
Arduino Uno
Standard Servo Motor
Two 9 volt batteries
Breadboard
Wire, solder
DPST switch
5 volt dc relay
2n3904 Transistor
1N4004 diode (or any old diode will probably do)
Step 2:

To create Humpty Dumpty, my wife made the character using Sculpey Clay and I scanned it on a MakerBot scanner.
Step 3:

I combined (in Tinkercad) the scanned figure and a rod. This was "colorized" by my wife.
3D printed part files are included in this step. There's around 12 hours of printing involved, so be patient.


Step 4:


Holes are drilled in the servo horn and the end of Humpty's adapter--so they will fit together in the next step.
Humpty is placed inside the motor holder, then the motor (with servo horn attached) is added.
Step 5:

Humpty is fastened to the servo horn using 2-56 screws and nuts.
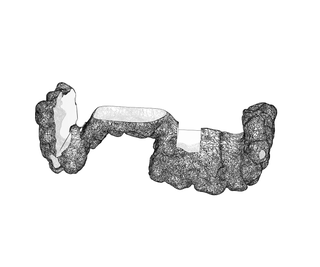
Step 6:

A wall was built using Sculpey clay, and Humpty fit inside. This wall was scanned (after being cut in three pieces) and the scanned pieces were combined in Tinkercad.
Step 7:


Print the wall (4.5 hours) then remove the supports and paint it. Glue the motor bracket to the painted wall.
Step 8:


Wire the circuitry according to this schematic. The only tricky part is the "play" button on the sound module.
Remove the button, then solder tiny wire (I use wire wrap wire) to the pads on the module. This requires a low wattage iron and patience.
Step 9:
Record your message on the sound module. I used "Whoa--I was sitting on the wall . . and I had a great fall!"
Install the sketch on the Arduino.
Attachments

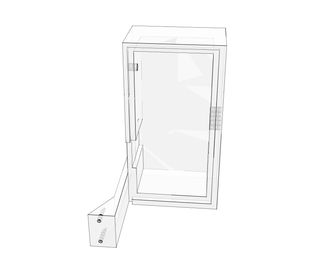
Step 10:


Add the batteries and cram everything into the box.
Step 11:

Turn Humpty on and he will fall everytime someone walks past the sensor.

Participated in the
3D Printing Contest

Participated in the
Move It


