

Introduction: K'nex Greek Temple Model


Hello everyone! I hope you all had a happy Thanksgiving. Recently, I had a school project in which we were assigned to create a realistic model of a Greek temple, either by drawing it or building it. I, of course, chose to build it. ;)
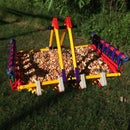
This model temple consists of everything you would find on a Greek temple. It has the columns with a capitol, an architrave, a frieze, and a pediment, along with decorations. The support poles are not found on an actual temple. Due to time reasons, I could only make the front of a Greek temple. It's still cool though.
This was a very fun project, and I hope you enjoy it as much as I did. Please note that I was in a rush to finish this instructable, so there is no piece count.
A quick update on my ball machine: I have not worked on since the update because of school and my other projects. But, it is still standing and I hope to work on it again soon. Keep an eye out for it!
Without any further ado, proceed to the next step to start building!
Step 1: The Columns


First, you'll make the columns. Please note that you have to make 4 of these in total. Let me know if anything is unclear, and follow all of the image notes.
Step 2: The Base and Connecting the Columns


This is a very shorts and easy step. Make sure to follow the image notes!
Step 3: The Architrave


The architrave is where designs are carved or painted on real Greek temples. This is a small, easy architrave that you can add any design to.
Step 4: The Frieze


Now, you'll build the frieze. The frieze consists of relief sculptures in real life. These will be added later in the build. Make sure that you ave the supports for the K'nex men!
Step 5: Support Poles


These are the only things not found on a real Greek temple. However, they are extremely important, for they keep the model from tipping over. Make sure that they are completely straight once they are attached, and be careful with the Y- Clip connection. Time for the next step!
Step 6: The Pediment


Finally, you'll build the pediment. The pediment is the triangular shaped roof that also consists of relief sculptures, This is another easy step. Make sure you have the supports for the K'nex men!
Step 7: Adding Decoration


Finally, you'll attach the decorations. The K'nex men serve as the relief sculptures. Please note that the legs need to be shorter than normal to attach them to the model. They go on every support built.
In order to create the decorations for the architrave and rest of the temple, you'll need to cut some paper. Then, you can add any design you wish to them. For my model, I included some Greek writing about Iris. This is optional, however. To attach these parts, add tape where needed and attach it to the model. Don't worry, the tape does not hurt the K'nex in any way. Once you have finished this, you're all done!
Step 8: You're Finished!

Congrats! If you built this, post a picture and I'll add it to this step. Please let me know if anything is unclear, and ask any questions in the comments. Don't forget to comment, rate, and subscribe! See you all next time.
- Knex2thelimit


