

Introduction: Knex Pistol: Winona V1.0


For the new improved version go to: https://www.instructables.com/id/knex-pistol---Winona-v3.0/
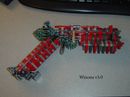
This is my attempt at a K'nex gun, dubbed Winona. After having read a few others, let me say a few things first.
I apologize for the picture quality ahead of time.
I am posting exactly how I made it, but there are a great many pieces that are there simply to make it look good or keep things from sliding around. I did not use any "exotic" pieces, all of the ones I used came from two of the "value tubs" of 400 pieces that I purchased at Wal-Mart for approximately $20 apiece.
Ammo loads in the front. It will shoot anything you can fit in there. The only problem (concerning the ammo) is that it doesn't stay in if you tilt it. I am hoping someone will solve that little dilemma and post their own version or a picture in the comments.
Power is of course dependent upon the strength of your rubberbands. You don't really need too strong of one for the trigger, but you will want a pretty strong one for the firing pin.
Anyway, I welcome any thoughts, suggestions, questions, etc... and I hope you enjoy.
Step 1: Parts.

I used a crapload of the red connectors. Also, I counted this up after the gun was constructed, so there may be a few errors.
I suggest looking at all the pictures for all steps before building, some of them do not show all the parts as well as they should during each step (such as the handle) but show better views in other pictures.
Step 2: Construct the Barrel.


This thing is a pain to assemble as you start getting to the end of the barrel.The majority of it consists of red connectors with gray rods through either end. The pictures show spaces and the way it is setup to accommodate the trigger and other bits. Most of the front end isn't necessary but I thought it looked good, and it added some space to work with in case this ended up going from a pistol to a rifle.
Step 3: Construct the Handle.


The handle is a pain in the rear as well, but it works fairly well.
Step 4: Construct the Trigger.


Here is the trigger.
Step 5: Construct the Firing Pin.


Pretty straightforward.
Step 6: Assembly.


Time to start putting crap together.
Step 7: Finish!

Pull back the firing pin, the trigger will set, insert your ammo, and pull the trigger.


