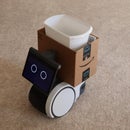
Introduction: Mato, the Ultracapacitor Powered Robot Friend
This mechanical pet can wander around and interact with a human master. After 20 minutes of wandering she can find her recharging station and fill within two minutes (super capacitors are used for energy storage).
Mato (short for "tomato") will live (recharge) in a Taco--but that comes later.
Step 1:
You are going to need some parts for this. I 3d printed a body and included the files here. This will change in the future as the robot becomes more human friendly.
Parts needed:
Arduino Uno
Arduino Motor Shield
DC converter module--this $9.00 module provides a steady output (you select from 1.25 to 26 volts) based on an input of 3.5 to 28 volts. The output remains the same even as the input changes.
(5) 350 farad 2.7 volt capacitors
(2) 12 volt 60 rpm gear motors
Optional: Digital voltmeter to monitor capacitors
(2) Eureka vacuum belts (tread for the wheels)
Step 2:
Set the output voltage on the dc converter to about 11 volts (this is adjusted using a small screwdriver on a multi-turn potentiometer).
Install the sketch in the Arduino. The Arduino senses current increase on the motors (ran into something) to trigger the "backup and turn" behavior.
Attachments
Step 3:
In the future, Mato will get a skin and more personality. She will find the taco shell (charging station) and quickly fill up before returning to companion duty.
Charging right now is accomplished using a bench top power supply set at 12.8 volts and 4.5 amps. The supply will deliver 4.5 amps until the ultracapacitor reaches 12.8 volts. I'm being conservative (5 capacitors times 2.7 volts equals 13.5 volts) and will probably test the limits later.
To follow this project (a hackaday 2016 contest entrant), go here.


