

Introduction: Simple Easy Homework Machine


This machine is built using cheap materials and doesn't cross 7$ to build. To build this you need some patience and 2hours of time. And you must be familiar with soldering and wiring since this involves a small circuit. Once it is built just plug in this device to your computer and run the required content to be written and it will start the job in no time. This I have called writing machine since it uses a pen to write the things. So let's build your own writing machine.
Step 1: Things Gathering


You need following things.
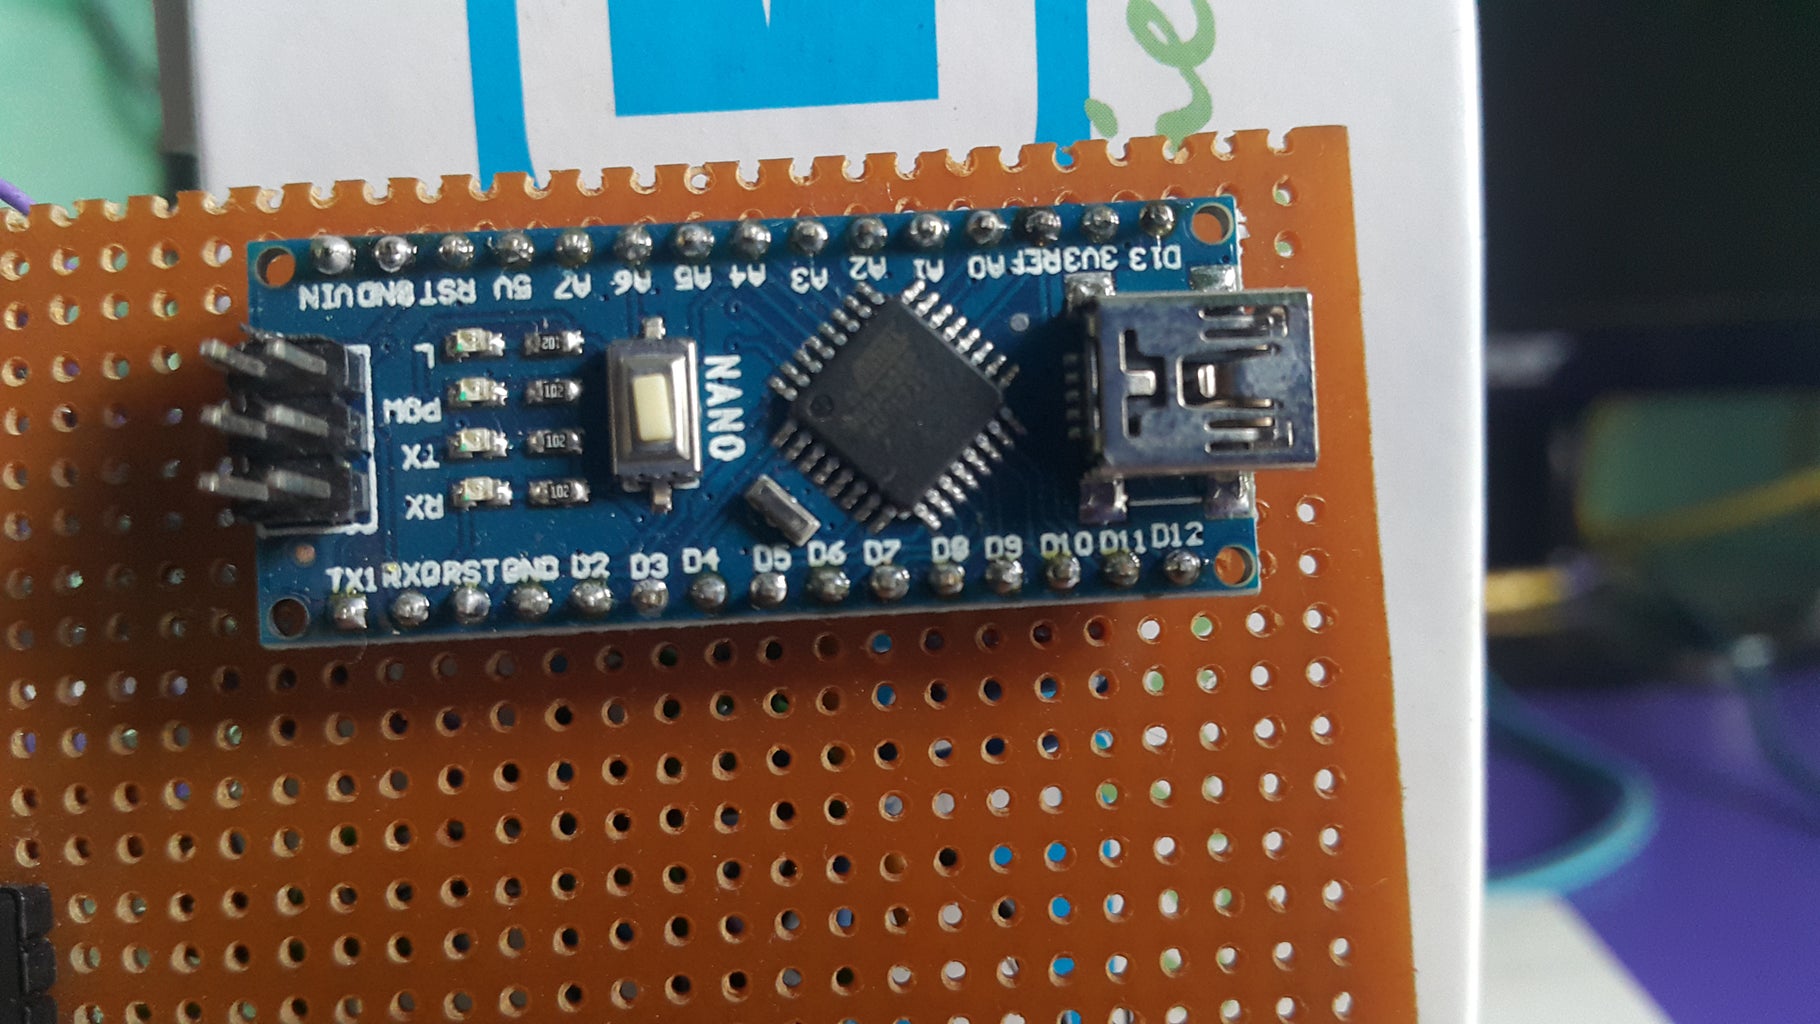
1. arduino nano. x1
2. L293D IC with Base connectors. x2
3. PCB board. x1
4. Computer DVD writers. x2
5. Some hard cardboard boxes.
6. 1ft.X1ft. plastic or wooden or metallic board.
7. Some wires.
8. soldering iron and wire.
9. Some male and female headers.
10. USB cable for arduino.
11. A pen with a strong string or thread which is flexible.
12. A micro 9g tower pro servo motor.
Step 2: Building X and Y Axis Carriages
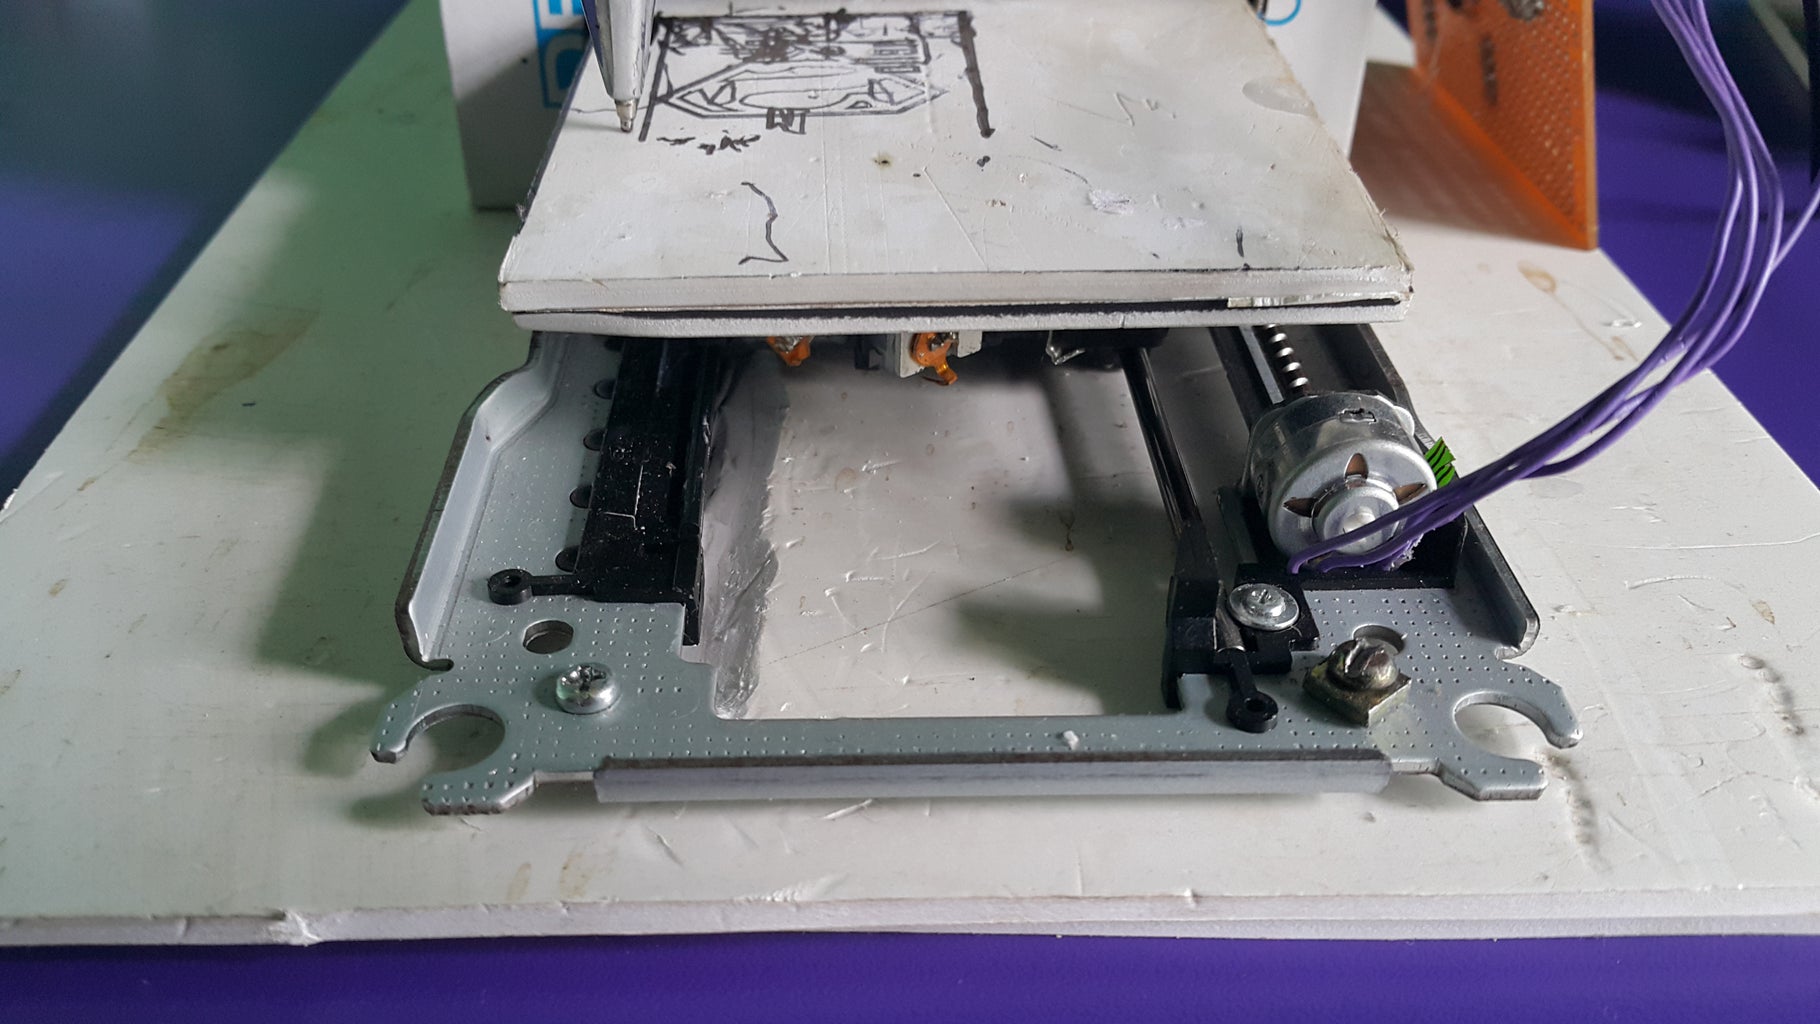


Take out the stepper Motor from dvd writer as in the picture. You need to open 2 dvd writers carefully without damaging anything inside it. Screw one carriage which contained the stepper motor to the 1ft.x1ft. board, this is the X-axis motor carriage. Keep some gap for Y axis motor carriage to be placed . Left most side of the X-axis carriage stick a cardboard box as in picture and make a long slot at the bottom of the box so that x axis carriage plate can go inside the box. stick a plastic rectangular board to x axis carriage as in image which supports the paper to be placed on it.
Step 3: Circuit Building Process


Step 4: Finalizing and Start Writing the Things


DOWNLOAD EVERYTHING IN A .rar FORMAT
