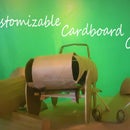
Introduction: 1960's Jaguar Customizable Cardboard Car Body Design
Hey everybody, if you followed my previous Instructable on creating the drive frame to a customizable rubber band cardboard car, this Instructable follows up and gives an idea for a design for that frame. This design is rather more difficult than my other one so bare that in mind.
As a classic car enthusiast, I wanted to create a classic design to fit on my newly designed drive frame. And I turned for inspiration to one of the most beautiful body designs, the classic 1966 Jaguar xke convertible. Though this design does not quite do the real thing justice, it still looks like a smart sleek design to make in our extended time at home.
Supplies
Materials:
Cardboard (All shapes and sizes)
Popsicle sticks (preferably long, 5 ¾ in. long ones)
Rubber bands
Tools:
Hot glue gun
Scissors
X-Acto knife or razor blade
Compass (For drawing circles)
Step 1:
To start making any body, you will need a basic frame, or can be loosely called a "buck", to add on your own original designs. I made mine out of hot glued Popsicle sticks in a 3 in.x 9.5 in. rectangle (to fit the basic body we just made.)
Step 2:
Now take two empty rolls of toilet paper and flatten them symmetrically, and draw a triangle with the corners of one side on each rolls as the 90 degree angle. Measure 0.5 in. from the top and 1 in. going down. Repeat so that each roll on one end has two cuts. Now un-flatten the roll and now you have some awesome turbo jets! (Not exactly to spec with the jaguar xke, but its cool and easy to make!)
Step 3:
Hot glue the turbo jets to a 3.5 in. x 2 in. cardboard rectangle to form the car's back end.
Step 4:
Hot glue the jets to the end of the Popsicle frame, and cut another 3.5 in. x 2 in. cardboard panel out and hot glue that one 2.5 in from the jets.
Step 5:
Then take another toilet paper roll and cut it lengthwise in half (Cut from short end to short end), take take off another 0.5 in. from each of the short sides. *Keep these for later on*
Step 6:
Hot glue the big halved rolls on each side of the dash panel (that is not the turbo jets panel) so that it curves out from either side but is connected to the body by three contact points. Then cut out a 3.5 in. x 3.5 in. and bridge the gap be tween the halved rolls.
Step 7:
Not take the shorter halved rolls (the 0.5 in. wide ones) and hot glue those to the top of the jets to add some more cool flare. (And to not waste a perfectly good piece of cardboard.)
Step 8:
For doors, cut out two 1 in. x 2.5 in. rectangles and glue them in between the dash panel and the jet panel so that they connect.
Step 9:
Cut another toilet paper roll in half. Now for the harder part, take a compass and measure a radius of 2.75 in. Take the compass and draw on the inside of the curl of the roll so that the center point is 1.5 in. away from the roll. (hopefully the mark should span from corner to corner). Repeat on both halves of the roll.
Step 10:
Then hot glue these right along the other halved rolls to continue the body style and slightly curve these inward from the wheels so that they do not hit the wheels.
Step 11:
Now take yet another toilet paper roll but only cut one side in half, then hot glue one long end to the edge of the hood and the underneath to the Popsicle stick frame.
Step 12:
Almost done, just check to make sure everything is secure, and cut a .25 in x 1 in. strip, bend twice, and place in front of the dash for a windshield and then you are ready to go!
Step 13:
Congratulations! You made a cardboard car body just place the body on the frame and your are ready to go!

Participated in the
Cardboard Speed Challenge


