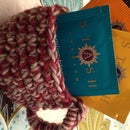
Introduction: Yarn Art - Shapes
Ever wanted to play and decorate with your yarn?
This is a very fun and unique project.
You won't need your knitting needles or crochet hooks or even any crafting experience.
This will create stand alone shapes that you can hang up or tape up onto anything.
And the possibilities are endless :)
Great for kids ages 9 and up.
(Younger kids can do this too with adult help with the pins and guidance)
Step 1: Supplies...
*Yarn (Any weight will work - Drying time will vary depending on thickness of yarn)
*White Elmers Glue
*T-Pins or Push Pins
*Corrugated Cardboard - (You can use an old box)
*Small bowl
*Plastic Wrap or Parchment Paper or Foil
Optional: Foam Board (I used my kids play mat - just turned over)
Optional: Spray Glitter Optional: Ornaments Hooks to use for hanging them up
I used a variety of yarns including Bernat Sheepish (4), Elann Bamboo (2), Universal Yarn Classic Shades (4)
Step 2: Prep Work
Decide what you would like your shape to be drawn with yarn. You could freehand the shape on a piece of paper or you could use clip art, or search with google for a certain image or theme. Want to personalize a room, think about that person's interest. Want to decorate for a holiday or for a season, think about key components to express that. Simple shapes and images work best. Once you find it make sure it isn't copyrighted then copy the image into Word or Pages. If you need to, adjust the size and then print it out.
Start by mixing 1 part glue to 1 part water until blended in a small bowl.
Choose your yarn and cut to about 24" - 36" depending on the size of word. The shorter amount of yarn makes it easier to manipulate without getting tangled.
Place your piece of paper with the word on it and place it on a piece of cardboard and then place that on your foam mat or another piece of cardboard.
Cut a piece of plastic wrap big enough to cover the cardboard and place this on top of the paper then wrap edges under the cardboard. The plastic wrap keeps the glue off the paper and helps it not to stick.
Get your pins in a bowl and your ready to start :)
Your hands will get messy and sticky but that's part of the fun :) You could wear gloves but they will get tacky and you'll find it hard to control the yarn. It's easier with just bare hands.
Step 3: Time to Yarn It Up...
Loosely pile your yarn into the glue mixture. Then grab an end and working down towards the bowl squeeze out the excess glue mixture from the yarn.
Choose a starting position and place the pin there - not pushing all the way down as you will be using the metal portion of push pins. Tie one end of the yarn to that pin to anchor it. In a continuous movement, move the yarn to follow your template and use the pins as guides along side of the yarn pinning to achieve the shape you want. If you need to change directions just wrap yarn around the pin and continue working. Keep the yarn taunt. Achieving curves requires more pins. Don't worry about being perfect. Work towards getting the overall effect of the shape. (Note: The pins are not piercing the yarn. The pins are support to keep the yarn in the shape until dry.)
When you reach the end you can wind the yarn around the pins again giving a double or triple thickness. Which I recommend for a stronger structure.
Now let this dry overnight.
Step 4: Unpin and Decorate :)
When it's dry gently unpin your project.
Cut any yarn ends and remove any glue residue.
This is optional, you can spray some clear glitter on to it following the directions on the back of the can for some extra sparkle and it gives it a frosted appearance.
Some Uses...
This project is very light and can be taped to a cupboard to decorate the kitchen or elsewhere.
Use it as an ornament on a tree or wreath.
Use it to decorate and personalize your walls.
Use it as a cute decoration on a present.
Use it as a season garland or holiday garland.
Use it to decorate your office or cubicle.
Let this be a starting point for your imagination :) Have Fun :)

Participated in the
Made with Yarn Contest 2016


