

Introduction: Christmas Lights Storage


Remember the scene from National Lampoons Christmas Vacation where Clark hands his son Russ a ball of lights to untangle? Well I too hate fighting with tangled lights at Christmas time.
So after wrestling with the lights this year I decided to come up with a better storage plan.
Items needed:
- Cardboard tubes
- Plastic tube ends
- Hot Glue
- White tape
- Box (or large sheet of cardboard to make your own box)
- Packing tape
- Sharpie
Step 1: Make Spools to Store Lights


I work for a packaging company and we use large format printers for proofing. These come on rolls and in each box there is a plastic end disc to keep the roll secure for shipping purposes. Both the plastics discs and cardboard tubes are thrown away after the paper has been depleted. (My middle name is repurpose)
I save these all for a variety of uses. In this project I’ll be using the tubes and the plastic end discs.
I already had a cardboard box that I deemed usable for this project, So I cut the tubes down to about 12” long. Knowing how many I could possibly fit into the box.
Then I hot glue the plastic discs onto the tubes to keep them secure. I made 8 of these. Let them sit to dry.
NOTE: If you don't have access to the materials I show here. Another option is use left over wrapping paper tubes. And hot glue cardboard squares to the end. Make them to what ever length you need to fit a box you may already have.
Step 2: Use Existing Box or Make Your Own Box


Since I already had a box that I designed my spools to fit into it, I simply made sure the multiple spools all fit.
How ever if you don't have a ready made box you can simply make your own.
Lay all the spools down on their sides 4 across by 2 deep(or however you think would best store them). Measured out an area for which this would take to make a storage box.
Using a large sheet of cardboard I scored and folded the sides up (being careful not to cut through the cardboard). Measure cut, score, fold ends. Fold and use packing tape to form and seal all edges of the box.
Step 3: Wind Strands on Spools


Begin winding individual strands onto each spool. One spool will hold a strand of 100 mini lights, or two strands of 50. Carefully wind each strand around a spool. I usually leave the plug to be at the end, then I’ll stick the prongs of the plug through one of the open slots on the end.
Step 4: Label and Organize Spools by Bush


These lights are for the front of my house on the bushes.
Using white tape mark each spool as to which bush it belongs to. And indicate how many lights on the strand.
Step 5: Seal and Store Box


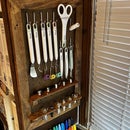
Place each spool in the box. Seal box and mark the box legibly for easy locating for next years Christmas season. Then store where you can find it.
I hope you’ve managed to get your Christmas lights down by now, but if not I get it.

Participated in the
Spotless Contest


