

Introduction: Knex Simple Modified Stepper Lift


HERE'S the lift IN ACTION:
Step 1: The Base


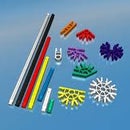
Gathered your pieces for building with the newer black/white balls? Good, let's start out with something simple. Building the bottom of the whole structure. You NEED to look at all the pictures in every step even this one to be sure of everything. Right?
Step 2: The Dispenser Holder


This is what will hold the thing that will dispense the balls one by one.
Step 3: Layer 1


The first main layer of the structure. I have a lot of close-ups for this.
Step 4: Add a Entrance Track

Simply just add a yellow path to easily load balls one by one.
Step 5: The Dispenser


This is what will dispense the balls into the first claw when it lowers.
Step 6: Layer 2


The second main layer of the structure.
Step 7: Layer 3


Really simple, right?
Step 8: The Motor Section


This is were a crankshaft is motorized to rock back and forth a see-saw thing (which is in the next step) to work the lift.
Step 9: That See-Saw Thing


This is the important part that controls the lift rocking back and forth. Refer to the video to see how the whole lift mechanism works.
Step 10: Layer 4


The fourth main layer of the whole structure. Just remember what is showed in pic.2.
Step 11: Layer 5


Just another layer to the structure. The last main layer will be built in the next step.
Step 12: Layer 6


The top of the structure where the exit track will go.
Step 13: The Blue Supports


You're gonna need these to hold the claws on the axles just like the main layers do.
Step 14: The Exit Track


This is where the balls will exit from when a ball gets pushed off of the top claw.
Step 15: Building the Steppers


Now it's time to build the stuff that'll help transfer the balls to the top.
Step 16: Attaching the Steppers


Now to attach everything you built in the previous step. Be sure to look all the pictures to see how everything is attached.
Step 17: Motor Placement

Lastly (if your using a battery-powered motor like me), you're probably gonna need to put that red battery thing somewhere so your dog doesn't have it for lunch. lol
Step 18: You're Done!

Congratulations! You now have your own simple version of a modified stepper. Now, just load some NEWER balls into the dispenser, turn the red motor switch to the right, and let the fun begin! If it doesn't work, try putting new batteries in. If it still doesn't work, I don't know what else to say for you. If you really want to use the OLDER balls and it doesn't work, just try to modify it to the best of your ability.
If you built this, send me a picture and I'll put it on this step.
Till next time
-collinjo12


