

Introduction: Short Start Arm Lift: a K'nex Ball Machine Lift


Hello!
Welcome to the first lift of a series of 3 new lifts on our k'nex ball machine Impossible!
This lift is called the Short Start Arm lift because it has a...short...start (li'l help here with names...)! We hope you have fun building this lift. So for now, just look at the pictures, look at the video, and if you feel like it, move on to the next step to start making the lift. If you have any questions, feel free to ask them! Just post a comment or PM us, It's that simple!
Thanks for building and/or watching! :)
www139
Step 1: Part Count

If you've made it this far and are already tired out, then you don't have any hope of being able to make this lift. But, if you have made it this far and are still full of energy, then count pieces for the next hour, you will. Anyway, here's the list of parts you will need to get to make this lift. They are labeled in their classic colors.
rods
2 Grey
1 Black recommended, but if you don't have one, use a grey rod.
47 Red
66 Yellow
132 Blue
40 White
113 Green
Total Rods: 401
Connectors
7 Dark Grey
3 Light grey
15 Orange
28 Red
5 Green
85 Purple
110 Yellow
3 Blue
19 White
Total Connectors: 275
Miscelaneous:
42 Blue Spacers
20 Grey Spacers
10 Y clips
15 Tan Clips
29 Chain links
1 Little Blue Gear
4 Medium Red Gears
1 Large Yellow Gear
1 New Style Motor (Green)
Total Miscelaneous: 123
Grand total: 649
*If you have those pieces, then on to the next step!*
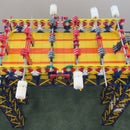
Step 2: The Entrance and Start Path.


The very beginning for the instructions and for the balls! This is where it all begins.
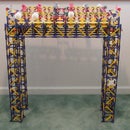
Step 3: The Frame: Part 1


The first part of the frame, which includes some gear stuff.
Step 4: The Motor Section


The part that makes the lift go 'round!
Step 5: The Frame: Part 2.


The Last part of the back frame.
Step 6: The Separator.


the part that separates out the balls! This is by far the most interesting and fun part to watch and build. It's also pretty complicated, so read the image notes and look closely at the images.
Step 7: The Front Frame: Part 1


Now we're finally starting on the front part of the lift!
Step 8: The Exit and Top


This is the part that takes the ball from the arm and allows you to attach it to your machine!
Step 9: The Arm (axel)


This is the axel for the arm, the part that makes the whole lift worthwhile! Pay very close attention to the images and notes.
Step 10: The Arm


Almost done! Just make the arm and attach it to the axel.
Step 11: Connecting It Together.


Here we will attach the arm to the frame, and motorize the separator!
Step 12: Done!

Congradulations! You now have your very own Short Start Arm Lift to impliment to your ball machine! Feel free to upload a picture of your lift, so then it can be added to this step! I hope you had fun!
Step 13: Troubleshooting!

Having trouble or the lift doesn't work right? Here are some pictures that people who had issues posted so others will not have the same problem.

Participated in the
Make it Move Contest 2016


